=================================
=================================
=================================

iOS In-app purchases with Adobe Air (Adobe Gaming SDK ANE) [Tutorial]
by Carlos Torres on June 25, 2013 in Development, Tutorials
There’s no doubt that monetization is a vital aspect when developing a mobile application. Some ways to deal with this are the use of advertisements or creating a paid version of your application, but there’s also a very interesting alternativa: The use of In-app purchases (AKA In-App billing, for Android users).
Among the advantages offered by In-app purchases we can find the following:
- You can create a virtual store within your application, which allows you to offer virtual goods to your users, which can be used within the application. You can also sell extra content related to your app.
- Offer only one version of your app on Mobile Application Stores. If you publish a free and a paid version of your app the chances are that users will download the free version and never look for a full version. By offering paid expansions within your application that’s available for free, it will become more likely that they’ll buy your application.
- Prevent piracy. A paid application is very easy to crack and be downloaded from a non-apple source for free. Including In-App purchases in your app lets you control the access to paid content more effectively.
Having that clear, we present you a short tutorial about how to implement In-app purchases in iOS with the Air Native Extension (ANE) provided by Adobe on their Gaming SDK (a good alternative to Milkman game’s ANE, specially because IT’S FREE).
For this tutorial you’ll need:
-An active Apple Developer account
-Adobe Flash CS6
-Adobe Air 3.6 o higher
-Adobe Gaming SDK (http://gaming.adobe.com/technologies/gamingsdk/)
1. Create an app with In-app Purchases on iTunes Connect
The only way of testing this ANE is by creating an application on iTunes Connect and add In-App purchases to it so we can test them later on the App Store’s sandbox.
I’d like to keep this tutorial short, so the needed setup from the creation of the application on iTunes connect to the creation of test user accounts can be found here: http://www.adobe.com/devnet/air/articles/storekit-ane-ios.html (that is actually a tutorial for the Milkman Game’s paid In-App purchase ANE).
2. Include the ANE on Flash CS6
The process to add Native Extensions to Flash is very simple:
1. Having your project open go to File>Publish Settings
2. Click on the ActionScript 3.0 preferences button

3. On the “Library Path” tab, click on the button to add native extensions.

4.Browse to the location of the ANE file on your computer and click OK.
Important:
To avoid compatibility issues, make sure you have the latest version of Air SDK installed.
Air SDK: http://www.adobe.com/devnet/air/air-sdk-download.html
3. Implementing In-App purchases
First of all, we must import the classes:

Once that’s done, we can divide the process of In-App purchasing into 3 steps:
1. Request for details of the In-App purchases that we’ll use.
2. Start a transaction.
3. Process the response given by the App Store.
1. Request for details of the In-App purchases that we’ll use.
This will help us to check for valid In-App purchase Id’s and retrieve all details like name and price from the articles on sale.
The first step is to add listeners for the details request success and fail, since the request process is made asynchronously. Then we make the transaction by using the method ProductStore.requestProductsDetails, which receives a Vector including In-App purchase id’s as a parameter (only the In-App purchase is used, it is not necessary to append the application bundle ID).

The PRODUCT_DETAILS_SUCCESS event contains an Array with all the details of the In-App purchases that were found with the specified ID, while PRODUCT_DETAILS_FAIL provides an array of invalid identifiers.


2. Start a transaction.
Once we know which identifiers are valid we can start to make transactions with the App Store. The method user for this is productStore.makePurchaseTransaction which gets an In-app purchase identifier and an amount of purchased items as parameters. Listeners to the possible answers from the App Store should be included.

3. Process the response given by the App Store
Once the transaction is started the next step is to handle the response from the App Store. In iOS this is a very important step since we must send back an encoded receipt to confirm the transaction.
Here’s the code for the verification:

Note: Base64 Class can be found on the source of the ProductStore example included on the Adobe Gaming SDK.
The other 2 listeners must react accordingly to the purchase you are trying to enable within your application.
When testing In-App purchases:
Remember to log out from your account on the App Store and DO NOT sign in on the settings application. Open your app and wait until you are asked for your credentials to access sanbox mode. If you do it in another way you might not be able to use your test account successfully.
Hope you find this tutorial usefull, hope to see your Apps with In-App purchases soon.
Actionscript, adobe, Development, Flash
About Carlos Torres
Desarrollador en Game Over Studios.
View all posts by Carlos Torres →
¡Sigue a Game Over!
Mantente al tanto de noticias, nuevas aplicaciones y actualizaciones de las aplicaciones existentes.
Related Posts:
- asm.js in Action
- Leo Grand: Developer
- A quick update on Oculus Rift
- Pirate Pixel Piracy
- How to Fail as an Indie Developer
← The Key of Phineas and Ferb Business Success
Xbox One and The Indie Games →
4 Responses to “iOS In-app purchases with Adobe Air (Adobe Gaming SDK ANE) [Tutorial]”
Arin September 30, 2013 at 04:04 # Reply
thanks for the tutorial,
When I call the “makePurchaseTransaction” function I don’t see any dialog boxes asking for username and password
Also, when I call the “restoreTransactions” function, I see the normal dialog box asking for username ans password, and there is nowhere indicating that i’m in “sandbox” mode( should it say somewhere? the word ‘sandbox’?? )
I’ve published my app in “Quick publish for device testing”
I’ve used development certificates
any suggestions?
- Carlos Torres October 3, 2013 at 11:15 # ReplyWell, I’m not sure what would cause the makePurchaseTransaction function not to work in your particular case (I’d need to see some code) but… are you requesting product details on the product you are trying to buy? It is a required step to ask for product details to make the purchase, even if you don’t plan to use them.Now, to test In-App purchases you must close your iTunes/App Store session on the Settings app. Once you’ve done that try to make the purchase and when prompted for username and password, login with a test user (you can create those in iTunes connect If you haven’t already), that will automatically make the purchase work in Sandbox mode.
- I recommend you to compile the App in debug mode and use a debugger session in Flash CS6 to see if your app is throwing any exceptions.
- Hey! Thanks for commenting!
- Emre November 6, 2013 at 20:04 # Reply
- Carlos Torres November 11, 2013 at 18:43 # ReplyBut let’s assume you already have a button or with instance name “purchaseButton”, the code to integrate the functions would look something like this:“compra” is the function that we show on the tutorial above.
Remember that in order to make the transactions you must ask for the products details first and declare all the listeners for the transaction events as shown on the tutorial. - purchaseButton.addEventListener(MouseEvent.CLICK,compra);
- Well, it actually depends on the platform you are using.
- Carlos Torres November 11, 2013 at 18:43 # ReplyBut let’s assume you already have a button or with instance name “purchaseButton”, the code to integrate the functions would look something like this:“compra” is the function that we show on the tutorial above.
- Hey first of all thank you tutorial.
i have a problem and i want to ask some question
i have buy button someting like this :http://m1311.hizliresim.com/1h/7/u98r1.jpg
How can i integrate this code under this button can you help me?
if you have a time could you take this tutorial in video please becaouse there is no information about this topic
=================================
=================================
=================================
출처: https://github.com/freshplanet/ANE-In-App-Purchase
Air Native Extension (iOS and Android) for In App Purchase
Fix Android crash in IabHelper
ataugeron authored 10 hours ago
| actionscript | v2.0 | 3 months ago | |
| android | Fix Android crash in IabHelper | 10 hours ago | |
| bin | Fix Android crash in IabHelper | 10 hours ago | |
| build | Fix Android crash in IabHelper | 10 hours ago | |
| ios | v2.0 | 3 months ago | |
| .gitignore | Updated folder structure and build script | 7 months ago | |
| LICENSE | Adds Apache License. | 2 years ago | |
| NOTICE | Adds Apache License. | 2 years ago | |
| README.md | v2.0 | 3 months ago |
README.md
Air Native Extension for In App Purchases (iOS + Android)
This is an Air native extension for In-App Purchases on iOS and Android. It has been developed by FreshPlanet and is used in the game SongPop.
Notes
- iOS implementation does NOT contain on-device receipt validation.
- Android implementation uses In-app Billing Version 3.
Installation
The ANE binary (InAppPurchase.ane) is located in the bin folder. You should add it to your application project's Build Path and make sure to package it with your app (more information here).
On Android:
- you will need to add the following in your application descriptor:
<android> <manifestAdditions><![CDATA[ <manifest android:installLocation="auto"> <uses-permission android:name="com.android.vending.BILLING" /> <application> <service android:name="com.freshplanet.inapppurchase.BillingService" /> </application> </manifest> ]]></manifestAdditions> </android>
Build script
Should you need to edit the extension source code and/or recompile it, you will find an ant build script (build.xml) in the build folder:
cd /path/to/the/ane # Setup build configuration cd build mv example.build.config build.config # Edit build.config file to provide your machine-specific paths # Build the ANE ant
Authors
This ANE has been written by Thibaut Crenn. It belongs to FreshPlanet Inc. and is distributed under the Apache Licence, version 2.0.
=================================
=================================
=================================
출처: https://github.com/StickSports/ANE-In-App-Purchase
Air native extension for integration with Apple's in-app purchase
branch: master
Fix error in restoring purchases.
richardlord authored 2 years ago
| actionscript | Make native code more object-oriented so it's easier to isolate from … | 2 years ago | |
| bin | Fix error in restoring purchases. | 2 years ago | |
| build | Make native code more object-oriented so it's easier to isolate from … | 2 years ago | |
| default | Add canMakePayments method to the extension. | 2 years ago | |
| ios | Fix error in restoring purchases. | 2 years ago | |
| test | Make native code more object-oriented so it's easier to isolate from … | 2 years ago | |
| .gitignore | Initial commit. | 2 years ago | |
| LICENSE | Add license and read-me files. | 2 years ago | |
| README.textile | Make native code more object-oriented so it's easier to isolate from … | 2 years ago |
README.textile
Air Native Extension for In-App Purchase integration on iOS
This is an Air native extension for In-App Purchase integration on the iOS platform.
Version
This is version 0.6.0 of this extension.
Binary files
The bin folder contains the compiled extension and the default swc, which can be used for local testing if required by your development environment (Flash Builder shouldn’t need it, but other IDEs may).
Building
Requirements – Adobe Air SDK 3.1 or later, XCode IDE, iOS SDK 5.0 or later
- Add the FlashRuntimeExtensions.h file from the Adobe Air sdk to the ios/InAppPurchaseIosExtension folder in the project.
- Create a copy of the build/example.build.config file in the build folder, calling it build.config and change the properties in this file to match your system.
- A certificate is required by the build script. This may be a self-signed certificate created by Adobe Air.
- Run the ant build script build.xml. This creates the native extension, and default swc file, inside the bin folder.
The test project
A simple test project is included for testing the extension. To build this air project
- Create a copy of the test/build/example.build.config file in the test/build folder, calling it build.config and change the properties in this file to match your system.
- Create a test app in iTunesConnect and add In-App Purchases to the app.
- Add a consumable purchase to the project with the id “consumable1”.
- Add a non-consumable purchase to the project with the id “nonconsumable1”.
- Create a copy of the test/build/example.InAppPurchaseExtensionTest-app.xml file in the test/build folder, calling it InAppPurchaseExtensionTest-app.xml and change the id in this file to match the test app you just created.
- Run the ant build script test/build.xml. This creates the test ipa inside the test/bin folder.
Using the extension
Test if In-App Purchases are supported by the operating system
InAppPurchase.isSupported;
Is a boolean.
Test if In-App Purchase payments are possible or have been disabled on the device
InAppPurchase.canMakePayments;
Is a boolean.
If payments are blocked (in the iOS deveice settings) then other activities, like restoring existing purchases, are still possible.
Fetch product information
InAppPurchase.fetchProductInformation( ...productIds ) : void
Is asynchronous.
Dispatches one of two signals
- InAppPurchase.productInformationReceived with a parameter of type Array, containing objects of type IAPProduct
- InAppPurchase.productInformationFailed
Throws an error if In-App Purchases are not supported
Purchase a product
InAppPurchase.purchaseProduct( productId : String, quantity : int = 1 ) : void
Is asynchronous.
Dispatches one of two signals
- InAppPurchase.transactionPurchased with a parameter of type IAPTransaction
- InAppPurchase.transactionFailed with a parameter of type IAPTransaction
Throws an error if In-App Purchases are not supported
Finish a transaction
Transactions remain in the transaction queue until you mark them as finished. After handling a successful or failed purchase or restored transaction you should remove it from the transaction queue by calling this method.
InAppPurchase.finishTransaction( transactionId : String ) : Boolean
Returns true if the transaction was successfully marked as finished and removed from the transaction queue.
Throws an error if In-App Purchases are not supported
Restore past purchases
To restore past non-consumable purchases
InAppPurchase.restorePurchases() : void
Is asynchronous.
Dispatches the signal
- InAppPurchase.transactionRestored with a parameter of type IAPTransaction for each restored transaction.
Throws an error if In-App Purchases are not supported
Get all transactions in the transactions queue
InAppPurchase.getCurrentTransactions() : Array
Returns an array of IAPTransaction objects.
Throws an error if In-App Purchases are not supported
Example code
You can see all the features in action in the source code of the test project.
Compiling your project
This is an Air 3.1 extension. Specify the path to the iPhone SDK when compiling the project, using the functionality built in to your IDE or the platformsdk parameter if building with adt from the command line or a build script.
Developers
License
Author: Richard Lord
Owner: Stick Sports Ltd.
http://www.sticksports.com
Copyright © 2011-2012, Stick Sports Ltd.
All rights reserved.
Redistribution and use in source and binary forms, with or without modification, are permitted provided that the following conditions are met:
- Redistributions of source code must retain the above copyright notice, this list of conditions and the following disclaimer.
- Redistri
=================================
=================================
=================================
출처: http://forum.starling-framework.org/topic/anyone-success-which-in-app-purchase-ane-for-adobe-air
Anyone success which In App Purchase ANE for Adobe air?
I Tried two versions of Inhttps://github.com/freshplanet/ANE-In-App-Purchase andhttps://github.com/StickSports/ANE-In-App-Purchase but both of them fail. When I try to get product info, no error throws out, just empty array returned in success handler. Is there anyone success with In App Purchase in Flash? Following are my info:
Bundle ID matchs App ID. YES.
One binary version was uploaded to Appstore and rejected later. YES.
in app purchase Product status: Ready to submit and Waiting for review(two products).
Correct product ID: I tried both full and short one: "testproduct" and "APP_BUNDDLE_ID.testproduct" but both fail.
POSTED 8 MONTHS AGO #
i did manage to use it.
// ************************* IN APPS ************************* //

		public function unLockTheApp(what:String):void {

			WhiteSO.data.allUnlock = true;
			WhiteSO.flush();
			allUnlocked = true;
			if(what == "levelScreen") LevelScreen.LEVELSCREEN.unlockNow();
			if(IAd.iAd.isIAdAvailable()) { IAd.iAd.destroyBannerAd(); IAd.iAd.dispose(); }
		}

		public function initTheStore():void {

			productStore = new ProductStore();

			if(ProductStore.isSupported) {

				if(productStore.available) get_Product();
				else return;
			}

			else return;
		}

		public function get_Product():void
		{
			productStore.addEventListener(ProductEvent.PRODUCT_DETAILS_SUCCESS,productDetailsSucceeded);
			productStore.addEventListener(ProductEvent.PRODUCT_DETAILS_FAIL, productDetailsFailed);

			var vector:Vector.<String> = new Vector.<String>(1); EVEN IF IT IS ONE
			vector[0] = "PRODUCT-ID";

			productStore.requestProductsDetails(vector);
		}

		public function buyTheApp():void {

			productStore.addEventListener(TransactionEvent.PURCHASE_TRANSACTION_SUCCESS, purchaseTransactionSucceeded);
			productStore.addEventListener(TransactionEvent.PURCHASE_TRANSACTION_CANCEL, purchaseTransactionCanceled);
			productStore.addEventListener(TransactionEvent.PURCHASE_TRANSACTION_FAIL, purchaseTransactionFailed);
			productStore.makePurchaseTransaction("PRODUCT-ID", 1);

		}

		public function productDetailsSucceeded(e:ProductEvent):void
		{
			var i:uint=0;
			while(e.products && i < e.products.length)
			{
				var p:Product = e.products[i];
				i++;
			}
		}

		public function productDetailsFailed(e:ProductEvent):void
		{
			var i:uint=0;
			while(e.invalidIdentifiers && i < e.invalidIdentifiers.length)
			{
				trace(e.invalidIdentifiers[i]);
				i++;
			}
		}

		protected function purchaseTransactionSucceeded(e:TransactionEvent):void
		{
			var i:uint=0;
			var t:Transaction;
			while(e.transactions && i < e.transactions.length)
			{
				t = e.transactions[i];
				printTransaction(t);
				i++;
				var Base:Base64 = new Base64();
				var encodedReceipt:String = Base64.Encode(t.receipt);
				var req:URLRequest = new URLRequest("https://buy.itunes.apple.com/verifyReceipt");
				req.method = URLRequestMethod.POST;
				req.data = "{\"receipt-data\" : \""+ encodedReceipt+"\"}";
				var ldr:URLLoader = new URLLoader(req);
				ldr.load(req);
				ldr.addEventListener(Event.COMPLETE,function(e:Event):void{
					trace("LOAD COMPLETE: " + ldr.data);
					productStore.addEventListener(TransactionEvent.FINISH_TRANSACTION_SUCCESS, finishTransactionSucceeded);
					productStore.finishTransaction(t.identifier);
				});
			}

			getPendingTransaction(productStore);

			unLockTheApp("levelScreen");
		}

		protected function purchaseTransactionCanceled(e:TransactionEvent):void{

			trace("in purchaseTransactionCanceled" + e);
			var i:uint=0;
			while(e.transactions && i < e.transactions.length)
			{
				var t:Transaction = e.transactions[i];
				printTransaction(t);
				i++;
				trace("FinishTransactions" + t.identifier);
				productStore.addEventListener(TransactionEvent.FINISH_TRANSACTION_SUCCESS, finishTransactionSucceeded);
				productStore.finishTransaction(t.identifier);
			}
			getPendingTransaction(productStore);
		}

		protected function purchaseTransactionFailed(e:TransactionEvent):void
		{
			trace("in purchaseTransactionFailed"+e);
			var i:uint=0;
			while(e.transactions && i < e.transactions.length)
			{
				var t:Transaction = e.transactions[i];
				printTransaction(t);
				i++;
				trace("FinishTransactions" + t.identifier);
				productStore.addEventListener(TransactionEvent.FINISH_TRANSACTION_SUCCESS, finishTransactionSucceeded);
				productStore.finishTransaction(t.identifier);
			}

			getPendingTransaction(productStore);
		}

		protected function finishTransactionSucceeded(e:TransactionEvent):void{

			var i:uint=0;
			while(e.transactions && i < e.transactions.length)
			{
				var t:Transaction = e.transactions[i];
				printTransaction(t);
				i++;
			}
		}

		public function getPendingTransaction(prdStore:ProductStore):void
		{
			trace("pending transaction");
			var transactions:Vector.<Transaction> = prdStore.pendingTransactions;
			var i:uint=0;
			while(transactions && i<transactions.length)
			{
				var t:Transaction = transactions[i];
				printTransaction(t);
				i++;
			}
		}

		public function printTransaction(t:Transaction):void
		{

			trace("-------------------in Print Transaction----------------------");
			trace("identifier :"+t.identifier);
			trace("productIdentifier: "+ t.productIdentifier);
			trace("productQuantity: "+t.productQuantity);
			trace("date: "+t.date);
			trace("receipt: "+t.receipt);
			trace("error: "+t.error);
			trace("originalTransaction: "+t.originalTransaction);
			if(t.originalTransaction)
				printTransaction(t.originalTransaction);
			trace("---------end of print transaction----------------------------");
		}

		public function restorePurchase():void
		{
			trace("in restore_Transactions");
			productStore.addEventListener(TransactionEvent.RESTORE_TRANSACTION_SUCCESS, restoreTransactionSucceeded);
			productStore.addEventListener(TransactionEvent.RESTORE_TRANSACTION_FAIL, restoreTransactionFailed);
			productStore.addEventListener(TransactionEvent.RESTORE_TRANSACTION_COMPLETE,  restoreTransactionCompleted);
			productStore.restoreTransactions();
		}

		protected function restoreTransactionSucceeded(e:TransactionEvent):void{

			trace("in restoreTransactionSucceeded" +e);

			var i:uint=0;
			while(e.transactions && i < e.transactions.length)
			{
				var t:Transaction = e.transactions[i];
				printTransaction(t);
				i++;

				trace("FinishTransactions" + t.identifier);
				productStore.addEventListener(TransactionEvent.FINISH_TRANSACTION_SUCCESS, finishTransactionSucceeded);
				productStore.finishTransaction(t.identifier);
			}

			getPendingTransaction(productStore);
		}

		protected function restoreTransactionFailed(e:TransactionEvent):void{

			trace("in restoreTransactionFailed" +e);

		}

		protected function restoreTransactionCompleted(e:TransactionEvent):void{

			trace("in restoreTransactionCompleted" +e);

			unLockTheApp("restore");
		}

	}


출처: https://202psj.tistory.com/655 [알레폰드의 IT 이모저모]
POSTED 8 MONTHS AGO #- The adobe ane
- wanting252I tried as you said, but still no success :X. And I found that instead of connect to Sandbox server, my ipad just tunnels to the real one: itunes.apple.com, even when I quit my account. Do you test it on Window or Mac OS, simulator or real device?
- POSTED 8 MONTHS AGO #
- Novice Bird
Joined: Dec '12
Posts: 13 - Mistakennessboth, do you have set up an account on itunes connect as a beta tester ? you can't use yours .
- POSTED 8 MONTHS AGO #
- Expert Bird
Joined: Mar '12
Posts: 316 - wanting252Ok, success at last! For anyone want to test In App Purchase in jailbreak devices, you need to uninstall Appsync before testing :).
- POSTED 8 MONTHS AGO #
- Novice Bird
Joined: Dec '12
Posts: 13
=================================
=================================
=================================
출처: http://www.adobe.com/devnet/air/articles/android-billing-ane.html
With the In-App Billing Extension for Android from Milkman Games, you can rapidly integrate In-App-app purchasing into your mobile AIR application using ActionScript 3.
The In-App Billing Extension for Android is a 100 percent native Java solution that enables you to:
- Offer your app for free and earn revenue within-app purchases
- Make a purchase with just a few lines of code
- Jumpstart development with a complete sample application, ActionScript 3 documentation, and a getting started guide
- Invoke testing methods to verify purchases before your app goes live
Installing the latest AIR SDK
This native extension requires-the AIR 3.5 SDK or a later version. You can download the latest AIR SDK fromhttp://www.adobe.com/special/products/air/sdk/. If you haven't already installed the AIR 3.5 or later SDK for your Flash Professional CS6 or Flash Builder IDE, follow the instructions below.
Enabling the latest AIR SDK in Flash Professional CS6
- Unzip the AIR SDK package on your hard drive.
- Launch Flash Professional CS6.
- Choose Help > Manage AIR SDK.
- Click the Plus (+) Button and navigate to the location of the unzipped AIR SDK.
- Click OK.
- Choose File > Publish Settings.
- Select the AIR 3.5 (or Later) SDK for iOS as the Target.
Enabling the latest AIR SDK in Flash Builder on Windows
- Unzip the AIR SDK package on your hard drive.
- Close Flash Builder.
- Locate the Flash Builder SDK directory. On Windows, this is typically c:\Program Files\Adobe\Adobe Flash Builder4.6\sdks.
- Make a copy of the current Flex SDK directory, and give it a descriptive name. For instance, copy the 4.6.0 SDK folder inside /sdks and name the copy 4.6.0_AIR37.
- Copy and paste the contents of the AIR 3.5 SDK into the 4.6.0_AIR37 directory. Accept all changes.
- Edit the flex-sdk-description.xml file inside the new directory, and change the value of the <name> tag to match the version of the latest AIR SDK- for instance, Flex 4.6.0 (AIR 3.7).
- Open Flash Builder and choose Project > Properties > Flex Compiler >Configure Flex SDKs.
- Click Add and navigate to the new folder location.
Enabling the latest AIR SDK in Flash Builder on OS X
- Copy the contents AIR SDK package to your hard drive.
- Close Flash Builder.
- Locate the Flash Builder SDK directory. On OS X, it is typically /Applications/Adobe Flash Builder 4.6/sdks/.
- Create a new folder inside the /Flash Builder 4.6/sdks/ folder named after the latest SDK- for instance,AIR37SDK, and copy the contents of the AIR SDK package thatyou downloaded in step 1 into it.
- Open the Terminal, and merge the new AIR SDK files into your current SDK directory:
sudo cp -Rp /Applications/Adobe\ Flash\ Builder\ 4.6/sdks/AIR37SDK/ /Applications/Adobe\ Flash\ Builder\ 4.6/sdks/4.6.0/
- Edit the flex-sdk-description.xml file inside the new directory, and change thevalue of the <name> tag to match the version of the latest AIR SDK-for instance, Flex 4.6.0 (AIR 3.7).
- Open Flash Builder and choose Project > Properties > Flex Compiler >Configure Flex SDKs.
- Click Add and navigate to the new folder location.
Including the library
The next step is to add the com.milkmangames.extensions.AndroidIAB.ane library to your project. (If you are not using FlashBuilder 4.6 and later or Flash Professional CS6 and later you'll need to add the AndroidIABAPI.swc library instead.)
In Flash Professional CS6:
- Create a new project of the type AIR for Android.
- Choose File > Publish Settings.
- Click the wrench icon next to Script for ActionScript Settings.
- Select the Library Path tab.
- Click Browse For Native Extension (ANE) File and select the com.milkmangames.extensions.AndroidIAB.ane file.
- Select Player Settings.
- Select the Permissions tab and enable INTERNET.
- Check Manually Manage Permissions and Manifest Additions for this App and press OK.
In Flash Builder 4.6 and later:
- Go to Project Properties (right-click your project in Package Explorer and select Properties).
- Select ActionScript Build Path and click the Native Extensions tab.
- Click Add ANE and navigate to the com.milkmangames.nativeextensions.AndroidIAB.anefile .
- Select ActionScript Build Packaging > Google Android
- Select the Native Extensions tab and enable the Package checkbox for the extension
In FlashDevelop:
- Copy the AndroidIABAPI.swc file to your project folder.
- Inthe explorer panel, right-click the SWC and select AddTo Library.
- Right-click the SWC file in the explorer panel again, select Options,and then select External Library.
Updating your application descriptor file
You need to configure your AIR application descriptor file to use the AIR 3.5 SDK (or later), include the In-AppBilling extension, and update the Android manifest additions with some AndroidBilling specific settings. (If you're using Flash Professional, make sure you've followed the steps above for Including the Library in Flash ProfessionalCS6, to ensure the changes you make are not overwritten.) For a working example, see example/app.xml.
- Set your AIR SDK to 3.5 or later in the app descriptor file:
<application xmlns="http://ns.adobe.com/air/application/3.5">
- Include a link to the extension in the descriptor:
<extensions>
    <extensionID>com.milkmangames.extensions.AndroidIAB</extensionID>
</extensions>- Update your Android manifest additions. The android.permission.INTERNET andcom.android.vending.BILLING permissions must be present for In-App Billing to work. You also must add theminSdkVersion and targetSdkVersion tags as shown below:
<android>
    <manifestAdditions>
        <![CDATA[
           <manifest android:installLocation="auto">
           <uses-sdk android:targetSdkVersion="12"/>
           <uses-sdk android:minSdkVersion="8"/>

           <uses-permission android:name="android.permission.INTERNET"/>
           <uses-permission android:name="com.android.vending.BILLING"/>
    </manifest> ]]>
    </manifestAdditions>
</android>
Building the application and uploading a draft to Google Play
- Save your work, and build an APK file from your application. Although there is nocode in the application yet, it's a good idea to build it now, as Google Play requires you to upload an APK before In-App Billing will work. Make sure you are happy with the application ID, title, p12 certificate, and version number - if these values change, you will need to upload a new draft – and it can take anywhere from minutes to hours before Google processes the APK file!
Important Note for Flash Builder Users: Flash Builder 4.6 will change your application ID every time you switch between a 'release' and 'debug' build. Because the IDs of the uploaded APK and the APK you test with must match, you will either need to commit to using only one type of build during testing, or uploading a new build and waiting a few minutes every time you need to change targets. One solution to mitigate this is to build only for debug until you're ready to publish app, then rebuild and re-upload a new draft at that time. In Flash Builder 4.7, this behavior can be overridden by removing the '.debug' from the 'AppId' box under Run/Debug Configurations Dialog Box (Project Properties > Build Packaging > Run / Debug Settings > Edit.) - Go to http://play.google.com/apps/publish/ to access the Google Play Developer Panel.
- Choose '+Add new application' to define your new app.

Figure 1. Click In-App Products.
- Enter a title and language for your app, then select 'Upload APK'.

Figure 2. Uploading a new APK.
- Select 'Upload Your First APK', and select the APK file you created in step 1.
- From the 'Services & APIs' tab, copy and paste your License Key, and save it for future reference.

Figure 3. Retrieving your license key.
- From the 'In-App Products' tab, select 'Add New Product', and enter a name for the first in-app item you'd like to sell.
If the Item is a Subscription, choose the Subscription button. Otherwise,choose 'Managed'. (Although you may still select 'Unmanaged', the option is deprecated as all Google Play Billing items are now managed.)

Figure 4. Adding a new product.
- Enter the Product ID Title, Description, pricing and language information for your product. Then choose Save, and change the status to Active by choosing the 'Activate' option.

Figure 5. Adding product details.
- Repeat the process for each product you'd like to sell. If you'd like to create products that match with the example code, create managed items called 'my_levelpack' and 'my_spell', and a subscription called 'my_subscription'.
Preparing for device testing
In order to test In-App Billing, you'll need to update Google Play with your test account address, and possibly make changes to the registered account on your phone.
When you first setup your Android device, you entered a Google/ Gmail Account to use with Google Play – the 'primary account' on your phone. This gmail address needs to be added to the Google Play developer panel in order to test In-app Billing. To add the test email to Google Play:
- Select the 'Settings' tab from the left.
- Select 'Account Details'
- Under 'Gmail accounts with testing access', enter the gmail address that is the primary account on the device. You may enter multiple email addresses separated by commas if you wish.

Figure 6. Adding testing accounts.
- Unfortunately,Google does not let you 'buy things from yourself'. In other words, if the primary Gmail account is the same as the one you used to sign up for Google Play Developer, you'll need to change the primary account on the device to something else.
Although many Android devices will let you remove and add accounts, this isn't good enough for Google Play testing- you'll have to factory reset the device. See the documentation for your device's make and model if you need to factory reset the phone.
Getting started with the API
While you wait for Google to process your APK, you can start adding code to your application.
Follow these steps to get started:
- Import the API Classes:
import com.milkmangames.nativeextensions.android.*;
import com.milkmangames.nativeextensions.android.events.*;
- Initialize the API by calling AndroidIAB.create().You can check the AndroidIAB.isSupported() method first, to ensure the current platform is Android and not an unsupported platform (like iOS or Windows).
It is important that this initialization occurs in the entry point of your application. If you are using Flex/MXML, this means you must call create() in the initialize() event of the main class (not a View constructor or createComplete callback.) If you are using pure ActionScript, you must call create() inside the Constructor function of the Document Class. If you are using timeline code in Flash, call this once at the beginning of Frame 1.
if (AndroidIAB.isSupported()) {
    AndroidIAB.create();
}- Call the AndroidIAB.androidIAB.startBillingService("YOUR_PUBLIC_KEY_HERE") method to begin interactions with Android's In-App Billing server. Use the public key you retrieved earlier in the section Building the Application and Uploading the Draft to Google Play, Step 6.
If the current device will not support In-App Billing (because it doesn't have Google Play, for instance), you'll receive the AndroidBillingEvent.SERVICE_NOT_SUPPORTED event. Otherwise, when the service is ready, you'll receive the AndroidBillingEvent.SERVICE_READY event; once that happens, you may begin calling the other API methods to make purchases.
// listeners for billing service startup
AndroidIAB.androidIAB.addEventListener(AndroidBillingEvent.SERVICE_READY,onReady);
AndroidIAB.androidIAB.addEventListener(AndroidBillingEvent.SERVICE_NOT_SUPPORTED, onUnsupported);

// start the service

AndroidIAB.androidIAB.startBillingService("YOUR_PUBLIC_KEY_HERE");

private
function onReady(e: AndroidBillingEvent): void {
    trace("service now ready- you can now make purchases.");
}
private
function onUnsupported(e: AndroidBillingEvent): void {
    trace("sorry, in app billing won't work on this phone!");
}
Loading the player's inventory
Once you've connected to Google Play, you can request information about the items that the user has previously purchased. It's a good idea to do this as soon as your app starts, in case the user has installed the app on a new device, had an item refunded, or their inventory has otherwise changed.
- Add event listeners for AndroidBillingEvent.INVENTORY_LOADED andAndroidBillingErrorEvent.INVENTORY_LOAD_FAILED. When the INVENTORY_LOADED event is dispatched, its 'purchases' property will be populated with a vector array of AndroidPurchase objects, representing the purchases the user has previously made.
The LOAD_INVENTORY_FAILED is dispatched when an error occurs attempting to load the inventory. Because it is an error event, you should listen for it even if you don't plan to do anything about the error, to avoid an uncaught exception in your code:
// listen for inventory events
AndroidIAB.androidIAB.addEventListener(AndroidBillingEvent.INVENTORY_LOADED, onInventoryLoaded);
AndroidIAB.androidIAB.addEventListener(AndroidBillingErrorEvent.LOAD_INVENTORY_FAILED, onInventoryFailed);

function onInventoryLoaded(e: AndroidBillingEvent): void

{
    for each(var purchase: AndroidPurchase in e.purchases) {
        trace("You own the item:" + purchase.itemId);

        // this is where you'd update the state of your app to reflect ownership of the item

    }
}

function onInventoryFailed(e: AndroidBillingErrorEvent): void {
    trace("Something went wrong loading inventory: " + e.text);
}
- To start the inventory request, call AndroidIAB.androidIAB.loadPlayerInventory():
// load the player's current inventory
AndroidIAB.androidIAB.loadPlayerInventory();
Loading details about purchasable items
In addition to loading the list of items the player already owns, you may wish to load details about items your app offers for sale, such as title, description, and price.
- Add event listeners for AndroidBillingEvent.ITEM_DETAILS_LOADED andAndroidBillingErrorEvent.ITEM_DETAILS_FAILED. When the ITEM_DETAILS_LOADED event is dispatched, its itemDetails property will be populated with a vector array of AndroidItemDetails objects, representing the details about items available in your app's store.
The ITEM_DETAILS_FAILED is dispatched when an error occurs attempting to load the item details. Because it is an error event, you should listen for it even if you don't plan to do anything about the error, to avoid an uncaught exception in your code:
// listen for inventory events
AndroidIAB.androidIAB.addEventListener(AndroidBillingEvent.ITEM_DETAILS_LOADED, onItemDetails);
AndroidIAB.androidIAB.addEventListener(AndroidBillingErrorEvent.ITEM_DETAILS_FAILED, onDetailsFailed);

function onItemDetails(e: AndroidBillingEvent): void

{
    for each(var item: AndroidItemDetails in e.itemDetails) {
        trace("item id:" + item.itemId);
        trace("title:" + item.title);
        trace("description:" + item.description);
        trace("price:" + item.price);
    }
}

function onDetailsFailed(e: AndroidBillingErrorEvent): void {
    trace("Something went wrong loading details: " + e.text);
}
- To start the details request, pass a Vector array of item ids to the loadItemDetails() function. (The IDs you choose will need to be defined later in the Google Play control panel after you've uploaded your APK):
// load info about the items for sale
var allItemIds: Vector. < String >= new < String > ["my_spell", "my_subscription", "my_levelpack"];
AndroidIAB.androidIAB.loadItemDetails(allItemIds);
Making purchases
- First, add event listeners for AndroidBillingEvent.PURCHASE_SUCCEEDED andAndroidBillingErrorEvent.PURCHASE_FAILED:
// listen for purchase events
AndroidIAB.androidIAB.addEventListener(AndroidBillingEvent.PURCHASE_SUCCEEDED, onPurchaseSuccess);
AndroidIAB.androidIAB.addEventListener(AndroidBillingErrorEvent.PURCHASE_FAILED, onPurchaseFailed);- When PURCHASE_SUCCEEDED is dispatched, its purchases property will be a vector array containinganAndroidPurchase object for the item that was bought.When this event fires, you can callloadPlayerInventory() again to update the list of items the player now owns. If something goes wrong,PURCHASE_FAILED will be dispatched instead:
function onPurchaseSuccess(e: AndroidBillingEvent): void {
    var purchase: AndroidPurchase = e.purchases[0];
    trace("you purchased the item " + purchase.itemId);
    AndroidIAB.androidIAB.loadPlayerInventory();
}

function onPurchaseFailed(e: AndroidBillingErrorEvent): void {
    trace("Something went wrong with the purchase of " + e.itemId + ": " + e.text);
}- The extension provides a number of functions for testing purchase event responses with fake items that you have not registered in Google Play. The following example illustrates how to initiate such a fake purchase:
// this will start a purchase dialog and on success callback the PURCHASE_SUCCEEDED event
AndroidIAB.androidIAB.testPurchaseItemSuccess();

// this will start a purchase dialog then cause a PURCHASE_FAILED event
AndroidIAB.androidIAB.testPurchaseItemCancelled();- To start the purchase process for a real item, call AndroidIAB.androidIAB.purchaseItem(itemId),whereitemId is one of the products you registered on theGoogle Play Developer panel.
Note that for the purchase to work on an unpublished app, the test account mustbe set up properly as described above in Section Preparing for Device Testing. As long as you are using a test account, your credit card will not be charged- make sure that the purchase window includes the phrase "You will not be charged."
To initiate the purchase of a real item:
AndroidIAB.androidIAB.purchaseItem("your_itemid");- If your item is a Subscription Item, use the purchaseSubscriptionItem(itemId) call instead. Because not all phones will support subscriptions, you should check the areSubscritpionsSupported() method first:
if (AndroidIAB.androidIAB.areSubscriptionsSupported()) {
    AndroidIAB.androidIAB.purchaseSubscriptionItem("your_itemid");
} else {
    trace("this device needs a Google Play Update to support subscriptions.");
}
Consuming items
Some in-app purchases may be treated as permanent upgrades,such as pack of new levels added to the game. For these types of items, the user purchases them one time, and they are then treated as permanently owned.
Some games or apps may benefit from a 'consumable' type of item: something that can be purchased, used up, and purchased again. To implement such an item, implement the consumption flow as described below:
- Add event listeners for AndroidBillingEvent.CONSUME_SUCCEEDED andAndroidBillingErrorEvent.CONSUME_FAILED. When the CONSUME_SUCCEEDED event is dispatched, the item has been removed from the player's inventory and can be purchased again, and you should callloadPlayerInventory() again to update the state of the player's inventory.
The CONSUME_FAILED event is dispatched when an error occurs attempting to consume an item. Because it is an error event, you should listen for it even if you don't plan to do anything about the error, to avoid an uncaught exception in your code:
// listen for consumption events
AndroidIAB.androidIAB.addEventListener(AndroidBillingEvent.CONSUME_SUCCEEDED, onItemConsumed);
AndroidIAB.androidIAB.addEventListener(AndroidBillingErrorEvent.CONSUME_FAILED, onConsumeFailed);

function onItemConsumed(e: AndroidBillingEvent): void {
    trace("you consumed the item " + e.itemId);
    AndroidIAB.androidIAB.loadPlayerInventory();
}

function onConsumeFailed(e: AndroidBillingErrorEvent): void {
    trace("Something went wrong consuming " + e.itemId + ": " + e.text);
}- To start the consume request, pass the item's id to the consumeItem() method. (Note that you cannot consume item unless you've previously called loadPlayerInventory() and the item is present):
// consume an item
AndroidIAB.androidIAB.consumeItem("my_spell");
Building and troubleshooting your app
If you're using Flash Builder4.6 or later, or Flash Professional CS6 or later, and have added the In-AppBilling for Android extension library as described above, then you can compile as you usually do directly from the IDE. If not and you are building your appwith the extension from the command line, then you'll need to specify thedirectory containing the com.milkmangames.extensions.AndroidIAB.ane file.
Here is an example build command line:
[PATH_TO_AIR_SDK]\bin\adt -package -target apk-debug -storetype pkcs12 -keystore [YOUR_KEYSTORE_FILE]
-storepass [YOUR_PASSWORD] anesample.apk app.xml anesample.swf -extdir [DIRECTORY_CONTAINING_ANE_FILE]
If your app is not receiving events as expected, try these tips:
- Make sure you've saved a draft of the application to the Android Market Developer Website as described in Building the Application and Uploading a Draft to Google Play.
- Make sure you've updated your application descriptor file as described in Updating your application descriptor file.
- Make sure the Google email address associated with your device is a Registered Developer Email or a Test Account Email as described in Preparing for Device Testing.
- If you're testing the IAB example application as is, make sure that you've created the In-App Product IDs that it uses: a managed product named my_levelpack and an unmanaged one named my_spell.See Building the Application and Uploading a Draft to Google Play for information on how to set up products.
- If you're using a subscription product, make sure you're using the purchaseSubscriptionItem() method.
- Google can take anywhere from an hour to a day to update its servers after you upload a new draft APK or change a product; wait at least an hour and try again.
- If you want to implement purchase verification on your own server:
- The AndroidPurchase object contains the properties itemId, developerPayload, orderId,jsonData, signature, purchaseTime, and purchaseToken. You can pass all or a subset of this data back to your server for verification. Refer to Google's latest documentation for information on how to validate a purchase using your key.
- If your application appears to stop responding after calling certain functions:
- If you don't have a debugger attached, and you're doing something that's causing an ErrorEvent, execution will halt but you may not notice it. Always add event listeners of the type AndroidBillingErrorEvent.
- If you've done that, look carefully at your function signature, and make sure the type ise:AndroidBillingErrorEvent and not e:AndroidBillingEvent.
- If you want to implement purchase verification on your own server:
Where to go from here
Now that you have the In-App Billing Extension for Android up and running, you may want to explore the ActionScript 3 documentation, read about Using the iOS In-App Purchase native extension for Adobe AIR, or check out the other tools from available from Milkman Games.
=================================
=================================
=================================
출처: http://www.adobe.com/devnet/air/native-extensions-for-air.html
Native extensions for Adobe AIR
Native Extensions for Adobe AIR are code libraries that contain native code wrapped with an ActionScript API. Native extensions provide easy access to device-specific libraries and features that are not available in the built-in ActionScript classes. Examples of native extensions include making a mobile device vibrate, integrating ad-networks and in-app purchasing systems into your games, and using the iOS Game Center in your iOS games.
Tutorials and articles
- Building a native extension for iOS and Android
- Developing and using Adobe AIR native extensions for Android devices
- Extending Adobe AIR
- Using native extensions in Adobe Flash Professional CS6
- Transferring data with AIR Native Extensions for iOS
Reference and documentation
Native extensions by Adobe |
DownloadOSDescription
| Beta Testing |
iOS | Use the native extension with ActionScript 3 to log messages to TestFlight and monitor crashes and errors from your app. |
| Licensing |
Android | Shows you how to package the native extension for Android licensing. |
| NetworkInfo |
iOS | Retrieves information about the network interfaces on an iOS device. |
| Vibration |
iOS / Android | Makes an iOS or Android device vibrate. |
Commercial native extensions |
DownloadOSDescriptionDocumentationDeveloper
| Game Kit |
iOS | Allow your game to set up real-time Game Center matches for up to 4 players, send and receive custom data between players, and enable voice chat during gameplay! | Tutorial | vitapoly inc. |
Game Kit |
iOS | Allow your game to integrate turn-based matches for up to 16 players. | Tutorial | vitapoly inc. |
| iOS 6 Social Networking |
iOS | Add iOS 6 social networking and sharing to your iOS app with an AIR native extension. | Tutorial | Milkman Games |
| GoViral social networking |
Android | Integrate social networking support for Facebook, Twitter, and email into your mobile AIR application using ActionScript 3. | Tutorial | Milkman Games |
| Push Notifications |
iOS | Share news and updates, bring lapsed users back to your app, and even update the state of an app remotely. | Tutorial | Milkman Games |
| Game Center |
iOS | Integrates Leaderboards, Achievements, and User Authentication into your Adobe AIR and Flash applications. | Tutorial | Milkman Games |
| iAd |
iOS | Enables you to monetize your free apps while using the official iAd Network provided by Apple. | Tutorial | Milkman Games |
| AdMob |
Android | Allows you to integrate AdMob from Google's ads into your mobile AIR 3.0 application using ActionScript 3. | Tutorial | Milkman Games |
| In-App Billing |
Android | Allows you to quickly and easily integrate In-App Purchases for Google Android into your mobile AIR 3.0 application using Actionscript 3. | Tutorial | Milkman Games |
| In-App Purchase |
iOS | Allows you to quickly and easily integrate In-App Purchases for iOS into your mobile AIR 3.0 application using Actionscript 3. | Tutorial | Milkman Games |
| GoViral social networking |
iOS | Allows you to rapidly integrate social networking support for Facebook, Twitter, and email into your mobile AIR application using ActionScript 3. | Tutorial | Milkman Games |
| RateBox |
iOS/Android | Increase your mobile app store ratings. | Tutorial | Milkman Games |
Non-commercial native extensions |
DownloadOSDescriptionDeveloper
| Voice Command |
Android | Allows you to control your AIR for Android apps with voice commands. | Ruedaminute |
| .NET Image Encoder |
Windows | Encodes a bitmap into BMP, JPEG, or PNG format using Microsoft .NET Framework 4. |
Sean Fujiwara |
| AS3C2DM |
Android | Lets you create custom push notifications for your Android applications. | Piotr Walczyszyn |
| iBattery |
iOS | Gets the battery status—unknown, unplugged, charging, or full—of an iOS device. | Todd Anderson |
| ICU |
Windows | Lets you leverage ICU provided globalization services. | Harish Suvarna |
| NookColorTools |
Android | Exposes the Nook Color's Android APIs to AIR developers. | Alex Liebert |
| PenTablet | Windows | Allows you to read pressure sensitivity data from a pen tablet. | Sean Fujiwara |
| Sharing/SMS/Toast | Android | Three extensions let you share content, send SMS, show a Toast message. | SmallScreenDesigns |
| App Finder | Android | Finds other Applications on your Android system. | Jonathan Campos |
| AIRKinect | Windows & Mac OSX | Taps into the rich experience of the Microsoft Kinect SDK. | as3NUI |
| as3-arduino-connector | Windows & Mac OSX | Connects Arduino Prototyping board to Adobe AIR through an AIR Native Extension. | Nick Kwiatkowsk |
| iOS 5.0.1 data storage | iOS | Enables AIR for iOS apps to conform to Apple's app store policies for local storage. | JamPot |
| Speech Recognition |
Android | Brings in Speech Input capabilities to AIR apps through the speech recognition engine built into Android devices. | Immanuel Noel |
=================================
=================================
=================================
출처: http://devpark.egloos.com/11649
air + ios in app purchase 처음부터 끝까지 part-1 iphone
- by 두얼굴의 사냥꾼
- 2012/12/06 10:19
- devpark.egloos.com/11649
- 덧글수 : 0
처음부터 끝까지
- 아래글을 따라가다보면 "여기"라고해서 작은 튜토리얼들은 이미 잘 써놓은 곳으로 링크 시켜놨다. (바퀴를 다시 만들고 싶지 않기 때문에..) 덕분에 내용이 상당히 줄어들었지만, 막상 쓰다보니 머가 많은것 같다. 하지만 한번 닦아놓은 길이라 그리 험하지는 않을 것이니 긴장풀고 고고씽 하시길.
1. 준비물
- apple development 계정
- 위에 링크된 코드 다운로드 (꼭 위에것을 이용할 필요는 없음 다 비슷함)
- 결제 테스트 id (아래서 설명)
- 결제계좌 (아래서 설명)
- 테스트할 기기 (시뮬레이터에서는 안됨)
- 하고자하는 의지
2. In-app-purchase flow이해
3. 일단 셋팅 부터 [AppId 만들기, App을 iTunes Connect에 등록, Product 만들기, Test 계정 만들기]
- App Id 만들기 (앱을 기기로 다운로드 해봐서 이미 있으면 pass. 기존에 만들어진 AppId는 in app purchase에 파란불이 들어와있는것만 확인)
여기에서 "1. 프로비저닝 프로파일 생성"까지 따라하시면 됩니다. - In-app-purchase를 사용할 App을 iTunes Connect에 등록
a. IOS dev center에서 오른쪽 메뉴중 "iTunes Connect" 클릭
b. 다음 나오는 화면에서 "Manage your Applications" 클릭
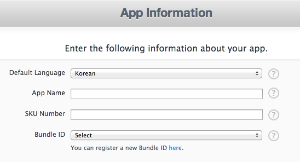
c. 여기서 부터 이곳 참조 단, 아래 보이는 App Information 설정에서 SKU Number는 자기가 만든 어플리케이션 고유넘버라고 생각하면 된다고한다. 혹자는 "AB0001", "AB0002" 이런식으로 앱마다 넘버를 줬다고 함. - product 만들기 (만들고 최대 12~24시간정도 기다려야 테스트 가능하다고함. 그래도 될수 있으니 1~2시간 후에도 해볼것)
a. 위에서 등록한 App을 클릭하면 아래와 같은 화면이 나오는데 여기서 "Manage In app purchase"를 클릭 
b. 그리고 왼쪽 상단에 "create new"를 클릭해서 드디어 product를 하나씩 만들수 있다. create new를 클릭하면 아래와 같은 화면을 볼 수있다.
맨처음에 걸어둔 in-app-purchase flow를 보았다면, 아 그 product type 하고 감이 올것이다. 그렇다. 바로 그 것이다.
잉? 그런데 이 스샷처럼 리스트가 여러개 있는것이 아니라 Free subscription만 보인다고? 위에 빨간 빡스를 그냥 쳐둔것이 아니다.
바로 "Contracts, Tax, and Banking"을 입력하지 않았기 떄문에 가능한 리스트가 Free..용 밖에 없다는 것이다.
일단 로직이 되는것 부터 확인하고 싶다면 free로 걍 만들고 테스트 하면된다. (바로 아래스텝 스킵가능. 로직만들고 구매하기 누르면 구독하시겠습니까? 이런식으로 떠서 확인가능)
나는 이왕 하는김에 이것까지 셋팅하겠다하면 바로 아래 스텝으로.
c. Bank(결제계좌), Tax info 입력하기
여기 참조. 이때 주의할점은 Contact, Bank, Tax 세가지 모두 입력해야 테스트가 가능하다는 불편한 진실이다. 그리고 "지금 대충 가라로 입력하고 나중에 고쳐야지"라는 생각을 떠올릴 수 있는데, Tax는 한번 입력하면 수정하기위해서 이메일을 보내서 해야하는 불편함이 있다고 한다. 본인도 검색해서 본 내용이기 때문에 의심이 간다면 검색을통해 확인해 보길 바란다.
d. 이제 product만들기 위해서 Reference Name, Product ID, Price Tier, Language, Screenshot for Review만 입력하면된다.
Reference Name은 나중에 이 아이템의 팔린 통계뭐 이런거 볼때 쓰이는것 같다. 같은종류의 product들을 묶어주는 거랄까? 라고 내뱉었지만 아직 해보지 않아서.. ㅋ 암튼 본인은 일단 productID와 동일하게 줬다. (productID는 수정이 불가하지만 reference Name은 수정이 가능하다)
여기서 기억해야할 것은 productID이다. 나중에 로직에서 구매요청이나 product list요청을 할때 바로 이 아이디를 사용하기때문이다. "Super_sword"라고 입력했다면 "Super_sword"로 구매요청을 하면 된다. (내부적으로 App ID로 접근되기때문에 아이디만으로 가능하다)
Free subscription으로 했다면 Price Tier는 안보일 것이므로 skip, 유료로 하신분들은 알맞은 가격을 정하면된다.
그리고 대망의 Screenshot for Review. 본인은 뽀샵으로 아무그림이나 그려서 대충 사이즈 맞춰줬다. 귀찮은 분들은 요걸쓰면된다. (그렇다고 출시할때까지 쓰면안되겠쥐?)- Test 계정 만들기
여기를 참조해서 만들면되는데, 본인은 이메일주소가 꼭 존재하지 않는것이어도 테스트가 가능했다. 그러니 verify까진 안해도 된다. 6번까지만 ㄱ.
출처: http://devpark.egloos.com/11848
air + ios in app purchase 처음부터 끝까지 part-2 iphone
- by 두얼굴의 사냥꾼
- 2012/12/06 10:46
- devpark.egloos.com/11848
- 덧글수 : 0
4. 이제 코드좀 만져보자. (flash builder툴을 기반으로 설명)
- flash builder에 flex sdk버젼이 4.6.0이라면 http://gaming.adobe.com/getstarted/ 에서 Download the Adobe® AIR® SDK 를 이용해서 최신버젼을 다운받아 설치하길 바란다.
설치방법은 flash builder 폴더/sdks/4.6.0.xx/ 라는 폴더를만들고 다운받은것을 압축풀어 넣고 flash builder를 킨후 Preferences->Flash builder->Installed Flex SDKs를 클릭하고 add해서 4.6.0.xx를 선택해주면 된다.
4-1. native extension code import
- 터미널에서 적절한 위치에 다음 명령으로 native extension codes를 다운 받는다.
svn checkout http://in-app-purchase-air-ios.googlecode.com/svn/branches/v1-And in-app-purchase-air-ios - 먼저, ios extension code를 이용하기위해 .a파일을 생성해야된다. 받은 폴더 밑에 Native/iOS/AppPurchase/에 있는 xcodeproj를 연다.
- project build setting에서 Pre-configuration Build Products Path 를 더블클릭하고 나오는 내용을 아래와 같이 바꿔주고 run 시킨다.
$(PROJECT_DIR)/build/$(CONFIGURATION)$(EFFECTIVE_PLATFORM_NAME)
- /Native/IOS/AppPurchase/build/debug-iphoneos/libAppPurchase.a 파일이 생성된것을 확인할 수 있을 것이다.
- 이제 flash builder에서 svn으로 받은 폴더 밑에있는 AS폴더를 import시킨다. (Existing Projects into Workspace로)
- 이 프로젝트에 숨겨진 파일이 하나 있는데 AS를 선택하고 메뉴에서 Search를 누르고 Containing Text에 "DEVICE"라고 입력하고, file name patterns에 "*"를 입력하고 search를 누른다. 그럼 search결과로 AS/src/.actionScriptProperties가 나올 것이다.
- 이 파일을 선택해서 "CONFIG::DEVICE false"를 "CONFIG::DEVICE true"로 바꿔준다.
- 이 프로젝트는 android와 ios모두를 지원하기위해서 만들어진 것인데 android부분은 동작이 잘 안되었었다. 암튼 지금은 ios이므로 안드로이드 관련부분을 제거하자.
AS 프로젝트 밑에 보면 buildANE.sh파일이 있는데 이 파일을 열고 다음을 수정해 준다.예) ADT="/Applications/Adobe Flash Builder 4.6/sdks/4.6.0/bin/adt"2. 아래 내용 모두 삭제...# native Android project path and jar nameANDROID_JAR_NAME=IAPAndroid.jar...mkdir -p ${BUILD_PATH}/Android-ARM
cp ./${ANDROID_PROJECT}/bin/${ANDROID_JAR_NAME} ${BUILD_PATH}/Android-ARM
cp ${BUILD_PATH}/library.swf ${BUILD_PATH}/Android-ARM...
... <applicationDeployment> <initializer>com.sbhave.appPurchase.glue.AppPurchaseExtension</initializer> </applicationDeployment>... - </platform>
- <finalizer>com.sbhave.appPurchase.glue.AppPurchaseExtension</finalizer>
- <nativeLibrary>IAPAndroid.jar</nativeLibrary>
- <platform name="Android-ARM">
- 다음으로 AS프로젝트/src/extenstion.xml에서 다음 부분을 제거해준다.
- ...
- -platform Android-ARM -C ${BUILD_PATH}/Android-ARM/ . \
- ...
- cp -R ./${ANDROID_PROJECT}/res ${BUILD_PATH}/Android-ARM
- # copy native Android resources
- ...
- mkdir -p ${BUILD_PATH}/Android-ARM/res
- ANDROID_PROJECT=../Native/Android
- 1. "ADT=" 이경로를 flash builder 가 설치된 폴더를 찾아 그곳의 bin/adt로 고쳐준다.
- 이제 AS프로젝트를 선택하고 project -> clean을 클릭한다.
- 아래와 같이 셋팅하고 ok클릭

- 에러가 없다면 AS프로젝트/bin/ 에 AS.swc와 inAppMain.ane파일이 생성되었을 것이다. 이것을 이용해서 extension코드를 이용하면된다.
- 혹시 ios native codes를 수정할일이 있으면 수정하고 빌드시켜서 .a파일을 생성해놓고 flash builder로 와서 AS프로젝트만 clean하면 알아서 AS.swc와 inAppMain.ane가 다시 생성된다. AS/src/밑에 스크립트 코드들도 마찬가지로 clean할때 고친것이 AS.swc와 inAppMain.ane에 반영된다.
출처: http://devpark.egloos.com/11917
air + ios in app purchase 처음부터 끝까지 part-3 iphone
- by 두얼굴의 사냥꾼
- 2012/12/06 10:48
- devpark.egloos.com/11917
- 덧글수 : 0
4-2. 내 프로젝트에서 native extension code 이용하기
- flash builder에서 flex mobile project로 project를 하나 만든다 (만들때 첫화면에 default로 위에서 넣어준 최신버전 선택하고있는지 확인).
- 아래화면처럼 셋팅하고 finish.

- 만들어진 프로젝트에서 마우스 오른쪽 버튼을 눌러 properties-> Flex Build Path 선택
- 선택되있는 Library path탭에서 add SWC를 클릭해서 svn으로 받은 폴더안에 있는 .swc파일을 선택한다.
- 아래 화면같이 나오는데 merge into code를 아래화면처럼 external로 바꿔준다.

- 바로 옆 탭인 "Native Extensions" -> add ANE 클릭. 역시 압축푼 폴더 안에있는 appPurchase.ane를 선택.
- 같은 properties 화면에서 이번엔 Flex Build Path바로위에있는 Flex Build Packaging->Apple iOS선택
- 다음으로 native extensions탭을 눌러 아까 추가해준 ane에 체크를 해주고 ok를 눌러 properties를 종료

- project명-app.xml 파일을 클릭하고 <extension>..</extenstion>을 아래와 같이 </initalwindow>밑에 추가해주고 저장....<extensions></extensions>
- <extensionID>com.adobe.appPurchase</extensionID>
- </initialWindow>
- *아래 내용을 추가하기 전에 스크롤을 맨아래로 내려서 비슷한 내용이 이미 추가되어있다면 스킵
출처: http://devpark.egloos.com/12367
air + ios in app purchase 처음부터 끝까지 part-3 마무리 iphone
- by 두얼굴의 사냥꾼
- 2012/12/06 11:00
- devpark.egloos.com/12367
- 덧글수 : 0
4.2 이어서.
- 프로젝트/src/(default package)/~.mxml을 열어 test code를 넣어보자. (아래 코드에서 </fx:Declarations>와 </s:Application>사이에 있는 코드를 통째로 복사해서 붙여넣는다.)본인은 "test"라는 productID를 만들어서 AppPurchase.manager.getProducts(["test"]); 로 테스트 했음.
- 간혹 get product버튼이 안보이는 경우가 있어서 design 버튼을 클릭해서 버튼과 list위치를 좀 조정해준다.
- 그리고 "AppPurchase.manager.getProducts([""]);" 이부분에 자신이 위에서 product만들때 productID로 넣었던 것을 고대로 넣어주면 된다.
</fx:Declarations>

    <fx:Script>

        <![CDATA[
            import com.adobe.nativeExtensions.AppPurchase;
            import com.adobe.nativeExtensions.AppPurchaseEvent;
            import com.adobe.nativeExtensions.Product;
            import com.adobe.nativeExtensions.Transaction;

            import mx.collections.ArrayCollection;
            import mx.events.FlexEvent;
            import mx.messaging.Producer;


            import spark.events.IndexChangeEvent;

            [Bindable] var arrC = null;
            protected function application1_applicationCompleteHandler(event:FlexEvent):void
            {
                AppPurchase.manager.addEventListener(AppPurchaseEvent.UPDATED_TRANSACTIONS,onUpdate);
AppPurchase.manager.addEventListener(AppPurchaseEvent.RESTORE_FAILED,function(e:AppPurchaseEvent):void{trace(e.error);});
AppPurchase.manager.addEventListener(AppPurchaseEvent.RESTORE_COMPLETE,function(e:AppPurchaseEvent):void{trace("Restore COMPLETE");});
                AppPurchase.manager.addEventListener(AppPurchaseEvent.REMOVED_TRANSACTIONS,function(e:AppPurchaseEvent):void{
                    for each(var t:Transaction in e.transactions){
                        trace ("Removed: " + t.transactionIdentifier);
                    }
                });

                AppPurchase.manager.restoreTransactions();  // Restore previous successful transactions. Results in UPDATE events
                var ts:Array = AppPurchase.manager.transactions;

                for each(var t:Transaction in ts){

                    // Iterate over in-Que transactions

                }

                trace ("APP - MUTED " + AppPurchase.manager.muted);  // Check if App Store payments are restricted.
            }

            protected function button1_clickHandler(event:MouseEvent):void
            {
                AppPurchase.manager.addEventListener(AppPurchaseEvent.PRODUCTS_RECEIVED,onProducts);
                AppPurchase.manager.getProducts(["suite","pepsi","ball"]); // Get the Products info from iTunes Connect.
                // (For the ones that you have defined)
            }
protected function onProducts(e:AppPurchaseEvent):void{
                arrC = new ArrayCollection(e.products);                for each(var s:String in e.invalidIdentifiers){
                    trace(s);
                }
}

protected function onUpdate(e:AppPurchaseEvent):void{
                trace("APP - onUpdate");
                for each(var t:Transaction in e.transactions){
                    if(t.state == Transaction.TRANSACTION_STATE_PUCHASED){
                        // Verify that this receipt came from apple and is not forged
                        var req:URLRequest = new URLRequest("https://sandbox.itunes.apple.com/verifyReceipt");
                        req.method = URLRequestMethod.POST;
                        req.data = "{\"receipt-data\" : \""+ t.receipt +"\"}";
                        var ldr:URLLoader = new URLLoader(req);
                        ldr.load(req);
                        ldr.addEventListener(Event.COMPLETE,function(e:Event):void{
                            trace("LOAD COMPLETE: " + ldr.data);
                            // Provide the purchased functionality/service/product/subscription to user.
                            AppPurchase.manager.finishTransaction(t.transactionIdentifier); // Finish the transaction completely
                        });
                    }else if(t.state == Transaction.TRANSACTION_STATE_RESTORED){
                        // Useful for restoring Non-Consumable purchases made by user. Read programming guide for more details.
                        if(t.originalTransaction.state == Transaction.TRANSACTION_STATE_PUCHASED){
                            AppPurchase.manager.finishTransaction(t.originalTransaction.transactionIdentifier);
                            trace("Restored Transaction Finish on " + t.transactionIdentifier);
                        }
                    }
                }
            }

            protected function list1_changeHandler(event:IndexChangeEvent):void
            {
                var p:Product = arrC[event.newIndex] as Product;
                AppPurchase.manager.startPayment(p.identifier,1); // Purchase 1 quantity of the selected product.
            }
        ]]>
    </fx:Script>

    <s:Button label="getProducts" click="button1_clickHandler(event)" />
    <s:List dataProvider="{arrC}" labelField="title" change="list1_changeHandler(event)" />
</s:Application>
출처: http://devpark.egloos.com/12879
air + ios in app purchase 처음부터 끝까지 part-4 끝 iphone
- by 두얼굴의 사냥꾼
- 2012/12/06 11:15
- devpark.egloos.com/12879
- 덧글수 : 0
5. 디바이스에서 실행 (simulator에서는 코드자체 에러가 나서 실행이 안된다.)
- 프로젝트 properties 화면에서 Flex Build Packaging->Apple iOS선택
- 여기서 certificate는 맨처음 provisioning portal에서 만든 certificate을 다운로드해서 실행하면 키체인에 들어가는데 이때 생성된 인증서에서 오른쪽 버튼->내보내기하면
.p12파일로 내보낼 수 있다. - 이렇게 만들어진 .p12 파일과 provisioning portal에서 다운받는 provisioning file을 선택해서 넣어준다.
- 프로젝트의 src/project명-app.xml 파일을 클릭하고 <id>..</id>부분을 아래와 같이 바꿔준다.
이부분을appId는 provisioning portal에있는 appId이다. 예)com.makamoye.myapp - <id>appId</id> 로 바꿔준다.
- <id>proejct명</id>
- project -> clean 선택. 이번엔 아래와 같은 셋팅 (test는 현재 작업중인 프로젝트다)

- 이제 실행을 하면되는데, provisioning에 등록된 기기를 연결하고 벌레모양의 debug버튼 옆에 있는 아래로있는 화살표를 누르고 debug configurations을 클릭한다.
- 왼쪽 리스트중에 Mobile Application을 더블클릭하고, (현재 프로젝트가 제대로 선택 되었는지 확인) 나오는 메뉴에서 on device를 선택하고 Debug를 실행해준다.
- 이때 잠시후 비번을 입력하라고 나와야 정상. (비번은 보통 자기 개발자 id에 해당하는 pw일듯)
- 비번을 입력하고 계속 진행을한다. (상당히 오래걸림.. 사양에 따라 다르겠지만 5~10분?)air에서 기기에 앱올리려고 하는데이런 에러 발생.flash builder preference에 java jre 참조하고있는것을 보면 Libraray/~ 밑에있는 1.7.0 jdk를 참조 하고있는데 이거 말고 /System/Library/Java/밑에 있는 1.6.0/content/Home을 참조하게 한다.그래도 안되서 포럼에서 본것처럼 걍 Library 밑에있는 자바디렉토리를 지워버렸다. 그러니까 됨.
- (기다리면서 한가지 추가로, 디바이스 wifi가 컴퓨터 wifi와 같은곳에 접속해 있어야 debug가 잘 동작한다. 다른데있으면 검은화면에서 안넘어감..)
- Exception in thread "main" java.lang.Error: Unable to find llvm JNI lib in:...
- (본인은 아래와 같은 에러를 직면했었음)
- 제대로 진행이 되었다면, iTunes에서 ipa를 동기화하고 앱을 실행하라는 문구가 나올 것이다. 아래 스텝을 따라하면된다.
a. iTunes에서 해당기기 클릭
b. 응용프로그램 클릭
c. 파일 -> 보관함에 추가
d. 지금까지 만든 프로젝트 폴더/bin-debug/~~.ipa 파일 선택
e. 체크 표시하고 동기화
f. device에서 해당 앱 실행. (만약 실행하기 전에 앱을 실행하라는 문구가 없어졌다면 다시 디버그 버튼을 누르면 바로 같은 문구가 나타날 것이다. 이상태에서 앱을 실행해야 디버깅 메시지를 볼 수 있다) - 두번째 다시 설치 할땐 다시 체크표시를 풀고 동기화해서 앱을 삭제한 다음에 위 싸이클을 c번부터 진행하면된다.
- 잘 되었다면, 실행하고 getProducts버튼을 클릭했을때 아래와 같은 디버그 메시지를 볼 수 있다.[SWF] test.swf - 108,246 bytes after decompressionAS - Creating ContextStatus Event Fired...Products Received
- Status Event Fired...
- AS - Asked For products
- AS - In Constructor
- [SWF] com.adobe.appPurchase - 1,143 bytes after decompression
- 실행 화면
a. get products 버튼클릭
b. product 클릭해서 구매요청
c. test user account로 로그인
d. 로그인후 구독 허용
- product type이 free subscription이라 구독으로 뜬것이고 다른 유료아이탬으로 한다면 구매로 뜰 것이다.

- 끝 -
=================================
=================================
=================================
adobe game sdk: ProductStoreTest.as
/*************************************************************************


*


* ADOBE CONFIDENTIAL


* ___________________


*


*  Copyright [first year code created] Adobe Systems Incorporated


*  All Rights Reserved.


*


* NOTICE:  All information contained herein is, and remains


* the property of Adobe Systems Incorporated and its suppliers,


* if any.  The intellectual and technical concepts contained


* herein are proprietary to Adobe Systems Incorporated and its


* suppliers and are protected by trade secret or copyright law.


* Dissemination of this information or reproduction of this material


* is strictly forbidden unless prior written permission is obtained


* from Adobe Systems Incorporated.


**************************************************************************/
package {
    import com.adobe.ane.productStore.Product;
    import com.adobe.ane.productStore.ProductEvent;
    import com.adobe.ane.productStore.ProductStore;
    import com.adobe.ane.productStore.Transaction;
    import com.adobe.ane.productStore.TransactionEvent;
    import flash.display.Sprite;
    import flash.display.StageAlign;
    import flash.display.StageScaleMode;
    import flash.events.*;
    import flash.events.MouseEvent;
    import flash.net.URLLoader;
    import flash.net.URLRequest;
    import flash.net.URLRequestMethod;
    import flash.sampler.NewObjectSample;
    import flash.text.TextField;
    import flash.text.TextFormat;
    public class ProductStoreTest extends Sprite {
        private
        var productStore: ProductStore = null;
        private
        var arrC3: Array = new Array();
        private
        var arrC2: Array = new Array();
        private
        var avlTxt: CustomTextField;
        private
        var isAvailable: CustomButton;
        private
        var isSupported: CustomButton;
        private
        var suppTxt: CustomTextField;
        private
        var restoreTransaction: CustomButton;
        private
        var getProduct: CustomButton;
        private
        var gt: TextField;
        private
        var proSuc: CustomTextField;
        private
        var prodSuccess: TextField;
        private
        var val: String;
        private
        var restoreVal: CustomTextField;
        private
        var restoreTxt: TextField;
        private
        var pendBtn: CustomButton;
        public

        function ProductStoreTest() {
            isAvailable = new CustomButton("isAvailable", 0, -135, 70, 25);
            addChild(isAvailable);
            avlTxt = new CustomTextField();
            addChild(avlTxt);
            isAvailable.addEventListener(MouseEvent.CLICK, is_Available);
            isSupported = new CustomButton("isSupported", 250, -135, 70, 25);
            addChild(isSupported);
            suppTxt = new CustomTextField();
            addChild(suppTxt);
            isSupported.addEventListener(MouseEvent.CLICK, check_isSupported);
            restoreTransaction = new CustomButton("restoreTransaction", 0, -90, 100, 25);
            addChild(restoreTransaction);
            restoreTransaction.addEventListener(MouseEvent.CLICK, restore_Transactions);
            restoreVal = new CustomTextField();
            restoreTxt = restoreVal.create(130, -90, 150, 25);
            addChild(restoreTxt);
            getProduct = new CustomButton("getProduct", 0, -50, 70, 25);
            addChild(getProduct);
            getProduct.addEventListener(MouseEvent.CLICK, get_Product);
            proSuc = new CustomTextField();
            addChild(proSuc);
            prodSuccess = proSuc.create(135, -20, 200, 50);
            addChild(prodSuccess);
            prodSuccess.text = "PRODUCT DETAILS";
            pendBtn = new CustomButton("Pending Transactions", 0, 180, 110, 25);
            addChild(pendBtn);
            pendBtn.addEventListener(MouseEvent.CLICK, pending_transaction);
            gt = new TextField();
            gt.x = 0;
            gt.y = -20;
            gt.width = 120;
            gt.height = 50;
            gt.border = true;
            addChild(gt);
        }
        protected

        function check_isSupported(event: MouseEvent): void {
            trace("in ckeck is supported");
            productStore = new ProductStore()
            var t1: Boolean = ProductStore.isSupported;
            var t: TextField = suppTxt.create(330, -135, 60, 25);
            t.text = t1.toString();
        }
        //		protected function abc(ps:ProductStore):void
        //		{
        //			trace("in abc");
        //		}
        protected

        function is_Available(event: MouseEvent): void {
            var ps: ProductStore = new ProductStore();
            trace("in is_Available");
            var t2: Boolean = productStore.available;
            var t: TextField = avlTxt.create(90, -135, 60, 20);
            t.text = t2.toString();
        }
        public

        function get_Product(event: MouseEvent): void {
            trace("in get_Product");
            productStore.addEventListener(ProductEvent.PRODUCT_DETAILS_SUCCESS, productDetailsSucceeded);
            productStore.addEventListener(ProductEvent.PRODUCT_DETAILS_FAIL, productDetailsFailed);
            var vector: Vector. < String > = new Vector. < String > (3);
            vector[0] = "9";
            vector[1] = "p8";
            vector[2] = "1234897";
            productStore.requestProductsDetails(vector);
            gt.text = ("Available products: \n" + "1. Consumable \n" + "2. Non Consumable \n" + vector);
            var consumable: CustomButton = new CustomButton("Consumable", 0, 50, 70, 25);
            addChild(consumable);
            consumable.addEventListener(MouseEvent.CLICK, consumableProduct);
            var nonconsumable: CustomButton = new CustomButton("Non Consumable", 90, 50, 90, 25);
            addChild(nonconsumable);
            nonconsumable.addEventListener(MouseEvent.CLICK, nonconsumableProduct);
        }
        public

        function productDetailsSucceeded(e: ProductEvent): void {
            trace("in productDetailsSucceeded " + e);
            var i: uint = 0;
            while (e.products && i < e.products.length) {
                var p: Product = e.products[i];
                prodSuccess.appendText("\nTITLE: " + p.title + "\nDescription: " + p.description + "\nIdentifier : " + p.identifier + "PriceLocale : " + p.priceLocale + "\nPrice: " + p.price);
                trace("title : " + p.title);
                trace("description: " + p.description);
                trace("identifier: " + p.identifier);
                trace("priceLocale: " + p.priceLocale);
                trace("price :" + p.price);
                i++;
            }
        }
        public

        function productDetailsFailed(e: ProductEvent): void {
            trace("in productDetailsFailed" + e);
            var i: uint = 0;
            while (e.invalidIdentifiers && i < e.invalidIdentifiers.length) {
                trace(e.invalidIdentifiers[i]);
                i++;
            }
        }
        public

        function consumableProduct(e: MouseEvent): void {
            trace("consumable product...");
            productStore.addEventListener(TransactionEvent.PURCHASE_TRANSACTION_SUCCESS, purchaseTransactionSucceeded);
            productStore.addEventListener(TransactionEvent.PURCHASE_TRANSACTION_CANCEL, purchaseTransactionCanceled);
            productStore.addEventListener(TransactionEvent.PURCHASE_TRANSACTION_FAIL, purchaseTransactionFailed);
            productStore.makePurchaseTransaction("p8", 1);
        }
        public

        function nonconsumableProduct(e: MouseEvent): void {
            trace("Non consumable product...");
            productStore.addEventListener(TransactionEvent.PURCHASE_TRANSACTION_SUCCESS, purchaseTransactionSucceeded);
            productStore.addEventListener(TransactionEvent.PURCHASE_TRANSACTION_CANCEL, purchaseTransactionCanceled);
            productStore.addEventListener(TransactionEvent.PURCHASE_TRANSACTION_FAIL, purchaseTransactionFailed);
            productStore.makePurchaseTransaction("9", 1);
        }
        protected

        function purchaseTransactionSucceeded(e: TransactionEvent): void {
            trace("in purchaseTransactionSucceeded" + e);
            var i: uint = 0;
            var t: Transaction;
            while (e.transactions && i < e.transactions.length) {
                t = e.transactions[i];
                printTransaction(t);
                i++;
                var Base: Base64 = new Base64();
                var encodedReceipt: String = Base64.Encode(t.receipt);
                var req: URLRequest = new URLRequest("https://sandbox.itunes.apple.com/verifyReceipt");
                req.method = URLRequestMethod.POST;
                req.data = "{\"receipt-data\" : \"" + encodedReceipt + "\"}";
                var ldr: URLLoader = new URLLoader(req);
                ldr.load(req);
                ldr.addEventListener(Event.COMPLETE, function(e: Event): void {
                    trace("LOAD COMPLETE: " + ldr.data);
                    productStore.addEventListener(TransactionEvent.FINISH_TRANSACTION_SUCCESS, finishTransactionSucceeded);
                    productStore.finishTransaction(t.identifier);
                });
                trace("Called Finish on/Finish Transaction " + t.identifier);
            }
            getPendingTransaction(productStore);
        }
        protected

        function purchaseTransactionCanceled(e: TransactionEvent): void {
            trace("in purchaseTransactionCanceled" + e);
            var i: uint = 0;
            while (e.transactions && i < e.transactions.length) {
                var t: Transaction = e.transactions[i];
                printTransaction(t);
                i++;
                trace("FinishTransactions" + t.identifier);
                productStore.addEventListener(TransactionEvent.FINISH_TRANSACTION_SUCCESS, finishTransactionSucceeded);
                productStore.finishTransaction(t.identifier);
            }
            getPendingTransaction(productStore);
        }
        protected

        function purchaseTransactionFailed(e: TransactionEvent): void {
            trace("in purchaseTransactionFailed" + e);
            var i: uint = 0;
            while (e.transactions && i < e.transactions.length) {
                var t: Transaction = e.transactions[i];
                printTransaction(t);
                i++;
                trace("FinishTransactions" + t.identifier);
                productStore.addEventListener(TransactionEvent.FINISH_TRANSACTION_SUCCESS, finishTransactionSucceeded);
                productStore.finishTransaction(t.identifier);
            }
            getPendingTransaction(productStore);
        }
        protected

        function finishTransactionSucceeded(e: TransactionEvent): void {
            trace("in finishTransactionSucceeded" + e);
            var i: uint = 0;
            while (e.transactions && i < e.transactions.length) {
                var t: Transaction = e.transactions[i];
                printTransaction(t);
                i++;
            }
        }
        protected

        function restore_Transactions(event: MouseEvent): void {
            trace("in restore_Transactions");
            productStore.addEventListener(TransactionEvent.RESTORE_TRANSACTION_SUCCESS, restoreTransactionSucceeded);
            productStore.addEventListener(TransactionEvent.RESTORE_TRANSACTION_FAIL, restoreTransactionFailed);
            productStore.addEventListener(TransactionEvent.RESTORE_TRANSACTION_COMPLETE, restoreTransactionCompleted);
            productStore.restoreTransactions();
        }
        protected

        function restoreTransactionSucceeded(e: TransactionEvent): void {
            trace("in restoreTransactionSucceeded" + e);
            val = "Restore Success";
            restoreTxt.text = val;
            var i: uint = 0;
            while (e.transactions && i < e.transactions.length) {
                var t: Transaction = e.transactions[i];
                printTransaction(t);
                i++;
                trace("FinishTransactions" + t.identifier);
                productStore.addEventListener(TransactionEvent.FINISH_TRANSACTION_SUCCESS, finishTransactionSucceeded);
                productStore.finishTransaction(t.identifier);
            }
            getPendingTransaction(productStore);
        }
        protected

        function restoreTransactionFailed(e: TransactionEvent): void {
            trace("in restoreTransactionFailed" + e);
            val = "Restore Fail";
            restoreTxt.text = val;
        }
        protected

        function restoreTransactionCompleted(e: TransactionEvent): void {
            trace("in restoreTransactionCompleted" + e);
            val = "Restore Complete";
            restoreTxt.text = val;
        }
        protected

        function pending_transaction(event: MouseEvent): void {
            getPendingTransaction(productStore);
        }
        public

        function getPendingTransaction(prdStore: ProductStore): void {
            trace("pending transaction");
            var transactions: Vector. < Transaction > = prdStore.pendingTransactions;
            var i: uint = 0;
            while (transactions && i < transactions.length) {
                var t: Transaction = transactions[i];
                printTransaction(t);
                i++;
            }
        }
        public

        function printTransaction(t: Transaction): void {
            trace("-------------------in Print Transaction----------------------");
            trace("identifier :" + t.identifier);
            trace("productIdentifier: " + t.productIdentifier);
            trace("productQuantity: " + t.productQuantity);
            trace("date: " + t.date);
            trace("receipt: " + t.receipt);
            trace("error: " + t.error);
            trace("originalTransaction: " + t.originalTransaction);
            if (t.originalTransaction)
                printTransaction(t.originalTransaction);
            trace("---------end of print transaction----------------------------");
        }
    }
}
=================================
=================================
=================================
기타링크:
http://www.milkmangames.com/iapdoc/com/milkmangames/nativeextensions/ios/StoreKit.html
http://www.milkmangames.com/iabdoc/com/milkmangames/nativeextensions/android/AndroidIAB.html
http://devpark.egloos.com/search?query=%EC%B2%98%EC%9D%8C%EB%B6%80%ED%84%B0&option=accu&page=1
http://devpark.egloos.com/11649
http://devpark.egloos.com/11848
http://devpark.egloos.com/11917
http://devpark.egloos.com/12367
http://devpark.egloos.com/12879
=================================
=================================
=================================


댓글 영역