=======================
=======================
=======================

//android
출처: http://joshhendo.com/2012/03/android-sqlite-database-upgrade/
Android: SQLite Database Upgrade
Posted by :josh On : March 3, 2012
Category:android, computer, development
Note: I haven’t edited this since writing it, or fully tested the code that I present (that said, it’s heavily based on one of my apps, it’s just I’ve reduced the number of tables being made.) I will update the tutorial later on when I get a chance.
There are quite a few tutorials out on the web of how to make a SQLite database within an Android application, but not so many that deal with proper upgrading of the database.
Over time the requirements of the database within your application may change, this is almost inevitable if your application is in active development and you’re constantly adding new features. Properly upgrading the database in your app is important, because if something goes wrong your application will have unexpected behaviour (such as crashing) or you may loose all your user data and have to start over.
Version 1 of your database
If you have followed one of the numerous tutorials online on how to setup a SQLite database in your app, you most likely have some form of DatabaseHelper class that extends SQLiteOpenHelper. It may look something like this:
package com.example.sampledb;

import android.content.Context;
import android.database.sqlite.SQLiteDatabase;
import android.database.sqlite.SQLiteOpenHelper;

import java.text.SimpleDateFormat;

public class DbHelper extends SQLiteOpenHelper
{
    private static final String DATABASE_NAME = "mysampledb";
    private static final int DATABASE_VERSION = 1;

    private static final String DATABASE_CREATE_SAMPLE_TABLE = "CREATE TABLE tblSample" +
        "(" +
        "   _id integer primary key autoincrement," +
        "   name varchar(32)" +
        ");";

    public static final String DATE_FORMAT = "yyyy-MM-dd HH:mm:ss.SSSS";
    public static final SimpleDateFormat SIMPLE_DATE_FORMAT = new SimpleDateFormat(DATE_FORMAT);

    public DbHelper(Context context)
    {
        super(context, DATABASE_NAME, null, DATABASE_VERSION);
    }

    @Override
    public void onCreate(SQLiteDatabase database)
    {
        database.execSQL(DATABASE_CREATE_SAMPLE_TABLE);
    }

    @Override
    public void onUpgrade(SQLiteDatabase db, int oldVersion, int newVersion)
    {
        // Do nothing for now
    }
}
Each time it is called, it will check to see if this database and version already exist. If the database doesn’t exist, it will create the database by calling onCreate(), and it will store the database name and version number with it. If it does exist, but the version of the current version is lower than what is defined in DATABASE_VERSION, the onUpgrade() method will be called.
Version 2 of your database
The question is, what is the best way to handle an upgrade? I had a think about the way it worked, and I decided the best way would be to loop through all the different versions and apply the required changes.
Let’s say you wanted to add a field to “tblSample” called “address”? The new statement to create the database table would look like:
CREATE TABLE tblSample
(
    _id integer primary key autoincrement,
    name varchar(32),
    address varchar(128)
);
Which you will obviously what you want to change your “DATABASE_CREATE_SAMPLE_TABLE” variable to, since you want all new creations of the database to be up to date. You also want to use the onUpgarade method(). The way I have implemented the onUpgrade method is as follows.
package com.example.sampledb;

import android.content.Context;
import android.database.sqlite.SQLiteDatabase;
import android.database.sqlite.SQLiteOpenHelper;

import java.text.SimpleDateFormat;

public class DbHelper extends SQLiteOpenHelper
{
    private static final String DATABASE_NAME = "mysampledb";
    private static final int DATABASE_VERSION = 2;

    private static final String DATABASE_CREATE_SAMPLE_TABLE = "CREATE TABLE tblSample" +
        "(" +
        "   _id integer primary key autoincrement," +
        "   name varchar(32)," +
        "   address varchar(128)" +
        ");";

    public static final String DATE_FORMAT = "yyyy-MM-dd HH:mm:ss.SSSS";
    public static final SimpleDateFormat SIMPLE_DATE_FORMAT = new SimpleDateFormat(DATE_FORMAT);

    public DbHelper(Context context)
    {
        super(context, DATABASE_NAME, null, DATABASE_VERSION);
    }

    @Override
    public void onCreate(SQLiteDatabase database)
    {
        database.execSQL(DATABASE_CREATE_SAMPLE_TABLE);
    }

    @Override
    public void onUpgrade(SQLiteDatabase db, int oldVersion, int newVersion)
    {
        for (int i = oldVersion; i < newVersion; i++)
        {
            switch(i)
            {
                case 1:
                    db.execSQL("ALTER TABLE tblSample ADD address varchar(128)");
                    break;
            }
        }
    }
}
How will this work? Well, quite well from what I’ve found, since it will work for any upgrade… if you always use this method, it will work for upgrading from version 1 to 9, or from version 4 to 5. Basically, it will loop through all the previous versions starting at the current version.
So, if my phone is on version 1, and the app needs to upgrade to version 2, this loop will iterate one time, with the value of “i = 1.” The switch case statement should, for each version number, execute the required statements to upgrade from that version to the next. So, in this case, “case 1:” will execute the required statements to upgrade from version 1 to version 2.
Potential Problems
The biggest problem that you may face is if your “fresh” database creation statements get out of sync with all the update statements. What should always be the case is, if you start with version 1, and run all the update statements to get it to the newest version, the schema of the database that has been upgraded should match exactly the schema of the database if it were created from the newest version.
In short, the best way around it is only make small changes to your database at a time, and make sure you apply the changes to both the creation statements and the update statements such that they match. I would also suggest always using string literals in the update statements rather than refer to any variables. This would definitely be the case if you need to create a new table. It would be tempting to just refer to the DATABASE_CREATE_NAME_TABLE variable in the upgrade section, but remember that this variable should be creating the newest version of the database, and in your upgrade statement, you need to be aiming to move to the version after what is specified in the case statement. So whilst it will work at first, when you change that table, it may mess up.
A potential solution
One potential solution I have thought of that may work is to keep the create table statements the same such as they were in version 1. Then, when you create a fresh database in the onCreate method, you create all the tables as they were in version 1, you call the onUpgrade method with the variables (database, 1, DATABASE_VERSION). It would look something like the following:
package com.example.sampledb;

import android.content.Context;
import android.database.sqlite.SQLiteDatabase;
import android.database.sqlite.SQLiteOpenHelper;

import java.text.SimpleDateFormat;

public class DbHelper extends SQLiteOpenHelper
{
    private static final String DATABASE_NAME = "mysampledb";
    private static final int DATABASE_VERSION = 2;

    private static final String DATABASE_CREATE_SAMPLE_TABLE = "CREATE TABLE tblSample" +
        "(" +
        "   _id integer primary key autoincrement," +
        "   name varchar(32)" +
        ");";

    public static final String DATE_FORMAT = "yyyy-MM-dd HH:mm:ss.SSSS";
    public static final SimpleDateFormat SIMPLE_DATE_FORMAT = new SimpleDateFormat(DATE_FORMAT);

    public DbHelper(Context context)
    {
        super(context, DATABASE_NAME, null, DATABASE_VERSION);
    }

    @Override
    public void onCreate(SQLiteDatabase database)
    {
        database.execSQL(DATABASE_CREATE_SAMPLE_TABLE);
        onUpgrade(database, 1, DATABASE_VERSION);

    }

    @Override
    public void onUpgrade(SQLiteDatabase db, int oldVersion, int newVersion)
    {
        for (int i = oldVersion; i < newVersion; i++)
        {
            switch(i)
            {
                case 1:
                    db.execSQL("ALTER TABLE tblSample ADD address varchar(128)");
                    break;
            }
        }
    }
}
I haven’t tried this, and I don’t think it’s the best way to go. If it does work, it would reduce the potential of a miss match between the same version if it were created fresh or upgraded, since it’s just creating the first version and upgrading it to the newest version.
The main problem with this I think is that it doesn’t force you to think about the structure of your database, and could easily turn you into a lazy programmer (like having a catch clause that doesn’t do anything.) The other problem I can see is that it’s hard to see at a glance the structure of your database in the newest version, since you will need to process all the upgrade statements to see what it really looks like.
It’s your choice. This way should work, and will pretty much eliminate any possibility of a miss match between a fresh and upgraded database, but at the same time you lose the ability to see the structure of your database, and it has the potential to make you lazy.
=======================
=======================
=======================
출처: http://blog.daum.net/_blog/BlogTypeView.do?blogid=0HOSO&articleno=5387549&_bloghome_menu=recenttext
[유용]안드로이드 db생성, 테이블 생성, insert [교재 내용]
package com.android.db1;

import android.app.Activity;
import android.content.ContentValues;
import android.database.sqlite.SQLiteDatabase;
import android.os.Bundle;
import android.util.Log;
import android.view.View;
import android.view.View.OnClickListener;
import android.widget.Button;
import android.widget.EditText;
import android.widget.TextView;

/**
 * Basic database usage
 *
 * @author Mike
 */
public class Db1Activity extends Activity {

    String databaseName;
    String tableName;
    TextView status;
    boolean databaseCreated = false;
    boolean tableCreated = false;

    SQLiteDatabase db;

    public void onCreate(Bundle savedInstanceState) {
        super.onCreate(savedInstanceState);
        setContentView(R.layout.main);

        final EditText databaseNameInput = (EditText) findViewById(R.id.databaseNameInput);
        final EditText tableNameInput = (EditText) findViewById(R.id.tableNameInput);

        Button createDatabaseBtn = (Button) findViewById(R.id.createDatabaseBtn);
        createDatabaseBtn.setOnClickListener(new onClickListener() {
            public void onClick(View v) {
                databaseName = databaseNameInput.getText().toString();
                createDatabase(databaseName);
            }
        });

        Button createTableBtn = (Button) findViewById(R.id.createTableBtn);
        createTableBtn.setOnClickListener(new onClickListener() {
            public void onClick(View v) {
                tableName = tableNameInput.getText().toString();
                createTable(tableName);
                int count = insertRecord();
                println(count + " records inserted.");
            }
        });

        status = (TextView) findViewById(R.id.status);

    }

    private void createDatabase(String name) {
        println("creating database [" + name + "].");

        db = openOrCreateDatabase(
                name,
                MODE_WORLD_WRITEABLE,
                null);

        databaseCreated = true;
    }

    private void createTable(String tableName) {
        println("creating table [" + tableName + "].");

        db.execSQL("create table " + tableName + "("
                + " _id integer PRIMARY KEY autoincrement, "
                + " name text, "
                + " age integer, "
                + " phone text);" );

        tableCreated = true;
    }

    private int insertRecord() {
        println("inserting records.");

        int count = 3;
        db.execSQL( "insert into "+ tableName + "(name, age, phone) values ('John', 20, '010-7788-1234');" );
        db.execSQL( "insert into "+ tableName + "(name, age, phone) values ('Mike', 35, '010-8888-1111');" );
        db.execSQL( "insert into "+ tableName + "(name, age, phone) values ('Sean', 26, '010-6677-4321');" );

        return count;
    }

    /**
     * insert records using parameters
     */
    private int insertRecordParam() {
        println("inserting records using parameters.");

        int count = 1;
        ContentValues recordValues = new ContentValues();

        recordValues.put("name", "Rice");
        recordValues.put("age", 43);
        recordValues.put("phone", "010-3322-9811");
        int rowPosition = (int) db.insert("employee", null, recordValues);

        return count;
    }

    /**
     * update records using parameters
     */
    private int updateRecordParam() {
        println("updating records using parameters.");

        ContentValues recordValues = new ContentValues();
        recordValues.put("age", 43);
        String[] whereArgs = {"Rice"};

        int rowAffected = db.update("employee",
                recordValues,
                "name = ?",
                whereArgs);

        return rowAffected;
    }

    /**
     * delete records using parameters
     */
    private int deleteRecordParam() {
        println("deleting records using parameters.");

        String[] whereArgs = {"Rice"};

        int rowAffected = db.delete("employee",
                "name = ?",
                whereArgs);

        return rowAffected;
    }

    private void println(String msg) {
        Log.d("SampleDatabase", msg);
        status.append("\n" + msg);

    }

}
=======================
=======================
=======================
출처: http://stackoverflow.com/questions/6540906/android-simple-export-and-import-of-sqlite-database
Android: simple export and import of sqlite database
i am trying to implement a simple SQLite export/import for backup purposes. Export is just a matter of storing a copy of the raw current.db file. What I want to do for import is to just delete the old current.db file and rename the imported.db file to current.db. Is this possible? When I try this solution, I get the following error:
06-30 13:33:38.831: ERROR/SQLiteOpenHelper(23570):
    android.database.sqlite.SQLiteDatabaseCorruptException: error code 11: database disk image is malformed
I use this code in the SQLiteOpenHelper in one of my applications to import a database file.
EDIT: I pasted my FileUtils.copyFile() method into the question.
SQLiteOpenHelper
public static String DB_FILEPATH = "/data/data/{package_name}/databases/database.db";

/**
 * Copies the database file at the specified location over the current
 * internal application database.
 * */
public boolean importDatabase(String dbPath) throws IOException {

    // Close the SQLiteOpenHelper so it will commit the created empty
    // database to internal storage.
    close();
    File newDb = new File(dbPath);
    File oldDb = new File(DB_FILEPATH);
    if (newDb.exists()) {
        FileUtils.copyFile(new FileInputStream(newDb), new FileOutputStream(oldDb));
        // Access the copied database so SQLiteHelper will cache it and mark
        // it as created.
        getWritableDatabase().close();
        return true;
    }
    return false;
}
FileUtils
public class FileUtils {
    /**
     * Creates the specified <code>toFile</code> as a byte for byte copy of the
     * <code>fromFile</code>. If <code>toFile</code> already exists, then it
     * will be replaced with a copy of <code>fromFile</code>. The name and path
     * of <code>toFile</code> will be that of <code>toFile</code>.<br/>
     * <br/>
     * <i> Note: <code>fromFile</code> and <code>toFile</code> will be closed by
     * this function.</i>
     *
     * @param fromFile
     *            - FileInputStream for the file to copy from.
     * @param toFile
     *            - FileInputStream for the file to copy to.
     */
    public static void copyFile(FileInputStream fromFile, FileOutputStream toFile) throws IOException {
        FileChannel fromChannel = null;
        FileChannel toChannel = null;
        try {
            fromChannel = fromFile.getChannel();
            toChannel = toFile.getChannel();
            fromChannel.transferTo(0, fromChannel.size(), toChannel);
        } finally {
            try {
                if (fromChannel != null) {
                    fromChannel.close();
                }
            } finally {
                if (toChannel != null) {
                    toChannel.close();
                }
            }
        }
    }
}---------------------------------------------------------------------------------------------------------------------------------------------------------------------------
this worked perfectly thank you so much!
---------------------------------------------------------------------------------------------------------------------------------------------------------------------------
Remember to up-vote answers you like, helps the community know which ones are good and which are junk
---------------------------------------------------------------------------------------------------------------------------------------------------------------------------
The answer above by Austyn worked for me as well. One thing to note that is not noted here, is the use of String path = Environment.getExternalStorageDirectory().toString() + "/{appName}/"; to set the write path on the SD card
---------------------------------------------------------------------------------------------------------------------------------------------------------------------------
That makes sense. This is some good advice. I actually do it inside my own application, but only included a string literal as a placeholder in this demo code
---------------------------------------------------------------------------------------------------------------------------------------------------------------------------
This is a simple method to export the database to a folder named backup folder you can name it as you want and a simple method to import the database from the same folder a
public class ExportImportDB extends Activity {
        @Override
        protected void onCreate(Bundle savedInstanceState) {
            // TODO Auto-generated method stub
            super.onCreate(savedInstanceState);
//creating a new folder for the database to be backuped to
            File direct = new File(Environment.getExternalStorageDirectory() + "/Exam Creator");

               if(!direct.exists())
                {
                    if(direct.mkdir())
                      {
                       //directory is created;
                      }

                }
            exportDB();
            importDB();

        }
    //importing database
        private void importDB() {
            // TODO Auto-generated method stub

            try {
                File sd = Environment.getExternalStorageDirectory();
                File data  = Environment.getDataDirectory();

                if (sd.canWrite()) {
                    String  currentDBPath= "//data//" + "PackageName"
                            + "//databases//" + "DatabaseName";
                    String backupDBPath  = "/BackupFolder/DatabaseName";
                    File  backupDB= new File(data, currentDBPath);
                    File currentDB  = new File(sd, backupDBPath);

                    FileChannel src = new FileInputStream(currentDB).getChannel();
                    FileChannel dst = new FileOutputStream(backupDB).getChannel();
                    dst.transferFrom(src, 0, src.size());
                    src.close();
                    dst.close();
                    Toast.makeText(getBaseContext(), backupDB.toString(),
                            Toast.LENGTH_LONG).show();

                }
            } catch (Exception e) {

                Toast.makeText(getBaseContext(), e.toString(), Toast.LENGTH_LONG)
                        .show();

            }
        }
    //exporting database
        private void exportDB() {
            // TODO Auto-generated method stub

            try {
                File sd = Environment.getExternalStorageDirectory();
                File data = Environment.getDataDirectory();

                if (sd.canWrite()) {
                    String  currentDBPath= "//data//" + "PackageName"
                            + "//databases//" + "DatabaseName";
                    String backupDBPath  = "/BackupFolder/DatabaseName";
                    File currentDB = new File(data, currentDBPath);
                    File backupDB = new File(sd, backupDBPath);

                    FileChannel src = new FileInputStream(currentDB).getChannel();
                    FileChannel dst = new FileOutputStream(backupDB).getChannel();
                    dst.transferFrom(src, 0, src.size());
                    src.close();
                    dst.close();
                    Toast.makeText(getBaseContext(), backupDB.toString(),
                            Toast.LENGTH_LONG).show();

                }
            } catch (Exception e) {

                Toast.makeText(getBaseContext(), e.toString(), Toast.LENGTH_LONG)
                        .show();

            }
        }

    }
Dont forget to add this permission to proceed it
 <uses-permission android:name="android.permission.WRITE_EXTERNAL_STORAGE" >
    </uses-permission>
=======================
=======================
=======================
출처: http://neodreamer-dev.tistory.com/437
Android 에서 SQLite Database 를 사용하려면 SQLiteOpenHelper, SQLiteDatabase 클래스를 상속받아 구현을 해야 히지만 복잡하고 귀찮아서 그냥 Activity 안에 구현해 보았다.
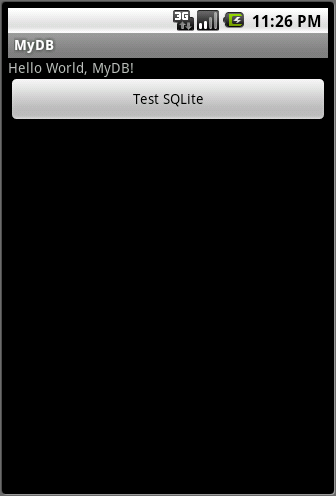

Activity 의 Layout 은 버튼하나와 수행 결과를 보여 줄 TextView 만 배치하였다.
<?xml version="1.0" encoding="utf-8"?>

<LinearLayout xmlns:android="http://schemas.android.com/apk/res/android"

    android:orientation="vertical"

    android:layout_width="fill_parent"

    android:layout_height="fill_parent"

    >

<TextView

    android:layout_width="fill_parent"

    android:layout_height="wrap_content"

    android:text="@string/hello"

    />

<Button

    android:id="@+id/BtnTestSQLite"

    android:layout_height="wrap_content"

    android:layout_width="fill_parent"

    android:text="Test SQLite"

    />

<TextView

    android:id="@+id/TxtResult"

    android:layout_width="fill_parent"

    android:layout_height="fill_parent"

    />

</LinearLayout>
버튼이 눌려지만 Database 를 테스트하는 명령이 수행되고 그 결과를 TextView에 출력 하였다.
@Override

public void onClick(View v)

{

    // 데이터베이스 열기 (생성)

    m_db = openOrCreateDatabase("test.db", Context.MODE_PRIVATE, null);

    if (!m_db.isOpen())

    {

        Log.e("SQLite", "openOrCreateDatabase ... Fail");

        return;

    }

    Log.i("SQLite", "openOrCreateDatabase ... OK");

    String strSQL;

    try

    {

        // member 테이블이 존재하면 삭제

        strSQL = "DROP TABLE IF EXISTS member;";

        m_db.execSQL(strSQL);

        // member 테이블이 존재하지 않으면 생성

        strSQL =

            "CREATE TABLE IF NOT EXISTS member " +

            "(" +

            "     c_name    TEXT" +

            "   , c_alias   TEXT" +

            "   , c_age     INTEGER" +

            ");";

        m_db.execSQL(strSQL);

        Log.i("SQLite", "Create Table ... OK");

        // Insert 구문을 이용한 Row 삽입

        for (int i = 0; i < 3; ++i)

        {

            strSQL =

                "INSERT INTO member ( c_name, c_alias, c_age )" +

                " VALUES (  'code_" + Integer.toString(i) + "'," +

                " 'test', " + Integer.toString(i + 2) +

                " );";

            m_db.execSQL(strSQL);

            Log.i("SQLite", "Insert data " + i + " ... OK");

        }

        // ContentValues 를 이용한 데이터 삽입

        ContentValues cvInsert = new ContentValues();

        cvInsert.put("c_name", "neo");

        cvInsert.put("c_alias", "dreamer");

        cvInsert.put("c_age", "20");

        m_db.insert("member", null, cvInsert);

        cvInsert.put("c_name", "neo2");

        cvInsert.put("c_alias", "dreamer2");

        cvInsert.put("c_age", "40");

        m_db.insert("member", null, cvInsert);

        // rawQuery 함수를 이용한 데이터 질의

        m_cursor = m_db.rawQuery("SELECT * FROM member", null);

        if (m_cursor != null)

        {

            if (m_cursor.moveToFirst())

            {

                String strRow = "--------------------------------\n";

                for (int i = 0; i < m_cursor.getColumnCount(); i++)

                {

                    strRow += m_cursor.getColumnName(i) + " | ";

                }

                strRow += "\n";

                txtResult.setText(strRow);

                do

                {

                    strRow = "";

                    for (int i = 0; i < m_cursor.getColumnCount(); i++)

                    {

                        strRow += m_cursor.getString(i) + " | ";

                    }

                    strRow += "\n";

                    txtResult.setText(txtResult.getText() + strRow);

                } while (m_cursor.moveToNext());

            }

        }

        m_cursor.close(); // 커서 닫기

        // rawQuery 함수에 parameter 를 이용한 데이터 질의

        String strParam[] = {
            "neo"
        };

        m_cursor = m_db.rawQuery("SELECT * FROM member WHERE c_name = ?", strParam);

        if (m_cursor != null)

        {

            if (m_cursor.moveToFirst())

            {

                String strRow = "--------------------------------\n";

                for (int i = 0; i < m_cursor.getColumnCount(); i++)

                {

                    strRow += m_cursor.getColumnName(i) + " | ";

                }

                strRow += "\n";

                txtResult.setText(txtResult.getText() + strRow);

                do

                {

                    strRow = "";

                    for (int i = 0; i < m_cursor.getColumnCount(); i++)

                    {

                        strRow += m_cursor.getString(i) + " | ";

                    }

                    strRow += "\n";

                    txtResult.setText(txtResult.getText() + strRow);

                } while (m_cursor.moveToNext());

            }

        }

        m_cursor.close(); // 커서 닫기

        // query 함수를 이용할 데이터 질의

        String strColumn[] = {
            "c_name",
            "c_age"
        };

        String strSelection = "c_name like 'neo%'";

        m_cursor = m_db.query("member", strColumn, strSelection,

            null, null, null, null);

        if (m_cursor != null)

        {

            if (m_cursor.moveToFirst())

            {

                String strRow = "--------------------------------\n";

                for (int i = 0; i < m_cursor.getColumnCount(); i++)

                {

                    strRow += m_cursor.getColumnName(i) + " | ";

                }

                strRow += "\n";

                txtResult.setText(txtResult.getText() + strRow);

                do

                {

                    strRow = "";

                    for (int i = 0; i < m_cursor.getColumnCount(); i++)

                    {

                        strRow += m_cursor.getString(i) + " | ";

                    }

                    strRow += "\n";

                    txtResult.setText(txtResult.getText() + strRow);

                } while (m_cursor.moveToNext());

            }

        }

        m_cursor.close(); // 커서 닫기

    } catch (SQLException e)

    {

        // SQL 예외 처리

        Log.e("SQLException", e.getMessage());

    } finally

    {

        // Database 닫기

        m_db.close();

        Log.i("SQLite", "Database Close ... OK");

    }

}
Log를 통해 진행 상황을 모니터링 한 내용이다.
05-12 23:26:20.110: INFO/SQLite(213): openOrCreateDatabase ... OK

05-12 23:26:20.190: INFO/SQLite(213): Create Table ... OK

05-12 23:26:20.200: INFO/SQLite(213): Insert data 0 ... OK

05-12 23:26:20.210: INFO/SQLite(213): Insert data 1 ... OK

05-12 23:26:20.240: INFO/SQLite(213): Insert data 2 ... OK

05-12 23:26:20.400: INFO/SQLite(213): Database Close ... OK
=======================
=======================
=======================
출처: http://berabue.tistory.com/53
앞서 데이터베이스의 간단한 사용방법과 데이터의 추가, 업그레이드 방법을 알아보았다.
이번에는 데이터 삭제 및 갱신하는 방법에 대하여 알아본다.
기존에 테스트하던 앱을 제거 후 새로운코드로 재설치 하였다.
DB_Test.java
package pe.berabue.dbtest;

import android.app.Activity;

import android.os.Bundle;

import android.view.View;

import android.widget.Button;

public class DB_Test extends Activity {

    private DBManager mDBManager;

    /** Called when the activity is first created. */

    @Override

    public void onCreate(Bundle savedInstanceState) {

        super.onCreate(savedInstanceState);

        setContentView(R.layout.main);

        findViewById(R.id.btn_insert).setOnClickListener(mClickListener);

        findViewById(R.id.btn_delete).setOnClickListener(mClickListener);

        findViewById(R.id.btn_update).setOnClickListener(mClickListener);

        findViewById(R.id.btn_select).setOnClickListener(mClickListener);

        mDBManager = new DBManager(this);

        mDBManager.getReadableDatabase();

        //  mDBManager.getWritableDatabase();

        mDBManager.close();

    }

    Button.OnClickListener mClickListener = new View.OnClickListener() {

        public void onClick(View v) {

            switch (v.getId()) {

                case R.id.btn_insert:
                    mDBManager.insert(mDBManager);
                    break;

                case R.id.btn_delete:
                    mDBManager.delete(mDBManager);
                    break;

                case R.id.btn_update:
                    mDBManager.update(mDBManager);
                    break;

                case R.id.btn_select:
                    mDBManager.select(mDBManager);
                    break;

            }

        }

    };

}
액티비티에 4개의 버튼을 구현해 놓고 각기 다른 기능을 넣어두었다.
4번째 버튼인 select버튼은 미구현.
DBManager.java
package pe.berabue.dbtest;

import android.content.Context;

import android.database.sqlite.SQLiteDatabase;

import android.database.sqlite.SQLiteOpenHelper;

import android.util.Log;

public class DBManager extends SQLiteOpenHelper {

    public static final String DB_NAME = "dbtest.db";

    public static final int DB_VERSION = 1;

    private SQLiteDatabase mDB;

    private String str;

    private int temp;

    public DBManager(Context context) {

        super(context, DB_NAME, null, DB_VERSION);

        str = "str_";

        temp = 0;

    }

    @Override

    public void onCreate(SQLiteDatabase db) {

        db.execSQL("CREATE TABLE Android( _id INTEGER PRIMARY KEY AUTOINCREMENT," + "name TEXT, price INTEGER);");

        db.execSQL("INSERT INTO Android VALUES (null, 'Cupcake'         , 500       );");

        db.execSQL("INSERT INTO Android VALUES (null, 'Donut'           , 1000      );");

        db.execSQL("INSERT INTO Android VALUES (null, 'Eclair'          , 1500      );");

        db.execSQL("INSERT INTO Android VALUES (null, 'Froyo'           , 10000     );");

        db.execSQL("INSERT INTO Android VALUES (null, 'Ginger bread'    , 100000    );");

        db.execSQL("INSERT INTO Android VALUES (null, 'Honeycomb'       , 999999    );");

    }

    @Override

    public void onUpgrade(SQLiteDatabase db, int oldVersion, int newVersion) {

        db.execSQL("INSERT INTO Android VALUES (null, 'Icecream Sandwich'   , 1 );");

        db.execSQL("INSERT INTO Android VALUES (null, 'Jellybean'           , 2 );");

    }

    @Override

    public void onOpen(SQLiteDatabase db) {

        super.onOpen(db);

        mDB = db;

    }

    public void insert(DBManager mDBManager) {

        mDBManager.getWritableDatabase();

        mDB.execSQL("INSERT INTO Android VALUES (null, '" + str + "', " + temp + " );");

        mDBManager.close();

        str += temp;

        temp++;

        Log.v(null, "Insert DB : " + temp);

    }

    public void delete(DBManager mDBManager) {

        mDBManager.getWritableDatabase();

        mDB.execSQL("DELETE FROM Android WHERE price = " + (temp - 1) + ";");

        mDBManager.close();

        temp--;

        Log.v(null, "Delete DB : " + temp);

    }

    public void update(DBManager mDBManager) {

        mDBManager.getWritableDatabase();

        mDB.execSQL("UPDATE Android SET price = " + (temp + 10) + " WHERE price = " + (temp - 1) + ";");

        mDBManager.close();

        Log.v(null, "Update DB : " + temp);

    }

    public void select(DBManager mDBManager) {

    }

}
open();
DB를 열때 mDB에 객체를 저장시켜 놓는다.
insert();
DB를 읽기/쓰기 용으로 열고 name과 price를 입력시켜 테이블에 추가한다.
delete();
DB를 읽기/쓰기 용으로 열고 Android 테이블에 price가 temp-1인 데이터를 찾아 삭제시킨다.
update();
DB를 읽기/쓰기 용으로 열고 Android 테이블에 price가 temp-1인 데이터를 찾아 price를 temp+10값으로 변경시킨다.
main.xml
<!--?xml version="1.0" encoding="utf-8"?-->

<linearlayout xmlns:android="http://schemas.android.com/apk/res/android" android:orientation="vertical"android:layout_width="fill_parent" android:layout_height="fill_parent">

<button android:id="@+id/btn_insert" android:layout_width="fill_parent" android:layout_height="wrap_content"android:text="Insert">

</button><button android:id="@+id/btn_delete" android:layout_width="fill_parent"android:layout_height="wrap_content" android:text="Delete">

</button><button android:id="@+id/btn_update" android:layout_width="fill_parent"android:layout_height="wrap_content" android:text="Update">

</button><button android:id="@+id/btn_select" android:layout_width="fill_parent"android:layout_height="wrap_content" android:text="Select">

<textview android:id="@+id/tv_text" android:layout_width="fill_parent" android:layout_height="wrap_content"android:text="@string/hello">

</textview></button></linearlayout>
=======================
=======================
=======================
출처: http://www.vogella.com/tutorials/AndroidSQLite/article.html
Android SQLite database and content provider - Tutorial
Based on Android 4.3
Lars Vogel
Version 4.9
Copyright © 2010, 2011, 2012, 2013 Lars Vogel
19.08.2013
Revision History
| Revision 0.1 | 22.12.2010 | Lars Vogel |
Created |
| Revision 0.2 - 4.9 | 31.12.2010 - 19.08.2013 | Lars Vogel |
bug fixes and enhancements |
Using the Android SQLite Database
This tutorial describes how to use the SQLite database in Android applications. It also demonstrates how to use existing ContentProvider and how to define new ones. It also demonstrates the usage of the Loader framework which allows to load data asynchronously.
The tutorial is based on Eclipse 4.2, Java 1.6 and Android 4.2.
1. SQLite and Android
1.1. What is SQLite?
SQLite is an Open Source database. SQLite supports standard relational database features like SQL syntax, transactions and prepared statements. The database requires limited memory at runtime (approx. 250 KByte) which makes it a good candidate from being embedded into other runtimes.
SQLite supports the data types TEXT (similar to String in Java), INTEGER (similar to long in Java) and REAL (similar to double in Java). All other types must be converted into one of these fields before getting saved in the database. SQLite itself does not validate if the types written to the columns are actually of the defined type, e.g. you can write an integer into a string column and vice versa.
More information about SQLite can be found on the SQLite website: http://www.sqlite.org.
1.2. SQLite in Android
SQLite is embedded into every Android device. Using an SQLite database in Android does not require a setup procedure or administration of the database.
You only have to define the SQL statements for creating and updating the database. Afterwards the database is automatically managed for you by the Android platform.
Access to an SQLite database involves accessing the file system. This can be slow. Therefore it is recommended to perform database operations asynchronously.
If your application creates a database, this database is by default saved in the directory DATA/data/APP_NAME/databases/FILENAME.
The parts of the above directory are constructed based on the following rules. DATA is the path which theEnvironment.getDataDirectory() method returns. APP_NAME is your application name. FILENAME is the name you specify in your application code for the database.
2. Prerequisites for this tutorial
The following assumes that you have already basic knowledge in Android development. Please check the Android development tutorial to learn the basics.
3. SQLite architecture
3.1. Packages
The android.database package contains all necessary classes for working with databases. The android.database.sqlite package contains the SQLite specific classes.
3.2. Creating and updating database with SQLiteOpenHelper
To create and upgrade a database in your Android application you create a subclass of the SQLiteOpenHelper class. In the constructor of your subclass you call the super() method of SQLiteOpenHelper, specifying the database name and the current database version.
In this class you need to override the following methods to create and update your database.
- onCreate() - is called by the framework, if the database is accessed but not yet created.
- onUpgrade() - called, if the database version is increased in your application code. This method allows you to update an existing database schema or to drop the existing database and recreate it via the onCreate() method.
Both methods receive an SQLiteDatabase object as parameter which is the Java representation of the database.
The SQLiteOpenHelper class provides the getReadableDatabase() and getWriteableDatabase() methods to get access to anSQLiteDatabase object; either in read or write mode.
The database tables should use the identifier _id for the primary key of the table. Several Android functions rely on this standard.
Tip
It is good practice to create a separate class per table. This class defines static onCreate() andonUpgrade() methods. These methods are called in the corresponding methods of SQLiteOpenHelper. This way your implementation of SQLiteOpenHelper stays readable, even if you have several tables.
3.3. SQLiteDatabase
SQLiteDatabase is the base class for working with a SQLite database in Android and provides methods to open, query, update and close the database.
More specifically SQLiteDatabase provides the insert(), update() and delete() methods.
In addition it provides the execSQL() method, which allows to execute an SQL statement directly.
The object ContentValues allows to define key/values. The key represents the table column identifier and the value represents the content for the table record in this column. ContentValues can be used for inserts and updates of database entries.
Queries can be created via the rawQuery() and query() methods or via the SQLiteQueryBuilder class .
rawQuery() directly accepts an SQL select statement as input.
query() provides a structured interface for specifying the SQL query.
SQLiteQueryBuilder is a convenience class that helps to build SQL queries.
3.4. rawQuery() Example
The following gives an example of a rawQuery() call.
Cursor cursor = getReadableDatabase(). rawQuery("select * from todo where _id = ?", new String[] { id });
3.5. query() Example
The following gives an example of a query() call.
return database.query(DATABASE_TABLE, new String[] { KEY_ROWID, KEY_CATEGORY, KEY_SUMMARY, KEY_DESCRIPTION }, null, null, null, null, null);
The method query() has the following parameters.
Table 1. Parameters of the query() method
ParameterComment
| String dbName | The table name to compile the query against. |
| String[] columnNames | A list of which table columns to return. Passing "null" will return all columns. |
| String whereClause | Where-clause, i.e. filter for the selection of data, null will select all data. |
| String[] selectionArgs | You may include ?s in the "whereClause"". These placeholders will get replaced by the values from the selectionArgs array. |
| String[] groupBy | A filter declaring how to group rows, null will cause the rows to not be grouped. |
| String[] having | Filter for the groups, null means no filter. |
| String[] orderBy | Table columns which will be used to order the data, null means no ordering. |
If a condition is not required you can pass null, e.g. for the group by clause.
The "whereClause" is specified without the word "where", for example a "where" statement might look like: "_id=19 and summary=?".
If you specify placeholder values in the where clause via ?, you pass them as the selectionArgs parameter to the query.
3.6. Cursor
A query returns a Cursor object. A Cursor represents the result of a query and basically points to one row of the query result. This way Android can buffer the query results efficiently; as it does not have to load all data into memory.
To get the number of elements of the resulting query use the getCount() method.
To move between individual data rows, you can use the moveToFirst() and moveToNext() methods. The isAfterLast() method allows to check if the end of the query result has been reached.
Cursor provides typed get*() methods, e.g. getLong(columnIndex), getString(columnIndex) to access the column data for the current position of the result. The "columnIndex" is the number of the column you are accessing.
Cursor also provides the getColumnIndexOrThrow(String) method which allows to get the column index for a column name of the table.
A Cursor needs to be closed with the close() method call.
3.7. ListViews, ListActivities and SimpleCursorAdapter
ListViews are Views which allow to display a list of elements.
ListActivities are specialized activities which make the usage of ListViews easier.
To work with databases and ListViews you can use the SimpleCursorAdapter. The SimpleCursorAdapter allows to set a layout for each row of the ListViews.
You also define an array which contains the column names and another array which contains the IDs of Views which should be filled with the data.
The SimpleCursorAdapter class will map the columns to the Views based on the Cursor passed to it.
To obtain the Cursor you should use the Loader class.
4. Tutorial: Using SQLite
4.1. Introduction to the project
The following demonstrates how to work with an SQLite database. We will use a data access object (DAO) to manage the data for us. The DAO is responsible for handling the database connection and for accessing and modifying the data. It will also convert the database objects into real Java Objects, so that our user interface code does not have to deal with the persistence layer.
The resulting application will look like the following.

Using a DAO is not always the right approach. A DAO creates Java model objects; using a database directly or via aContentProvider is typically more resource efficient as you can avoid the creation of model objects.
I still demonstrate the usage of the DAO in this example to have a relatively simple example to begin with. Use the latest version of Android 4.0. This is currently API Level 15. Otherwise I would have to introduce the Loader class, which should be used as of Android 3.0 for managing a database Cursor. And this class introduces additional complexity.
4.2. Create Project
Create the new Android project with the name de.vogella.android.sqlite.first and an activity called TestDatabaseActivity.
4.3. Database and Data Model
Create the MySQLiteHelper class. This class is responsible for creating the database. The onUpgrade() method will simply delete all existing data and re-create the table. It also defines several constants for the table name and the table columns.
package de.vogella.android.sqlite.first;

import android.content.Context;
import android.database.sqlite.SQLiteDatabase;
import android.database.sqlite.SQLiteOpenHelper;
import android.util.Log;

public class MySQLiteHelper extends SQLiteOpenHelper {

  public static final String TABLE_COMMENTS = "comments";
  public static final String COLUMN_ID = "_id";
  public static final String COLUMN_COMMENT = "comment";

  private static final String DATABASE_NAME = "commments.db";
  private static final int DATABASE_VERSION = 1;

  // Database creation sql statement
  private static final String DATABASE_CREATE = "create table "
      + TABLE_COMMENTS + "(" + COLUMN_ID
      + " integer primary key autoincrement, " + COLUMN_COMMENT
      + " text not null);";

  public MySQLiteHelper(Context context) {
    super(context, DATABASE_NAME, null, DATABASE_VERSION);
  }

  @Override
  public void onCreate(SQLiteDatabase database) {
    database.execSQL(DATABASE_CREATE);
  }

  @Override
  public void onUpgrade(SQLiteDatabase db, int oldVersion, int newVersion) {
    Log.w(MySQLiteHelper.class.getName(),
        "Upgrading database from version " + oldVersion + " to "
            + newVersion + ", which will destroy all old data");
    db.execSQL("DROP TABLE IF EXISTS " + TABLE_COMMENTS);
    onCreate(db);
  }

}
Create the Comment class. This class is our model and contains the data we will save in the database and show in the user interface.
package de.vogella.android.sqlite.first;

public class Comment {
  private long id;
  private String comment;

  public long getId() {
    return id;
  }

  public void setId(long id) {
    this.id = id;
  }

  public String getComment() {
    return comment;
  }

  public void setComment(String comment) {
    this.comment = comment;
  }

  // Will be used by the ArrayAdapter in the ListView
  @Override
  public String toString() {
    return comment;
  }
}
Create the CommentsDataSource class. This class is our DAO. It maintains the database connection and supports adding new comments and fetching all comments.
package de.vogella.android.sqlite.first;

import java.util.ArrayList;
import java.util.List;

import android.content.ContentValues;
import android.content.Context;
import android.database.Cursor;
import android.database.SQLException;
import android.database.sqlite.SQLiteDatabase;

public class CommentsDataSource {

  // Database fields
  private SQLiteDatabase database;
  private MySQLiteHelper dbHelper;
  private String[] allColumns = { MySQLiteHelper.COLUMN_ID,
      MySQLiteHelper.COLUMN_COMMENT };

  public CommentsDataSource(Context context) {
    dbHelper = new MySQLiteHelper(context);
  }

  public void open() throws SQLException {
    database = dbHelper.getWritableDatabase();
  }

  public void close() {
    dbHelper.close();
  }

  public Comment createComment(String comment) {
    ContentValues values = new ContentValues();
    values.put(MySQLiteHelper.COLUMN_COMMENT, comment);
    long insertId = database.insert(MySQLiteHelper.TABLE_COMMENTS, null,
        values);
    Cursor cursor = database.query(MySQLiteHelper.TABLE_COMMENTS,
        allColumns, MySQLiteHelper.COLUMN_ID + " = " + insertId, null,
        null, null, null);
    cursor.moveToFirst();
    Comment newComment = cursorToComment(cursor);
    cursor.close();
    return newComment;
  }

  public void deleteComment(Comment comment) {
    long id = comment.getId();
    System.out.println("Comment deleted with id: " + id);
    database.delete(MySQLiteHelper.TABLE_COMMENTS, MySQLiteHelper.COLUMN_ID
        + " = " + id, null);
  }

  public List<Comment> getAllComments() {
    List<Comment> comments = new ArrayList<Comment>();

    Cursor cursor = database.query(MySQLiteHelper.TABLE_COMMENTS,
        allColumns, null, null, null, null, null);

    cursor.moveToFirst();
    while (!cursor.isAfterLast()) {
      Comment comment = cursorToComment(cursor);
      comments.add(comment);
      cursor.moveToNext();
    }
    // make sure to close the cursor
    cursor.close();
    return comments;
  }

  private Comment cursorToComment(Cursor cursor) {
    Comment comment = new Comment();
    comment.setId(cursor.getLong(0));
    comment.setComment(cursor.getString(1));
    return comment;
  }
}
4.4. User Interface
Change your main.xml layout file in the res/layout folder to the following. This layout has two buttons for adding and deleting comments and a ListView which will be used to display the existing comments. The comment text will be generated later in theactivity by a small random generator.
<?xml version="1.0" encoding="utf-8"?>
<LinearLayout xmlns:android="http://schemas.android.com/apk/res/android"
    android:layout_width="match_parent"
    android:layout_height="match_parent"
    android:orientation="vertical" >

    <LinearLayout
        android:id="@+id/group"
        android:layout_width="wrap_content"
        android:layout_height="wrap_content" >

        <Button
            android:id="@+id/add"
            android:layout_width="wrap_content"
            android:layout_height="wrap_content"
            android:text="Add New"
            android:onClick="onClick"/>

        <Button
            android:id="@+id/delete"
            android:layout_width="wrap_content"
            android:layout_height="wrap_content"
            android:text="Delete First"
            android:onClick="onClick"/>

    </LinearLayout>

    <ListView
        android:id="@android:id/list"
        android:layout_width="match_parent"
        android:layout_height="wrap_content"
        android:text="@string/hello" />

</LinearLayout>
Change your TestDatabaseActivity class. to the following. We use here a ListActivity for displaying the data.
package de.vogella.android.sqlite.first;

import java.util.List;
import java.util.Random;

import android.app.ListActivity;
import android.os.Bundle;
import android.view.View;
import android.widget.ArrayAdapter;

public class TestDatabaseActivity extends ListActivity {
  private CommentsDataSource datasource;

  @Override
  public void onCreate(Bundle savedInstanceState) {
    super.onCreate(savedInstanceState);
    setContentView(R.layout.main);

    datasource = new CommentsDataSource(this);
    datasource.open();

    List<Comment> values = datasource.getAllComments();

    // use the SimpleCursorAdapter to show the
    // elements in a ListView
    ArrayAdapter<Comment> adapter = new ArrayAdapter<Comment>(this,
        android.R.layout.simple_list_item_1, values);
    setListAdapter(adapter);
  }

  // Will be called via the onClick attribute
  // of the buttons in main.xml
  public void onClick(View view) {
    @SuppressWarnings("unchecked")
    ArrayAdapter<Comment> adapter = (ArrayAdapter<Comment>) getListAdapter();
    Comment comment = null;
    switch (view.getId()) {
    case R.id.add:
      String[] comments = new String[] { "Cool", "Very nice", "Hate it" };
      int nextInt = new Random().nextInt(3);
      // save the new comment to the database
      comment = datasource.createComment(comments[nextInt]);
      adapter.add(comment);
      break;
    case R.id.delete:
      if (getListAdapter().getCount() > 0) {
        comment = (Comment) getListAdapter().getItem(0);
        datasource.deleteComment(comment);
        adapter.remove(comment);
      }
      break;
    }
    adapter.notifyDataSetChanged();
  }

  @Override
  protected void onResume() {
    datasource.open();
    super.onResume();
  }

  @Override
  protected void onPause() {
    datasource.close();
    super.onPause();
  }

}
4.5. Running the apps
Install your application and use the Add and Delete button. Restart your application to validate that the data is still there.
5. Content provider and sharing data
5.1. What is a content provider?
A SQLite database is private to the application which creates it. If you want to share data with other applications you can use acontent provider.
A content provider allows applications to access data. In most cases this data is stored in an SQlite database.
While a content provider can be used within an application to access data, its is typically used to share data with other application. As application data is by default private, a content provider is a convenient to share you data with other application based on a structured interface.
A content provider must be declared in the AndroidManifest.xml file.
5.2. Accessing a content provider
The access to a content provider is done via an URI. The basis for the URI is defined in the declaration of the ContentProvider in the AndroidManifest.xml file via the android:authorities attribute.
Tip
As it is required to know the URIs of an content providers to access it, it is good practice to provide public constants for the URIs to document them to other developers.
Many Android datasources, e.g. the contacts, are accessible via content providers.
5.3. Own ContentProvider
To create your own ContentProvider you have to define a class which extends android.content.ContentProvider. You also declare your ContentProvider in the AndroidManifest.xml file. This entry must specify the android:authorities attribute which allows to identify the ContentProvider. This authority is the basis for the URI to access data and must be unique.
<provider android:authorities="de.vogella.android.todos.contentprovider" android:name=".contentprovider.MyTodoContentProvider" > </provider>
Your ContentProvider must implement several methods, e.g. query(), insert(), update(), delete(), getType() and onCreate(). In case you do not support certain methods its good practice to throw an UnsupportedOperationException().
The query() method must return a Cursor object.
5.4. Security and ContentProvider
Until Android version 4.2 a content provider is by default available to other Android applications. As of Android 4.2 a content provider must be explicitly exported.
To set the visibility of your content provider use the android:exported=false|true parameter in the declaration of your content provider in the AndroidManifest.xml file.
Tip
It is good practice to always set the android:exported parameter to ensure correct behavior across Android versions.
5.5. Thread Safety
If you work directly with databases and have multiple writers from different threads you may run into concurrency issues.
The ContentProvider can be accessed from several programs at the same time, therefore you must implement the access thread-safe. The easiest way is to use the keyword synchronized in front of all methods of the ContentProvider, so that only one thread can access these methods at the same time.
If you do not require that Android synchronizes data access to the ContentProvider, set the android:multiprocess=true attribute in your <provider> definition in the AndroidManifest.xml file. This permits an instance of the provider to be created in each client process, eliminating the need to perform interprocess communication (IPC).
6. Tutorial: Using ContentProvider
6.1. Overview
The following example will use an existing ContentProvider from the People application.
6.2. Create contacts on your emulator
For this example we need a few maintained contacts. Select the home menu and then the People entry to create contacts.

The app will ask you if you want to login. Either login or select "Not now". Press ""Create a new contact". You can create local contacts.
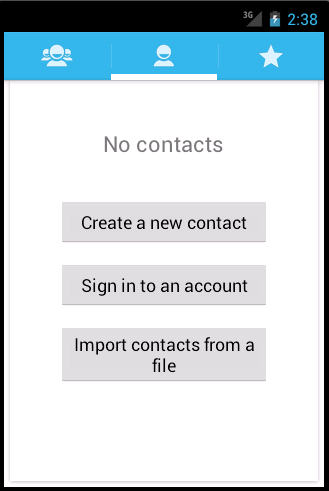

Finish adding your first contact. Afterwards the app allows you to add more contacts via the + button. As a result you should have a few new contacts in your application.
6.3. Using the Contact Content Provider
Create a new Android project called de.vogella.android.contentprovider with the activity called ContactsActivity.
Change the corresponding layout file in the res/layout folder. Rename the ID of the existing TextView to contactview. Delete the default text.
The resulting layout file should look like the following.
<?xml version="1.0" encoding="utf-8"?>
<LinearLayout xmlns:android="http://schemas.android.com/apk/res/android"
    android:layout_width="match_parent"
    android:layout_height="match_parent"
    android:orientation="vertical" >

    <TextView
        android:id="@+id/contactview"
        android:layout_width="match_parent"
        android:layout_height="match_parent" />

</LinearLayout>
Access to the contact ContentProvider requires a certain permission, as not all applications should have access to the contact information. Open the AndroidManifest.xml file, and select the Permissions tab. On that tab click the Add button, and select theUses Permission. From the drop-down list select the android.permission.READ_CONTACTS entry.
Change the coding of the activity.
package de.vogella.android.contentprovider;

import android.app.Activity;
import android.database.Cursor;
import android.net.Uri;
import android.os.Bundle;
import android.provider.ContactsContract;
import android.widget.TextView;

public class ContactsActivity extends Activity {

/** Called when the activity is first created. */

  @Override
  public void onCreate(Bundle savedInstanceState) {
    super.onCreate(savedInstanceState);
    setContentView(R.layout.activity_contacts);
    TextView contactView = (TextView) findViewById(R.id.contactview);

    Cursor cursor = getContacts();

    while (cursor.moveToNext()) {

      String displayName = cursor.getString(cursor
          .getColumnIndex(ContactsContract.Data.DISPLAY_NAME));
      contactView.append("Name: ");
      contactView.append(displayName);
      contactView.append("\n");
    }
  }

  private Cursor getContacts() {
    // Run query
    Uri uri = ContactsContract.Contacts.CONTENT_URI;
    String[] projection = new String[] { ContactsContract.Contacts._ID,
        ContactsContract.Contacts.DISPLAY_NAME };
    String selection = ContactsContract.Contacts.IN_VISIBLE_GROUP + " = '"
        + ("1") + "'";
    String[] selectionArgs = null;
    String sortOrder = ContactsContract.Contacts.DISPLAY_NAME
        + " COLLATE LOCALIZED ASC";


    return managedQuery(uri, projection, selection, selectionArgs,
        sortOrder);
  }

}
If you run this application the data is read from the ContentProvider of the People application and displayed in a TextView. Typically you would display such data in a ListView.
7. Loader
7.1. Purpose of the Loader class
The Loader class allow you to load data asynchronously in an activity or fragment. They can monitor the source of the data and deliver new results when the content changes. They also persist data between configuration changes.
If the result is retrieved by the Loader after the object has been disconnected from its parent (activity or fragment), it can cache the data.
Loaders have been introduced in Android 3.0 and are part of the compatibility layer for Android versions as of 1.6.
7.2. Implementing a Loader
You can use the abstract AsyncTaskLoader class as the basis for your own Loader implementations.
The LoaderManager of an activity or fragment manages one or more Loader instances. The creation of a Loader is done via the following method call.
# start a new loader or re-connect to existing one getLoaderManager().initLoader(0, null, this);
The first parameter is a unique ID which can be used by the callback class to identify that Loader later. The second parameter is a bundle which can be given to the callback class for more information.
The third parameter of initLoader() is the class which is called once the initialization has been started (callback class). This class must implement the LoaderManager.LoaderCallbacks interface. It is good practice that an activity or the fragment which uses aLoader implements the LoaderManager.LoaderCallbacks interface.
The Loader is not directly created by the getLoaderManager().initLoader() method call, but must be created by the callback class in the onCreateLoader() method.
Once the Loader has finished reading data asynchronously, the onLoadFinished() method of the callback class is called. Here you can update your user interface.
7.3. SQLite database and CursorLoader
Android provides a Loader default implementation to handle SQlite database connections, the CursorLoader class.
For a ContentProvider based on an SQLite database you would typically use the CursorLoader class. This Loader performs the database query in a background thread so that the application is not blocked.
The CursorLoader class is the replacement for Activity-managed cursors which are deprecated now.
If the Cursor becomes invalid, the onLoaderReset() method is called on the callback class.
8. Cursors and Loaders
One of the challenges with accessing databases is that this access is slow. The other challenge is that the application needs to consider the life cycle of the components correctly, e.g. opening and closing the cursor if a configuration change happens.
To manage the life cycle you could use the managedQuery() method in activities prior to Android 3.0.
As of Android 3.0 this method is deprecated and you should use the Loader framework to access the ContentProvider.
The SimpleCursorAdapter class, which can be used with ListViews, has the swapCursor() method. Your Loader can use this method to update the Cursor in its onLoadFinished() method.
The CursorLoader class reconnect the Cursor after a configuration change.
9. Tutorial: SQLite, custom ContentProvider and Loader
9.1. Overview
The following demo is also available in the Android Market. To allow more users to play with the app, it has been downported to Android 2.3. If you have a barcode scanner installed on your Android phone, you can scan the following QR Code to go to the example app in the Android market. Please note that the app looks and behaves differently due to the different Android versions, e.g. you have an OptionMenu instead of the ActionBar and the theme is different.

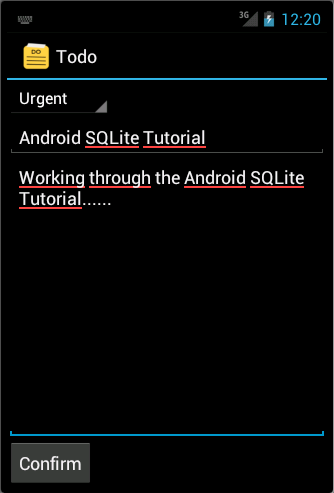
We will create a "To-do" application which allows the user to enter tasks for himself. These items will be stored in the SQLite database and accessed via a ContentProvider.
The tasks are called "todo items" or "todos" in this tutorial.
The application consists out of two activities, one for seeing a list of all todo items and one for creating and changing a specific todo item. Both activities will communicate via Intents.
To asynchronously load and manage the Cursor the main activity will use a Loader.
The resulting application will look similar to the following.

9.2. Project
Create the project de.vogella.android.todos with the activity called TodosOverviewActivity. Create another activity calledTodoDetailActivity.
9.3. Database classes
Create the package de.vogella.android.todos.database. This package will store the classes for the database handling.
As said earlier I consider having one separate class per table as best practice. Even though we have only one table in this example we will follow this practice. This way we are prepared in case our database schema grows.
Create the following class. This class also contains constants for the table name and the columns.
package de.vogella.android.todos.database;

import android.database.sqlite.SQLiteDatabase;
import android.util.Log;

public class TodoTable {

  // Database table
  public static final String TABLE_TODO = "todo";
  public static final String COLUMN_ID = "_id";
  public static final String COLUMN_CATEGORY = "category";
  public static final String COLUMN_SUMMARY = "summary";
  public static final String COLUMN_DESCRIPTION = "description";

  // Database creation SQL statement
  private static final String DATABASE_CREATE = "create table "
      + TABLE_TODO
      + "("
      + COLUMN_ID + " integer primary key autoincrement, "
      + COLUMN_CATEGORY + " text not null, "
      + COLUMN_SUMMARY + " text not null,"
      + COLUMN_DESCRIPTION
      + " text not null"
      + ");";

  public static void onCreate(SQLiteDatabase database) {
    database.execSQL(DATABASE_CREATE);
  }

  public static void onUpgrade(SQLiteDatabase database, int oldVersion,
      int newVersion) {
    Log.w(TodoTable.class.getName(), "Upgrading database from version "
        + oldVersion + " to " + newVersion
        + ", which will destroy all old data");
    database.execSQL("DROP TABLE IF EXISTS " + TABLE_TODO);
    onCreate(database);
  }
}
Create the following TodoDatabaseHelper class. This class extends SQLiteOpenHelper and calls the static methods of the TodoTablehelper class.
package de.vogella.android.todos.database;

import android.content.Context;
import android.database.sqlite.SQLiteDatabase;
import android.database.sqlite.SQLiteOpenHelper;

public class TodoDatabaseHelper extends SQLiteOpenHelper {

  private static final String DATABASE_NAME = "todotable.db";
  private static final int DATABASE_VERSION = 1;

  public TodoDatabaseHelper(Context context) {
    super(context, DATABASE_NAME, null, DATABASE_VERSION);
  }

  // Method is called during creation of the database
  @Override
  public void onCreate(SQLiteDatabase database) {
    TodoTable.onCreate(database);
  }

  // Method is called during an upgrade of the database,
  // e.g. if you increase the database version
  @Override
  public void onUpgrade(SQLiteDatabase database, int oldVersion,
      int newVersion) {
    TodoTable.onUpgrade(database, oldVersion, newVersion);
  }
}
We will use a ContentProvider for accessing the database; we will not write a data access object (DAO) as we did in the previous SQlite example.
9.4. Create ContentProvider
Create the package de.vogella.android.todos.contentprovider.
Create the following MyTodoContentProvider class which extends ContentProvider.
package de.vogella.android.todos.contentprovider;

import java.util.Arrays;
import java.util.HashSet;

import android.content.ContentProvider;
import android.content.ContentResolver;
import android.content.ContentValues;
import android.content.UriMatcher;
import android.database.Cursor;
import android.database.sqlite.SQLiteDatabase;
import android.database.sqlite.SQLiteQueryBuilder;
import android.net.Uri;
import android.text.TextUtils;
import de.vogella.android.todos.database.TodoDatabaseHelper;
import de.vogella.android.todos.database.TodoTable;

public class MyTodoContentProvider extends ContentProvider {

  // database
  private TodoDatabaseHelper database;

  // used for the UriMacher
  private static final int TODOS = 10;
  private static final int TODO_ID = 20;

  private static final String AUTHORITY = "de.vogella.android.todos.contentprovider";

  private static final String BASE_PATH = "todos";
  public static final Uri CONTENT_URI = Uri.parse("content://" + AUTHORITY
      + "/" + BASE_PATH);

  public static final String CONTENT_TYPE = ContentResolver.CURSOR_DIR_BASE_TYPE
      + "/todos";
  public static final String CONTENT_ITEM_TYPE = ContentResolver.CURSOR_ITEM_BASE_TYPE
      + "/todo";

  private static final UriMatcher sURIMatcher = new UriMatcher(UriMatcher.NO_MATCH);
  static {
    sURIMatcher.addURI(AUTHORITY, BASE_PATH, TODOS);
    sURIMatcher.addURI(AUTHORITY, BASE_PATH + "/#", TODO_ID);
  }

  @Override
  public boolean onCreate() {
    database = new TodoDatabaseHelper(getContext());
    return false;
  }

  @Override
  public Cursor query(Uri uri, String[] projection, String selection,
      String[] selectionArgs, String sortOrder) {

    // Uisng SQLiteQueryBuilder instead of query() method
    SQLiteQueryBuilder queryBuilder = new SQLiteQueryBuilder();

    // check if the caller has requested a column which does not exists
    checkColumns(projection);

    // Set the table
    queryBuilder.setTables(TodoTable.TABLE_TODO);

    int uriType = sURIMatcher.match(uri);
    switch (uriType) {
    case TODOS:
      break;
    case TODO_ID:
      // adding the ID to the original query
      queryBuilder.appendWhere(TodoTable.COLUMN_ID + "="
          + uri.getLastPathSegment());
      break;
    default:
      throw new IllegalArgumentException("Unknown URI: " + uri);
    }

    SQLiteDatabase db = database.getWritableDatabase();
    Cursor cursor = queryBuilder.query(db, projection, selection,
        selectionArgs, null, null, sortOrder);
    // make sure that potential listeners are getting notified
    cursor.setNotificationUri(getContext().getContentResolver(), uri);

    return cursor;
  }

  @Override
  public String getType(Uri uri) {
    return null;
  }

  @Override
  public Uri insert(Uri uri, ContentValues values) {
    int uriType = sURIMatcher.match(uri);
    SQLiteDatabase sqlDB = database.getWritableDatabase();
    int rowsDeleted = 0;
    long id = 0;
    switch (uriType) {
    case TODOS:
      id = sqlDB.insert(TodoTable.TABLE_TODO, null, values);
      break;
    default:
      throw new IllegalArgumentException("Unknown URI: " + uri);
    }
    getContext().getContentResolver().notifyChange(uri, null);
    return Uri.parse(BASE_PATH + "/" + id);
  }

  @Override
  public int delete(Uri uri, String selection, String[] selectionArgs) {
    int uriType = sURIMatcher.match(uri);
    SQLiteDatabase sqlDB = database.getWritableDatabase();
    int rowsDeleted = 0;
    switch (uriType) {
    case TODOS:
      rowsDeleted = sqlDB.delete(TodoTable.TABLE_TODO, selection,
          selectionArgs);
      break;
    case TODO_ID:
      String id = uri.getLastPathSegment();
      if (TextUtils.isEmpty(selection)) {
        rowsDeleted = sqlDB.delete(TodoTable.TABLE_TODO,
            TodoTable.COLUMN_ID + "=" + id,
            null);
      } else {
        rowsDeleted = sqlDB.delete(TodoTable.TABLE_TODO,
            TodoTable.COLUMN_ID + "=" + id
            + " and " + selection,
            selectionArgs);
      }
      break;
    default:
      throw new IllegalArgumentException("Unknown URI: " + uri);
    }
    getContext().getContentResolver().notifyChange(uri, null);
    return rowsDeleted;
  }

  @Override
  public int update(Uri uri, ContentValues values, String selection,
      String[] selectionArgs) {

    int uriType = sURIMatcher.match(uri);
    SQLiteDatabase sqlDB = database.getWritableDatabase();
    int rowsUpdated = 0;
    switch (uriType) {
    case TODOS:
      rowsUpdated = sqlDB.update(TodoTable.TABLE_TODO,
          values,
          selection,
          selectionArgs);
      break;
    case TODO_ID:
      String id = uri.getLastPathSegment();
      if (TextUtils.isEmpty(selection)) {
        rowsUpdated = sqlDB.update(TodoTable.TABLE_TODO,
            values,
            TodoTable.COLUMN_ID + "=" + id,
            null);
      } else {
        rowsUpdated = sqlDB.update(TodoTable.TABLE_TODO,
            values,
            TodoTable.COLUMN_ID + "=" + id
            + " and "
            + selection,
            selectionArgs);
      }
      break;
    default:
      throw new IllegalArgumentException("Unknown URI: " + uri);
    }
    getContext().getContentResolver().notifyChange(uri, null);
    return rowsUpdated;
  }

  private void checkColumns(String[] projection) {
    String[] available = { TodoTable.COLUMN_CATEGORY,
        TodoTable.COLUMN_SUMMARY, TodoTable.COLUMN_DESCRIPTION,
        TodoTable.COLUMN_ID };
    if (projection != null) {
      HashSet<String> requestedColumns = new HashSet<String>(Arrays.asList(projection));
      HashSet<String> availableColumns = new HashSet<String>(Arrays.asList(available));
      // check if all columns which are requested are available
      if (!availableColumns.containsAll(requestedColumns)) {
        throw new IllegalArgumentException("Unknown columns in projection");
      }
    }
  }

}
MyTodoContentProvider implements update(), insert(), delete() and query() methods. These methods map more or less directly to the SQLiteDatabase interface.
It also has the checkColumns() method to validate that a query only requests valid columns.
Register your ContentProvider in your AndroidManifest.xml file.
<application
  <!-- Place the following after the Activity
       Definition
  -->
  <provider
      android:name=".contentprovider.MyTodoContentProvider"
      android:authorities="de.vogella.android.todos.contentprovider" >
   </provider>
</application>
9.5. Resources
Our application requires several resources. First define a menu listmenu.xml in the folder res/menu. If you use the Android resource wizard to create the "listmenu.xml" file, the folder will be created for you; if you create the file manually you also need to create the folder manually.
This XML file will be used to define the option menu in our application. The android:showAsAction="always" attribute will ensure that this menu entry is displayed in the ActionBar of our application.
<?xml version="1.0" encoding="utf-8"?>
<menu xmlns:android="http://schemas.android.com/apk/res/android" >

    <item
        android:id="@+id/insert"
        android:showAsAction="always"
        android:title="Insert">
    </item>

</menu>
The user will be able to select the priority for the todo items. For the priorities we create a string array. Create the following filepriority.xml in the res/values folder .
<?xml version="1.0" encoding="utf-8"?>
<resources>

    <string-array name="priorities">
        <item>Urgent</item>
        <item>Reminder</item>
    </string-array>

</resources>
Define also additional strings for the application. Edit strings.xml under res/values.
<?xml version="1.0" encoding="utf-8"?>
<resources>
  <string name="hello">Hello World, Todo!</string>
  <string name="app_name">Todo</string>
  <string name="no_todos">Currently there are no Todo items maintained</string>
  <string name="menu_insert">Add Item</string>
  <string name="menu_delete">Delete Todo</string>
  <string name="todo_summary">Summary</string>
  <string name="todo_description">Delete Todo</string>
  <string name="todo_edit_summary">Summary</string>
  <string name="todo_edit_description">Description</string>
  <string name="todo_edit_confirm">Confirm</string>
</resources>
9.6. Layouts
We will define three layouts. One will be used for the display of a row in the list, the other ones will be used by our activities.
The row layout refers to an icon called reminder. Paste an icon of type "png" called "reminder.png" into your res/drawable folders (drawable-hdpi, drawable-mdpi, drawable-ldpi)
If you do not have an icon available you can copy the icon created by the Android wizard (ic_launcher.png in the res/drawable* folders) or rename the reference in the layout file. Please note that the Android Developer Tools sometimes change the name of this generated icon , so your file might not be called "ic_launcher.png".
Alternatively you could remove the icon definition from the "todo_row.xml" layout definition file which you will create in the next step.
Create the "todo_row.xml" layout file in the folder res/layout.
<?xml version="1.0" encoding="utf-8"?>
<LinearLayout xmlns:android="http://schemas.android.com/apk/res/android"
    android:layout_width="match_parent"
    android:layout_height="wrap_content" >

    <ImageView
        android:id="@+id/icon"
        android:layout_width="30dp"
        android:layout_height="24dp"
        android:layout_marginLeft="4dp"
        android:layout_marginRight="8dp"
        android:layout_marginTop="8dp"
        android:src="@drawable/reminder" >
    </ImageView>

    <TextView
        android:id="@+id/label"
        android:layout_width="match_parent"
        android:layout_height="wrap_content"
        android:layout_marginTop="6dp"
        android:lines="1"
        android:text="@+id/TextView01"
        android:textSize="24dp"
        >
    </TextView>

</LinearLayout>
Create the todo_list.xml layout file. This layout defines how the list looks like.
<?xml version="1.0" encoding="utf-8"?>
<LinearLayout xmlns:android="http://schemas.android.com/apk/res/android"
    android:layout_width="match_parent"
    android:layout_height="match_parent"
    android:orientation="vertical" >

    <ListView
        android:id="@android:id/list"
        android:layout_width="match_parent"
        android:layout_height="wrap_content" >
    </ListView>

    <TextView
        android:id="@android:id/empty"
        android:layout_width="wrap_content"
        android:layout_height="wrap_content"
        android:text="@string/no_todos" />

</LinearLayout>
Create the todo_edit.xml layout file. This layout will be used to display and edit an individual todo item in the TodoDetailActivityactivity.
<?xml version="1.0" encoding="utf-8"?>
<LinearLayout xmlns:android="http://schemas.android.com/apk/res/android"
    android:layout_width="match_parent"
    android:layout_height="match_parent"
    android:orientation="vertical" >

    <Spinner
        android:id="@+id/category"
        android:layout_width="wrap_content"
        android:layout_height="wrap_content"
        android:entries="@array/priorities" >
    </Spinner>

    <LinearLayout
        android:id="@+id/LinearLayout01"
        android:layout_width="match_parent"
        android:layout_height="wrap_content" >

        <EditText
            android:id="@+id/todo_edit_summary"
            android:layout_width="wrap_content"
            android:layout_height="wrap_content"
            android:layout_weight="1"
            android:hint="@string/todo_edit_summary"
            android:imeOptions="actionNext" >
        </EditText>
    </LinearLayout>

    <EditText
        android:id="@+id/todo_edit_description"
        android:layout_width="match_parent"
        android:layout_height="match_parent"
        android:layout_weight="1"
        android:gravity="top"
        android:hint="@string/todo_edit_description"
        android:imeOptions="actionNext" >
    </EditText>

    <Button
        android:id="@+id/todo_edit_button"
        android:layout_width="wrap_content"
        android:layout_height="wrap_content"
        android:text="@string/todo_edit_confirm" >
    </Button>

</LinearLayout>
9.7. Activities
Change the coding of your activities to the following. First TodosOverviewActivity.java.
package de.vogella.android.todos;

import android.app.ListActivity;
import android.app.LoaderManager;
import android.content.CursorLoader;
import android.content.Intent;
import android.content.Loader;
import android.database.Cursor;
import android.net.Uri;
import android.os.Bundle;
import android.view.ContextMenu;
import android.view.ContextMenu.ContextMenuInfo;
import android.view.Menu;
import android.view.MenuInflater;
import android.view.MenuItem;
import android.view.View;
import android.widget.AdapterView.AdapterContextMenuInfo;
import android.widget.ListView;
import android.widget.SimpleCursorAdapter;
import de.vogella.android.todos.contentprovider.MyTodoContentProvider;
import de.vogella.android.todos.database.TodoTable;

/*
 * TodosOverviewActivity displays the existing todo items
 * in a list
 *
 * You can create new ones via the ActionBar entry "Insert"
 * You can delete existing ones via a long press on the item
 */

public class TodosOverviewActivity extends ListActivity implements
    LoaderManager.LoaderCallbacks<Cursor> {
  private static final int ACTIVITY_CREATE = 0;
  private static final int ACTIVITY_EDIT = 1;
  private static final int DELETE_ID = Menu.FIRST + 1;
  // private Cursor cursor;
  private SimpleCursorAdapter adapter;


/** Called when the activity is first created. */

  @Override
  public void onCreate(Bundle savedInstanceState) {
    super.onCreate(savedInstanceState);
    setContentView(R.layout.todo_list);
    this.getListView().setDividerHeight(2);
    fillData();
    registerForContextMenu(getListView());
  }

  // create the menu based on the XML defintion
  @Override
  public boolean onCreateOptionsMenu(Menu menu) {
    MenuInflater inflater = getMenuInflater();
    inflater.inflate(R.menu.listmenu, menu);
    return true;
  }

  // Reaction to the menu selection
  @Override
  public boolean onOptionsItemSelected(MenuItem item) {
    switch (item.getItemId()) {
    case R.id.insert:
      createTodo();
      return true;
    }
    return super.onOptionsItemSelected(item);
  }

  @Override
  public boolean onContextItemSelected(MenuItem item) {
    switch (item.getItemId()) {
    case DELETE_ID:
      AdapterContextMenuInfo info = (AdapterContextMenuInfo) item
          .getMenuInfo();
      Uri uri = Uri.parse(MyTodoContentProvider.CONTENT_URI + "/"
          + info.id);
      getContentResolver().delete(uri, null, null);
      fillData();
      return true;
    }
    return super.onContextItemSelected(item);
  }

  private void createTodo() {
    Intent i = new Intent(this, TodoDetailActivity.class);
    startActivity(i);
  }

  // Opens the second activity if an entry is clicked
  @Override
  protected void onListItemClick(ListView l, View v, int position, long id) {
    super.onListItemClick(l, v, position, id);
    Intent i = new Intent(this, TodoDetailActivity.class);
    Uri todoUri = Uri.parse(MyTodoContentProvider.CONTENT_URI + "/" + id);
    i.putExtra(MyTodoContentProvider.CONTENT_ITEM_TYPE, todoUri);

    startActivity(i);
  }


  private void fillData() {

    // Fields from the database (projection)
    // Must include the _id column for the adapter to work
    String[] from = new String[] { TodoTable.COLUMN_SUMMARY };
    // Fields on the UI to which we map
    int[] to = new int[] { R.id.label };

    getLoaderManager().initLoader(0, null, this);
    adapter = new SimpleCursorAdapter(this, R.layout.todo_row, null, from,
        to, 0);

    setListAdapter(adapter);
  }

  @Override
  public void onCreateContextMenu(ContextMenu menu, View v,
      ContextMenuInfo menuInfo) {
    super.onCreateContextMenu(menu, v, menuInfo);
    menu.add(0, DELETE_ID, 0, R.string.menu_delete);
  }

  // creates a new loader after the initLoader () call
  @Override
  public Loader<Cursor> onCreateLoader(int id, Bundle args) {
    String[] projection = { TodoTable.COLUMN_ID, TodoTable.COLUMN_SUMMARY };
    CursorLoader cursorLoader = new CursorLoader(this,
        MyTodoContentProvider.CONTENT_URI, projection, null, null, null);
    return cursorLoader;
  }

  @Override
  public void onLoadFinished(Loader<Cursor> loader, Cursor data) {
    adapter.swapCursor(data);
  }

  @Override
  public void onLoaderReset(Loader<Cursor> loader) {
    // data is not available anymore, delete reference
    adapter.swapCursor(null);
  }

}
And TodoDetailActivity.java
package de.vogella.android.todos;

import android.app.Activity;
import android.content.ContentValues;
import android.database.Cursor;
import android.net.Uri;
import android.os.Bundle;
import android.text.TextUtils;
import android.view.View;
import android.widget.Button;
import android.widget.EditText;
import android.widget.Spinner;
import android.widget.Toast;
import de.vogella.android.todos.contentprovider.MyTodoContentProvider;
import de.vogella.android.todos.database.TodoTable;

/*
 * TodoDetailActivity allows to enter a new todo item
 * or to change an existing
 */
public class TodoDetailActivity extends Activity {
  private Spinner mCategory;
  private EditText mTitleText;
  private EditText mBodyText;

  private Uri todoUri;

  @Override
  protected void onCreate(Bundle bundle) {
    super.onCreate(bundle);
    setContentView(R.layout.todo_edit);

    mCategory = (Spinner) findViewById(R.id.category);
    mTitleText = (EditText) findViewById(R.id.todo_edit_summary);
    mBodyText = (EditText) findViewById(R.id.todo_edit_description);
    Button confirmButton = (Button) findViewById(R.id.todo_edit_button);

    Bundle extras = getIntent().getExtras();

    // check from the saved Instance
    todoUri = (bundle == null) ? null : (Uri) bundle
        .getParcelable(MyTodoContentProvider.CONTENT_ITEM_TYPE);

    // Or passed from the other activity
    if (extras != null) {
      todoUri = extras
          .getParcelable(MyTodoContentProvider.CONTENT_ITEM_TYPE);

      fillData(todoUri);
    }

    confirmButton.setOnClickListener(new View.OnClickListener() {
      public void onClick(View view) {
        if (TextUtils.isEmpty(mTitleText.getText().toString())) {
          makeToast();
        } else {
          setResult(RESULT_OK);
          finish();
        }
      }

    });
  }

  private void fillData(Uri uri) {
    String[] projection = { TodoTable.COLUMN_SUMMARY,
        TodoTable.COLUMN_DESCRIPTION, TodoTable.COLUMN_CATEGORY };
    Cursor cursor = getContentResolver().query(uri, projection, null, null,
        null);
    if (cursor != null) {
      cursor.moveToFirst();
      String category = cursor.getString(cursor
          .getColumnIndexOrThrow(TodoTable.COLUMN_CATEGORY));

      for (int i = 0; i < mCategory.getCount(); i++) {

        String s = (String) mCategory.getItemAtPosition(i);
        if (s.equalsIgnoreCase(category)) {
          mCategory.setSelection(i);
        }
      }

      mTitleText.setText(cursor.getString(cursor
          .getColumnIndexOrThrow(TodoTable.COLUMN_SUMMARY)));
      mBodyText.setText(cursor.getString(cursor
          .getColumnIndexOrThrow(TodoTable.COLUMN_DESCRIPTION)));

      // always close the cursor
      cursor.close();
    }
  }

  protected void onSaveInstanceState(Bundle outState) {
    super.onSaveInstanceState(outState);
    saveState();
    outState.putParcelable(MyTodoContentProvider.CONTENT_ITEM_TYPE, todoUri);
  }

  @Override
  protected void onPause() {
    super.onPause();
    saveState();
  }

  private void saveState() {
    String category = (String) mCategory.getSelectedItem();
    String summary = mTitleText.getText().toString();
    String description = mBodyText.getText().toString();

    // only save if either summary or description
    // is available

    if (description.length() == 0 && summary.length() == 0) {
      return;
    }

    ContentValues values = new ContentValues();
    values.put(TodoTable.COLUMN_CATEGORY, category);
    values.put(TodoTable.COLUMN_SUMMARY, summary);
    values.put(TodoTable.COLUMN_DESCRIPTION, description);

    if (todoUri == null) {
      // New todo
      todoUri = getContentResolver().insert(MyTodoContentProvider.CONTENT_URI, values);
    } else {
      // Update todo
      getContentResolver().update(todoUri, values, null, null);
    }
  }

  private void makeToast() {
    Toast.makeText(TodoDetailActivity.this, "Please maintain a summary",
        Toast.LENGTH_LONG).show();
  }
}
The resulting AndroidManifest.xml looks like the following.
<?xml version="1.0" encoding="utf-8"?>
<manifest xmlns:android="http://schemas.android.com/apk/res/android"
    package="de.vogella.android.todos"
    android:versionCode="1"
    android:versionName="1.0" >

    <uses-sdk android:minSdkVersion="15" />

    <application
        android:icon="@drawable/icon"
        android:label="@string/app_name" >
        <activity
            android:name=".TodosOverviewActivity"
            android:label="@string/app_name" >
            <intent-filter>
                <action android:name="android.intent.action.MAIN" />

                <category android:name="android.intent.category.LAUNCHER" />
            </intent-filter>
        </activity>
        <activity
            android:name=".TodoDetailActivity"
            android:windowSoftInputMode="stateVisible|adjustResize" >
        </activity>

        <provider
            android:name=".contentprovider.MyTodoContentProvider"
            android:authorities="de.vogella.android.todos.contentprovider" >
        </provider>
    </application>

</manifest>
Please note that android:windowSoftInputMode="stateVisible|adjustResize" is defined for the TodoDetailActivity. This makes the keyboard harmonize better with the widgets, but it is not required for this tutorial.
9.8. Start your application
Start your application. You should be able to enter a new todo item via the "Insert" button in the ActionBar.
An existing todo item can be deleted on the list via a long press.

To change an existing todo item, touch the corresponding row. This starts the second activity.
10. Accessing SQLite databases directly
10.1. Storage location of the SQLite database
SQlite stores the whole database in a file. If you have access to this file, you can work directly with the data base. Accessing the SQlite database file only works in the emulator or on a rooted device.
A standard Android device will not grant read-access to the database file.
10.2. Shell access to the database
It is possible to access an SQLite database on the emulator or a rooted device via the command line. For this use the following command to connect to the device.
adb shell The command adb is located in your Android SDK installation folder in the "platform-tools" subfolder.
Afterwards you use the "cd" command to switch the database directory and use the "sqlite3" command to connect to a database. For example in my case:
# Switch to the data directory
cd /data/data
# Our application
cd de.vogella.android.todos
# Switch to the database dir
cd databases
# Check the content
ls
# Assuming that there is a todotable file
# connect to this table
sqlite3 todotable.db
The most important commands are:
Table 2. SQlite commands
CommandDescription
| .help | List all commands and options. |
| .exit | Exit the sqlite3 command. |
| .schema | Show the CREATE statements which were used to create the tables of the current database. |
You find the complete documentation of SQlite at http://www.sqlite.org/sqlite.html.

11. More on ListViews
Please see Android ListView Tutorial for an introduction into ListViews and ListActivities .
12. Performance
Changes in SQLite are ACID (atomic, consistent, isolated, durable). This means that every update, insert and delete operation is ACID. Unfortunately this requires some overhead in the database processing therefore you should wrap updates in the SQLite database in an transaction and commit this transaction after several operations. This can significantly improve performance.
The following code demonstrates that performance optimization.
db.beginTransaction();
try {
   for (int i= 0; i< values.lenght; i++){
     // TODO prepare ContentValues object values
     db.insert(your_table, null, values);
     // In case you do larger updates
     yieldIfContededSafely()
     }
     db.setTransactionSuccessful();
    } finally {
      db.endTransaction();
}
For larger data updates you should use the yieldIfContededSafely() method. SQLite locks the database during an transaction. With this call, Android checks if someone else queries the data and if finish automatically the transaction and opens a new one. This way the other process can access the data in between.
13. Get the Book
This tutorial is part of a book available in electronic form for your Kindle.

14. Support this website
This tutorial is Open Content under the CC BY-NC-SA 3.0 DE license. Source code in this tutorial is distributed under the Eclipse Public License. See the vogella License page for details on the terms of reuse.
Writing and updating these tutorials is a lot of work. If this free community service was helpful, you can support the cause by giving a tip as well as reporting typos and factual errors.
14.1. Thank you
Please consider a contribution if this article helped you.
14.2. Questions and Discussion
If you find errors in this tutorial, please notify me (see the top of the page). Please note that due to the high volume of feedback I receive, I cannot answer questions to your implementation. Ensure you have read the vogella FAQ as I don't respond to questions already answered there.
15. Links and Literature
15.1. Source Code
15.2. Android SQLite resources
15.3. Android Resources
Android Background Processing Tutorial
Android Location API and Google Maps
15.4. vogella Resources
vogella Training Android and Eclipse Training from the vogella team
Android Tutorial Introduction to Android Programming
GWT Tutorial Program in Java, compile to JavaScript and HTML
Eclipse RCP Tutorial Create native applications in Java
JUnit Tutorial Test your application
Git Tutorial Put all your files in a distributed version control system
=======================
=======================
=======================
출처ㅣ http://mainia.tistory.com/670
| 안드로이드(android) SQLite 데이타 베이스 다루기 |
| 개발환경 : JDK 1.6, Android 4.2, window 7 32bit, Eclipse Juno |
오늘은 안드로이드 DB 인 SQLite 를 다루는 방법에 대해 기술하기로 한다.
어떤 언어에서나 DB 를 다루는 것은 필수이다. 장기로 보관하고 그것을 다시
효율적으로 꺼내서 다룰수 있어서 프로그램을 다이나믹하게 만들수 있기
때문이다.
안드로이드에서는 DB 외에 저장하는 방법이 여러가지 있다. 그중하나가
SQLite 를 사용하는 것이다. 휴대폰에서 차용한 만큼 심플하고 가볍다.
그리고 안드로이드 프레임웍에서 Help 클래스를 제공한다. 그것이 크게
두가지 클래스를 사용하는데 SQLiteDatabase, SQLiteOpenHelper 이다.
SQLiteOpenHelper 를 상속받은 클래스를 만들것이다. 주요 함수는
onCreate, onUpgrade, onOpen 이며 데이타베이스 생성과 관리, 존재여부에
대한 역활을 한다.
SQLiteDatabase 는 실질적으로 CRUD 를 수행하는데 쓰인다.
http://developer.android.com/reference/android/database/sqlite/SQLiteDatabase.html
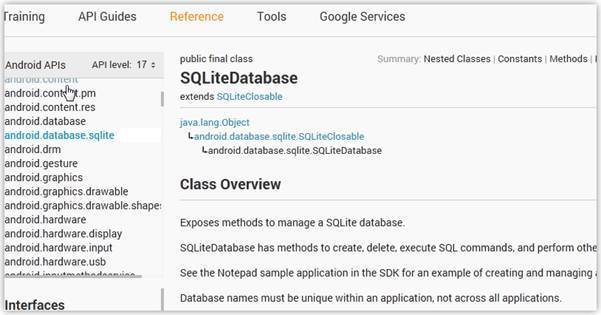
| 1. 데이타베이스 기능을 수행하기 위한 Contact 클래스 만들기 |
직접 쿼리를 작성해 CRUD 를 하는 것이 아니라 getter 와 setter 메소드가 있는
Contact 클래스를 만들어 기능을 수행할 것이다.
| public class Contact { int id; String name; String phone_number; public Contact(){ } public Contact(int id, String name, String phone_number){ this.id = id; this.name = name; this.phone_number = phone_number; } public Contact(String name, String phone_number){ this.name = name; this.phone_number = phone_number; } public int getID(){ return this.id; } public void setID(int id){ this.id = id; } public String getName(){ return this.name; } public void setName(String name){ this.name = name; } public String getPhoneNumber(){ return this.phone_number; } public void setPhoneNumber(String phone_number){ this.phone_number = phone_number; } } |
| 2. CRUD 를 수행할 클래스 작성 |
데이타베이스를 다루기 위해 읽기와 쓰기 함수들이 필요하다.
이런 CRUD 기능을 수행하기 위해 다음 함수들을 추가한다.
| // 새로운 contact 추가 public void addContact(Contact contact) {} // 아이디에 해당하는 contact 가져오기 public Contact getContact(int id) { } // 모든 contact 리스트 가져오기 public List<contact> getAllContacts() { } // 가져온 contact 숫자 가져오기 public int getContactsCount() { } // contact 업데이트 public int updateContact(Contact contact) { } // contact 삭제하기 public void deleteContact(Contact contact) { } </contact> |
위의 함수를 하나하나 구현해 본다.
(1) 새로운 contact 추가
addContact 함수는 파라미터로 Contact 객체를 넘기게 되어있다.
넘겨받은 Contact 객체의 값을 ContentValues 객체생성후 값을 채워넣는다.
값을 셋팅한 ContentValues 가 데이타베이스에 집어넣기 위한 매개체가 된다.
| // 새로운 contact 추가 public void addContact(Contact contact) { SQLiteDatabase db = this.getWritableDatabase(); ContentValues values = new ContentValues(); values.put(KEY_NAME, contact.getName()); // Name 필드명 values.put(KEY_PH_NO, contact.getPhoneNumber()); // phone number 필드명 // 새로운 Row 추가 db.insert(TABLE_CONTACTS, null, values); db.close(); // 연결종료 } |
(2) 아이디에 해당하는 Contact 가져오기
여기에서는 id 필드에 값을 넘겨주고 해당하는 하나의 행값을 가져온다.
| // 아이디에 해당하는 contact 가져오기 public Contact getContact(int id) { SQLiteDatabase db = this.getReadableDatabase(); Cursor cursor = db.query(TABLE_CONTACTS, new String[] { KEY_ID, KEY_NAME, KEY_PH_NO }, KEY_ID + "=?", new String[] { String.valueOf(id) }, null, null, null, null); if (cursor != null) cursor.moveToFirst(); Contact contact = new Contact(Integer.parseInt(cursor.getString(0)), cursor.getString(1), cursor.getString(2)); return contact; } |
(3) 테이블에 포함된 모든 Contact 데이타 가져오기
아이디에 해당하는 데이타를 가져올때 사용한 db.query 와 달리 이번에는
순수한 쿼리를 이용한다. 2번에서 사용한 query 함수를 사용하기 복잡하다면
문자열로 쿼리를 조합해 rawQuery 를 사용하면 될것이다.
| // 모든 contact 리스트 가져오기 public List<contact> getAllContacts() { List<contact> contactList = new ArrayList<contact>(); // Select All Query String selectQuery = "SELECT * FROM " + TABLE_CONTACTS; SQLiteDatabase db = this.getWritableDatabase(); Cursor cursor = db.rawQuery(selectQuery, null); // looping through all rows and adding to list if (cursor.moveToFirst()) { do { Contact contact = new Contact(); contact.setID(Integer.parseInt(cursor.getString(0))); contact.setName(cursor.getString(1)); contact.setPhoneNumber(cursor.getString(2)); // Adding contact to list contactList.add(contact); } while (cursor.moveToNext()); } return contactList; } </contact></contact></contact> |
(4) 테이블에 포함된 데이타 숫자 세기
3번에서 사용한 방법과 동일하며 리턴받은 Cursor 객체에서 getCount 함수를
사용해 갯수정보를 가져오면 된다.
| public int getContactsCount() { String countQuery = "SELECT * FROM " + TABLE_CONTACTS; SQLiteDatabase db = this.getReadableDatabase(); Cursor cursor = db.rawQuery(countQuery, null); cursor.close(); // return count return cursor.getCount(); } |
(5) contact 데이타 업데이트하기
파라미터로 넘겨준 Contact 객체를 업데이트 한다. 업데이트 해야할 contact id 는
포함되어있으므로 getter 함수를 사용해 꺼내쓰면 된다
| public int updateContact(Contact contact) { SQLiteDatabase db = this.getWritableDatabase(); ContentValues values = new ContentValues(); values.put(KEY_NAME, contact.getName()); values.put(KEY_PH_NO, contact.getPhoneNumber()); // updating row return db.update(TABLE_CONTACTS, values, KEY_ID + " = ?", new String[] { String.valueOf(contact.getID()) }); } |
(6) contact 데이타 삭제하기
파라미터로 넘겨준 Contact 객체에 해당하는 값을 삭제한다. 직접 쿼리를 작성해
삭제하고자 한다면 rawQuery 함수를 사용하면 된다.
| public void deleteContact(Contact contact) { SQLiteDatabase db = this.getWritableDatabase(); db.delete(TABLE_CONTACTS, KEY_ID + " = ?", new String[] { String.valueOf(contact.getID()) }); db.close(); } |
| 3. 전체소스 |
전체소스에서는 onCreate 와 onUpgrade 를 구현한 것을 볼수 있다.
onCreate 는 작업을 하기 위한 테이블 생성 쿼리를 수행하는 것이다.
onUpgrade 는 기존에 있던 테이블을 삭제하고 새로 생성한다.
| import java.util.ArrayList; import java.util.List; import android.content.ContentValues; import android.content.Context; import android.database.Cursor; import android.database.sqlite.SQLiteDatabase; import android.database.sqlite.SQLiteOpenHelper; import com.example.bookmanager.Contact; public class DBContactHelper extends SQLiteOpenHelper { // All Static variables // Database Version private static final int DATABASE_VERSION = 1; // Database Name private static final String DATABASE_NAME = "contactsManager"; // Contacts table name private static final String TABLE_CONTACTS = "contacts"; // Contacts Table Columns names private static final String KEY_ID = "id"; private static final String KEY_NAME = "name"; private static final String KEY_PH_NO = "phone_number"; public DBContactHelper(Context context) { super(context, DATABASE_NAME, null, DATABASE_VERSION); } // Creating Tables @Override public void onCreate(SQLiteDatabase db) { String CREATE_CONTACTS_TABLE = "CREATE TABLE " + TABLE_CONTACTS + "(" + KEY_ID + " INTEGER PRIMARY KEY," + KEY_NAME + " TEXT," + KEY_PH_NO + " TEXT" + ")"; db.execSQL(CREATE_CONTACTS_TABLE); } // Upgrading database @Override public void onUpgrade(SQLiteDatabase db, int oldVersion, int newVersion) { // Drop older table if existed db.execSQL("DROP TABLE IF EXISTS " + TABLE_CONTACTS); // Create tables again onCreate(db); } /** * CRUD 함수 */ // 새로운 Contact 함수 추가 public void addContact(Contact contact) { SQLiteDatabase db = this.getWritableDatabase(); ContentValues values = new ContentValues(); values.put(KEY_NAME, contact.getName()); // Contact Name values.put(KEY_PH_NO, contact.getPhoneNumber()); // Contact Phone // Inserting Row db.insert(TABLE_CONTACTS, null, values); db.close(); // Closing database connection } // id 에 해당하는 Contact 객체 가져오기 public Contact getContact(int id) { SQLiteDatabase db = this.getReadableDatabase(); Cursor cursor = db.query(TABLE_CONTACTS, new String[] { KEY_ID, KEY_NAME, KEY_PH_NO }, KEY_ID + "=?", new String[] { String.valueOf(id) }, null, null, null, null); if (cursor != null) cursor.moveToFirst(); Contact contact = new Contact(Integer.parseInt(cursor.getString(0)), cursor.getString(1), cursor.getString(2)); // return contact return contact; } // 모든 Contact 정보 가져오기 public List<contact> getAllContacts() { List<contact> contactList = new ArrayList<contact>(); // Select All Query String selectQuery = "SELECT * FROM " + TABLE_CONTACTS; SQLiteDatabase db = this.getWritableDatabase(); Cursor cursor = db.rawQuery(selectQuery, null); // looping through all rows and adding to list if (cursor.moveToFirst()) { do { Contact contact = new Contact(); contact.setID(Integer.parseInt(cursor.getString(0))); contact.setName(cursor.getString(1)); contact.setPhoneNumber(cursor.getString(2)); // Adding contact to list contactList.add(contact); } while (cursor.moveToNext()); } // return contact list return contactList; } //Contact 정보 업데이트 public int updateContact(Contact contact) { SQLiteDatabase db = this.getWritableDatabase(); ContentValues values = new ContentValues(); values.put(KEY_NAME, contact.getName()); values.put(KEY_PH_NO, contact.getPhoneNumber()); // updating row return db.update(TABLE_CONTACTS, values, KEY_ID + " = ?", new String[] { String.valueOf(contact.getID()) }); } // Contact 정보 삭제하기 public void deleteContact(Contact contact) { SQLiteDatabase db = this.getWritableDatabase(); db.delete(TABLE_CONTACTS, KEY_ID + " = ?", new String[] { String.valueOf(contact.getID()) }); db.close(); } // Contact 정보 숫자 public int getContactsCount() { String countQuery = "SELECT * FROM " + TABLE_CONTACTS; SQLiteDatabase db = this.getReadableDatabase(); Cursor cursor = db.rawQuery(countQuery, null); cursor.close(); // return count return cursor.getCount(); } } </contact></contact></contact> |
| 4. DBContactHelper 클래스를 사용해 DB 제어 하기 |
위에서 만든 클래스를 사용해 샘플데이타를 집어넣고 다시 읽어 들여서
Logcat 에서 확인할수 있도록 log 를 출력하는 예제이다.
| import java.util.List; import android.app.Activity; import android.os.Bundle; import android.util.Log; import android.view.Menu; import com.example.bookmanager.comm.DBContactHelper; public class MainActivity extends Activity { @Override protected void onCreate(Bundle savedInstanceState) { super.onCreate(savedInstanceState); setContentView(R.layout.activity_main); DBContactHelper db = new DBContactHelper(this); /** * CRUD Operations * */ // 샘플데이타 넣기 Log.d("Insert: ", "Inserting .."); db.addContact(new Contact("Ravi", "9100000000")); db.addContact(new Contact("Srinivas", "9199999999")); db.addContact(new Contact("Tommy", "9522222222")); db.addContact(new Contact("Karthik", "9533333333")); // 집어넣은 데이타 다시 읽어들이기 Log.d("Reading: ", "Reading all contacts.."); List<contact> contacts = db.getAllContacts(); for (Contact cn : contacts) { String log = "Id: "+cn.getID()+" ,Name: " + cn.getName() + " ,Phone: " + cn.getPhoneNumber(); Log.d("Name: ", log); } } @Override public boolean onCreateOptionsMenu(Menu menu) { // Inflate the menu; this adds items to the action bar if it is present. getMenuInflater().inflate(R.menu.activity_main, menu); return true; } } </contact> |
| 5. 로그 확인 |
이제 실행해서 제대로 로그가 찍히는지 확인한다.
Logcat 을 통해 제대로 들어가고 불러와 지는지 확인할수 있다.
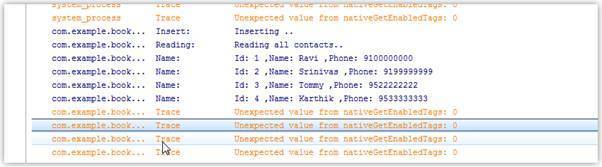
=======================
=======================
=======================
// ios
//출처: http://blog.naver.com/iss6388/10187021611
안녕하세요 제이입니다.
이번에 내장데이터베이스를 사용하며 난관에 봉착했었는데요..
제가 데이터베이스를 쓰는 방식은 이렇습니다.
첫번째 앱스토어에 등록하는 버젼은 default.sqlite 파일로 테이블을 만들어 놓습니다.
그리고 로그인 한 사람의 고유 키 (예를들면 아이디나 전화번호).sqlite로 파일명을 복사합니다.
| - (BOOL)InitLocalDB { NSString *ADBName = @"default.sqlite"; NSArray *paths = NSSearchPathForDirectoriesInDomains(NSDocumentDirectory, NSUserDomainMask, YES); NSString *documentsDirectory = [paths objectAtIndex:0]; NSString *myPath = [documentsDirectory stringByAppendingPathComponent:[NSString stringWithFormat:@"%@.sqlite",userInfo.dbfilename]]; //이부분이 파일을 리네임 하는 부분입니다. NSFileManager *fileManager = [NSFileManager defaultManager]; BOOL exist = [fileManager fileExistsAtPath:myPath]; if (exist) { return YES; } NSString *defaultDBPath = [[[NSBundle mainBundle] resourcePath] stringByAppendingPathComponent:ADBName]; NSError *error; exist = [fileManager copyItemAtPath:defaultDBPath toPath:myPath error:&error]; /* NSString *bundlePath = [[NSBundle mainBundle] pathForResource:@"default_Image" ofType:@"Bundle"]; NSLog(@"Bundle path is %@",bundlePath); */ NSBundle *myBundle = [NSBundle bundleWithURL:[[NSBundle mainBundle] URLForResource:@"default_Image"withExtension:@"bundle"]]; if (myBundle == nil) { } else { NSArray *arrContents = [[NSFileManager defaultManager] contentsOfDirectoryAtPath:[myBundle.bundlePathstringByAppendingPathComponent:@"image"] error:nil]; for (NSString *strFileName in arrContents) { NSLog(@"filename--> %@", strFileName); NSString *filePath = [documentsDirectory stringByAppendingPathComponent:strFileName]; [fileManager copyItemAtPath:[[myBundle.bundlePath stringByAppendingPathComponent:@"image"]stringByAppendingPathComponent:strFileName] toPath:filePath error:&error]; } } [userInfo saveToUserDefaults:userInfo.dbfilename forKey:@"dbfilename"]; return exist; } |
필요하신 부분만 참고하시면 되고 saveToUserDefaults 함수는 유저디폴트에 데이터를 저장하는 커스텀 함수입니다.
위와 같이 새로 리네임 한 데이터베이스를 설정한 경로에 id.sqlite 로 저장한 후 저 경로와 이름을 가지고 데이터베이스를 사용합니다.
이제 버젼이 올라가면서 새로운 테이블이나 컬럼이 추가되어야 한다고 생각해봅시다.
기존 사용자들은 업데이트를 받음과 동시에 소스는 모두 업데이트가 되어버리지만 번들 내부에 있는 데이터베이스 파일 자체는 변하지 않습니다.
이말인 즉슨 버젼업에서 새로 추가되는 테이블을 동적으로 추가하여야 한다는것입니다.
위 방법으로 조언을 받은 결과 데이터베이스를 프로그램 내부에서 버젼별로 관리해주는게 효율적이라는 말을 들었네요
데이터베이스를 관리하는 클래스 내부에서 버젼을 관리할 int형 변수를 하나 만들어줍시다
그리고 해당 버젼을 체크해서 업 되었을때 테이블을 만들어주는 방식입니다.
혹시나 하여 방어 로직을 구현해보았습니다.
(버젼 체크 후 테이블 검사하는 로직)
| - (int)selectTableYn :(NSString *)tblName{ sqlite3_stmt *statement; NSMutableString *tmpQuery; tmpQuery = [NSMutableString stringWithFormat:@"SELECT COUNT(*) FROM sqlite_master WHERE name='%@'",tblName]; NSLog(@"%@", tmpQuery); const char *sql = [tmpQuery UTF8String]; if (sqlite3_prepare_v2(FDataBase, sql, -1, &statement, NULL) != SQLITE_OK) { printf( "could not prepare statemnt(::selectMemoList::): %s\n", sqlite3_errmsg(FDataBase) ); return NO; } else { //바인드 } while (sqlite3_step(statement) == SQLITE_ROW) { return sqlite3_column_int(statement, 0); } sqlite3_reset(statement); return 0; } |
위 함수를 호출하는 부분에서 파라미터로 테이블 네임을 넘겨줍니다.
| SELECT COUNT(*) FROM sqlite_master WHERE name='테이블이름' |
위 구문은 실제 데이터베이스 파일의 마스터테이블 (사용자 데이터베이스의 정보들)에 접근하여 해당 테이블이 있는지 존재여부를 리턴해줍니다.
0일시 테이블이 없다는 뜻이고 테이블이 존재한다면 1을 리턴할 것입니다.
위 구분으로 테이블을 검사 후 없을경우 추가하는 쿼리를 실행시킵니다.
| int tMemoYn = [DBManager selectTableYn:@"T_MEMO"]; if(tMemoYn == 0){ //테이블 없으면 bool result = [DBManager createTMemoTbl]; if(result){ NSLog(@"create T_MEMO"); } } |
createTmomoTbl 구문 쿼리입니다.
| @"CREATE TABLE 'T_MEMO' ('uniq_key' VARCHAR NOT NULL ,'m_type' INTEGER NOT NULL ,'reg_date' VARCHAR NOT NULL ,'cash_price' INTEGER,'card_price' INTEGER,'etc_card_price' INTEGER,'etc_cash_price' INTEGER,'m_contents' TEXT, 'org_price' INTEGER DEFAULT 0, 'dis_price' INTEGER DEFAULT 0, 'sum_price' INTEGER DEFAULT 0) |
위와같이 완성된 쿼리를 실행시켜보면 잘 실행되네요 ^^
기존 사용자들은 위와같이 실행시켜주면 될것이고 버젼업 할때 기존에 만들어서 심어놓은 default.sqlite 파일은 수정을 해도 되고 안해도 됩니다.
어차피 버젼별로 분기를 타기때문에 테이블이 있을경우는 분기를 안타고 지나가겠죠..?
최초 업데이트시 한번 로직을 타냐 안타냐의 차이는 사실 크지 않습니다.
하지만 테이블의 구조를 이해하기에는 업데이트시 추가된 테이블을 default.sqlite에 모두 반영시키는것이 좋겠죠?
추가적으로 앱 개발시 내부 데이터베이스 테이블을위해 무거운 툴을 까실 필요는 없습니다.
파이어폭스 브라우져를 설치 후 데이터베이스 매니져를 설치하시면 파이어폭스 브라우져로 테이블을 관리할 수 있고
성능은 여느 다른 툴과 크게 차이가 없네요 ^^
이상 포스팅 마치겠습니다.
[출처] IOS sqlite 테이블 추가( 앱 버젼에 따른 추가) |작성자 제이
=======================
=======================
=======================
'스마트기기개발관련' 카테고리의 다른 글
| 프로그레시브 웹 앱(Progressive Web App) PWA 웹뷰 관련 (0) | 2021.02.03 |
|---|---|
| '플레이 스토어 연결되지 않음' 오류 해결법 (0) | 2020.09.23 |
| [iOS, android] 어플,브라우저 에서 다른 어플 app 앱 실행시키기,URL로 액티비티로 앱 실행하는 방법, 또 값넘기기(브라우저,앱에서 앱 실행 시키기) (0) | 2020.09.23 |
| 안드로이드 ios Flash Android App (StageWebView) air 안에 web 브라우져 html 넣기 붙이기 관련 (0) | 2020.09.21 |
| 모바일 ios, android 등등 결제할때 인증 영수증 Receipt 값 웹에서 처리 관련 (0) | 2020.09.20 |