=================================
=================================
=================================
출처: http://m.blog.naver.com/7588996/105996434
소 개
이 강좌는 초기화에 대한 것이다. 이 강좌에서 우리는 어떻게 윈도우즈에서 OpenGL을 초기화 하가에 대해 알아본다. 이 강좌에서는 윈도우즈 프로그래밍을 위한 Microsoft Foundation Classes (MFC)을 많이 사용할 것이며 MFC로 OpenGL을 어떻게 사용하는지 알아 볼것이다. 또한 앞으로 진행될 각각의 강좌에서 사용할 일반적인 OpenGL의 뼈대가 되는 소스를 제작해 볼것이다. MFC를 사용하는 이유는 쉽게 세련된 Graphics User Interface를 만들 수 있기 때문이다. GLUT나 AUX 라이브러리를 사용하는 프로그램은 OpenGL API를 배우는데 좋고 윈도우즈에서 3차원 그래픽을 만드는 방법을 익히는데 좋다. MFC를 사용하는 것의 단점은 GLUT나 AUX를 사용하여 얻게 되는 플랫폼 독립성을 잃게 된다는 점이다. 그러나 이 튜어리얼은 단지 윈도우즈 환경하에서만 OpenGL을 사용하고 익힐 목적이므로 염려할 것이 못된다.
이 강좌에서, 우리는 MFC Single Document Interface (SDI)를 만들고 OpenGL을 초기화해 볼것이다. OpenGL 명령의 수행을 위해 준비된 프로그램을 제작하는 것이 목적인 것이다.
WGL - Windows OpenGL Extension
OpenGL은 플랫폼 독립적으로 설계되어졌다. 각 운영체제가 자신만의 고유한 윈도우 체계를 가지고 있음으로 OpenGL은 이러한 운영체제의 고유성와 독립적적이라는 의미이기도 하다. 그리고 OpenGL이 윈도우 시스템과 독립적이기 때문에, 윈도우 시스템과 관련된 세부사항과의 연관을 가지고 있지 않다. 각 윈도우 시스템과 OpenGL을 적용시키기위해, 제한된 "접착제" 루틴들이 만들어졌으며 OpenGL의 핵심의 구현되지 않은 부분이 모든 윈도우 시스템에 걸쳐 남겨져있다. X 윈도우 시스템과 OpenGL에 대해서는 GLX라는 X 확장 기능이 있다. GLX는 OpenGL과 X와의 "접착하는" 방법을 제공한다. 마이크로 소프트의 윈도우즈에 대해서는 WGL 확장 기능이 제공되는데 이것은 \'위글\' (Windows + OpenGL)이라 불린다.
WGL 확장 능은 함수의 모임(예를 들어서, wglCreateContext, wglDeleteContext )과 구조체 타입의 모임(예를 들어서 PIXELFORMATDESCRIPTOR, GLYPHMETRICSFLOAT)으로 구성되어 있다. 그래서 모든 OpenGL 구현은 플랫폼에 따라 다른 OpenGL 초기화와 같은 부분과 다른 함수들이 있다. 이 강좌에서는 마이크로 소프트 플랫폼의 OpenGL 구현 부분을 시험하고 윈도우 프로그램이 OpenGL 함수 호출을 받아드릴 수 있도록 초기화하는 방법에 대해서 알아볼 것이다.
초기화 부분은 매번 반복적이다. 이 강좌에서 초기화에 대한 코드를 한번 작성하고 계속해서 다음 강좌에서 재사용할 것이다. 코드를 시작하기 앞서 중요한 3가지 용어에 대해서 설펴보자.
Device Context
윈도우즈 Graphical Device Interface (GDI) 는 화면이나 메모리, 프린터 또는 다른 장치에 무언가를 그리는 기능이다. GDI는 현재 선택된 장치의 핸들을 이용하여 그리기를 수행하는데, 장치를 Device Context(DC)라 부른다.
Rendering Context
Rendering Context(RC)는 GDI의 DC와 동등한 OpenGL의 DC라고 생각하면 된다. 모든 OpenGL 호출은 RC를 통해 그려진다. RC는 배경색이나 현재 사용중인 색 등과 같은 상태 변수를 가지고 있다. 마치 DC가 펜이나 브러쉬 등과 같은 상태 변수를 가지고 있는 것과 같이 말이다.
Pixel Format
Pixel formats은 OpenGL 호출과 윈도우즈가 수행하는 그리기 기능 사이의 해석 층이다. 예를 들어서, 만약 현재의 Pixel format이 OpenGL이 사용하고자 하는 것보다 적은 색상만을 지원한다면, 즉 RGB 색상값 (128, 120, 135)로 그리고자 하는데 이 색상을 나타내지 못한다면 Pixel format에 의해서 나타낼수있는 색상, 예를 들어서 (128, 128, 128)과 같은 색상으로 해석하는 것이다. Pixel format은 반드시 기술되어져야 한다.
왜 MFC인가?
SmallTalk에서 소개된 Modal-View-Controller 아키텍쳐는 매우 성공적이였다. MFC 프로그램은 Document와 View로 구성되어있으며 각각은 SmallTalk에서 Model과 View에 대응한다. Controller는 윈도우즈와 프로그램의 메세지 처리 사이에서 공유되어진다.
MFC를 선택한 이유 중의 하나는 대중성 때문이다. MFC는 윈도우즈 API를 캡슐화했으며 API를 C++로 감싼 집합니다. 필요로하는 기본적인 뻐대를 제공함으로써 MFC 윈도우즈 어플리케이션의 생성의 편리성을 Visual C++의 마법사(wizard) 집합이 제공한다. 그래서 우리는 설계시에 윈도우즈 어플리케이션의 생성 대신에 OpenGL 프로그래밍에 더 많은 초점을 마출수 있다.
MFC를 사용한 첫번째 OpenGL 프로그램
OpenGL 확장 기능을 소개와 함께, 이제는 MFC를 이용한 OpenGL 프로그램을 작성해 보겠다.
단계별로 MFC를 이용해 OpenGL 프로그램 작성하기
- Visual C++ 6.0 IDE를 실행한다.
- File 메뉴의 New를 선택하여 새로운 Workspace를 생성한다.
- 프로젝트 타입으로 MFC AppWizard (exe)를 선택한다.
- OpenGL이라는 이름의 프로젝트 이름을 입력하고 적절한 디렉토리 위치를 선택한다.
- 마법사에서, Single Document 를 선태갛고 Printing and Print Preview 를 제거하고 다른 기본값은 그대도 둔다.
- 컴파일하고 코드를 실행해 본다.
이제 우리는 MFC-Appwizard가 작성해준 코드를 OpenGL을 이용해 그릴수있도록 수정할 필요가 있다. 이미 알고있듯이, 윈도우에 그리기 위한 책임은 View 클래스에 있다. OpenGL 이미지를 표현하기 위한 view class를 만들기 위한 모든 필요한 기능을 추가해야 한다.
- ClassWizard를 열고, COpenGLView class를 선택한다. 다음 메세지에 대한 메세지 헨들러를 추가한다. - WM_CREATE (for OnCreate), WM_DESTROY (for OnDestroy), WM_SIZE (for OnSize), WM_ERASEBACKGROUND (for OnEraseBkground).
- OpenGL 헤더 파일을 위한 include 구문을 stdafx.h 파일에 추가한다.
//OpenGL Headers
#include <gl\gl.h> //OpenGL Main Library Header
#include <gl\glu.h> //OpenGL Utility Library Header
#include <gl\glaux.h> //OpenGL Auxiliary Library Header
#include <gl\glut.h> //OpenGL GLUT Library Header
- 아래와 같이 링크시에 필요한 라이브러리 파일을 추가한다. glut 라이브러리를 컴퓨터에 제대로 설치했는지 확인해 보기 바란다 - 헤더와 라이브러리를 OpenGL 헤더들과 같은 위치에 추가하라.
- 어플리이케이션을 실행해 보기 바란다.
만약 성공적으로 실행되었다면 이제 메세지 헨들러를 하나 하나 코딩할 준비가 된것이다. 각 핸들러를 추가한 후, 모든 것이 제대로 되었는지 실행해 보기 바란다.
Editing PreCreateWindow()
윈도우를 생성하기 전에, 우리는 WS_CLIPCHILDREN과 WS_CLIPSIBLINGS를 갖는 윈도우 스타일을 설정해야 하는데 이유는 다른 윈도우를 그려려는 시도를 막기 위함이다. 반드시 PreCreateWindow() 멤버 함수에서 바꿔줘야 한다.
BOOL COpenGLView::PreCreateWindow(CREATESTRUCT& cs)
{
// TODO: Modify the Window class or styles here by modifying
// the CREATESTRUCT cs
//An OpenGL Window must be created with the following flags
cs.style |= WS_CLIPSIBLINGS | WS_CLIPCHILDREN;
return CView::PreCreateWindow(cs);
Editing OnCreate() and Setting up a Pixel Format and Rendering Context
OnCreate()에서 우리는 픽셀 포맷과 랜더링 컨텍스을 설정함으로써 OpenGL을 초기화해 본다. 우리는 이러한 작동을 수행하는 InitializeOpenGL()라 불리는 맴버 함수를 추가할 것이다. OpenGLView.h 헤더 파일을 열고 클래스의 public 부에 다음 라인을 추가한다.
HGLRC m_hRC; //Rendering Context
CDC* m_pDC; //Device Context
HGLRC는 랜더링 컨텍스트의 헨들이고 윈도우즈 디바이스 컨텍스트로부터 옳바른 랜더링 컨텍스트를 얻기 위해 필요하다.
BOOL InitializeOpenGL();
BOOL SetupPixelFormat();
InitializeOpenGL() 는 디바이스 컨텍스트(DC)를 생성하는데 필요한데, 이 DC를 위한 픽셀 포멧을 선택하고 DC와 연관된 RC를 생성하며 그 RC를 선택한다. InitializeOpenGL은 픽셀 포맷을 설정하기 위해 SetupPixelFormat를 호출한다.
아래의 코드와 같이 OnCreate()에서 InitializeOpenGL() 함수 호출을 추가하자.
int COpenGLView::OnCreate(LPCREATESTRUCT lpCreateStruct)
{
if (CView::OnCreate(lpCreateStruct) == -1)
return -1;
// TODO: Add your specialized creation code here
//Initialize OpenGL Here
InitializeOpenGL();
return 0;
}
다음 InitializeOpenGL() 코드를 단계적으로 살펴보자.
BOOL COpenGLView::InitializeOpenGL()
{
//Get a DC for the Client Area
m_pDC = new CClientDC(this)
//Failure to Get DC
if(m_pDC == NULL)
{
MessageBox("Error Obtaining DC");
return FALSE;
}
함수는 첫번째로 클라이언트 영역에 대한 DC를 얻고 NULL이 아닌지 확인한다.
//Failure to set the pixel format
if(!SetupPixelFormat())
{
return FALSE;
}
그리고, 픽셀 포맷을 설정하기 위해 SetupPixelFormat() 함수를 호출하고 성공했는지를 검사한다. 이 함수에 대한 코드를 짧게 논해 볼것이다.
//Create Rendering Context
m_hRC = ::wglCreateContext (m_pDC->GetSafeHdc ());
//Failure to Create Rendering Context
if(m_hRC == 0)
{
MessageBox("Error Creating RC");
return FALSE;
}
다음에, DC로부터 렌더링 컨텍스트를 생성하고 성공했는지 검사한다. wglCreateContext 함수는 새로운 OpenGL 렌더링 컨텍스트를 생성하는데 이 렌더링 컨텍스트는 DC에 의해 참조되어진 디바이스 상에 무언가를 그릴 것이다.
//Make the RC Current
if(::wglMakeCurrent (m_pDC->GetSafeHdc (), m_hRC)==FALSE)
{
MessageBox("Error making RC Current");
return FALSE;
}
다음에, 생성된 RC를 현재 사용한다고 지정한다. wglMakeCurrent 함수는 지정된 OpengL 렌더링 컨텍스트를 호출되고 있는 쓰레드의 현재 랜더링 컨텍스트로 만든다. 쓰레드에 의해 호출되어지는 다음 모든 OpenGL 명령은 DC에 의해 지정된 디바이스 위에 그려지게 된다.
//Specify Black as the clear color
::glClearColor(0.0f,0.0f,0.0f,0.0f);
//Specify the back of the buffer as clear depth
::glClearDepth(1.0f);
//Enable Depth Testing
::glEnable(GL_DEPTH_TEST);
함수는 또한 위의 세줄의 코드에서 특정한 OpenGL 상태 변수를 추기화 한다. OpenGL은 특정한 전역 변수를 가지고 있는데 이 변수들은 현재 OpenGL의 상태와 관계된 정보가 담겨다. 예를 들어서, 현재의 배경색, 현재 사용되는 색, 빛에 대한 정보, 제질의 특성값 등등이 있는데 마치 이것은 윈도우즈 GDI 정보, 즉 현재의 브러쉬나 현재 사용되는 펜등과 같은 것에 해당되는 것이다.
glClearColor 함수는 배경색으로 사용될 빨강, 초록, 파랑 그리고 알파값을 지정한다. glClearColor에 의해 지정될 값의 범위는 0~1이다. 0은 검은색이고 1은 순백색을 의미한다. 여기서는 검은색으로 했다.
glClearDepth 함수는 깊이 버퍼를 초기화 하기 위해 glClear 함수에서 사용될 깊이 값을 지정한다. 나중에 깊이 버퍼에 대해서 알아볼 것이다. glClearDepth에 의해 사용되는 값의 범위는 0~1이다. 여기서는 1의 값으로 깊이 버퍼값을 설정했다.
glEnable 함수는 특정한 OpenGL 기능을 가능하게 하는 것이다. 여기서는 깊이 테스트를 수행하도록 OpenGL에게 지시했다. 나중에 깊이 버퍼에 대해서 자세하게 설명하겠다.
인자 뒤에 붙은 \'f\'는 실수형이라는 것을 분명하게 지시하기 위해 사용되어졌다.
이제, 우리는 픽셀 포멧을 설정하기 위한 함수, SetupPixelFormat()을 볼 것이다.
BOOL COpenGLView::SetupPixelFormat()
{
Pixel Format Structure
OpenGL 윈도우의 기능들은 OpenGL 랜더링 윈도우를 위해 선택된 픽셀 포맷에 의존한다. 이 포맷의 속성은 다음과 같다:
static PIXELFORMATDESCRIPTOR pfd =
{
nSize는 구조체의 크기를 지정하는데 아래 코드와 같다.
sizeof(PIXELFORMATDESCRIPTOR), // size of this pfd
nVersion은 구조체의 버번을 나타낸다.
1, // version number
dwFlags는 픽셀 버퍼의 속성값을 나타내는 비트 플래그이다. 다음과 같은 값들이 올 수 있다.
PFD_DRAW_TO_WINDOW 윈도우 상에 그리고자 할때 사용
그리고,
PFD_SUPPORT_OPENGL OpenGL을 사용하기를 원할때 사용
그리고,
PFD_DOUBLEBUFFER 더블 버퍼링을 원할때 사용. 더블 버퍼링은 뒤의 버퍼에 그리고 앞버퍼와 바꿔는 기술이다. 이것은 부드러운 랜더링을 위해 사용된다.
PFD_DRAW_TO_WINDOW | // support window
PFD_SUPPORT_OPENGL | // support OpenGL
PFD_DOUBLEBUFFER, // double buffered
iPixelType은 픽셀 데이타의 칼라 타입을 나타낸다. RGBA값이 사용되었는데, 이것은 픽셀 색이 Red, Green, Blue, Alpha값으로써 나타냄을 의미한다. 그래서 각 픽셀은 네게의 구분된 색상 요소를 갖는다.
PFD_TYPE_RGBA, // RGBA type
cColorBits는 색상 버퍼에서의 색상 비트 플랜의 수를 나타낸다. RGBA 모드에 대해서, 색상 버퍼의 비트에서의 크기값이다. 여기서는 24비트 깊이값이 사용되여졌는데 RGB 색당 8비트를 나타내기 때문이다.
24, // 24-bit color depth
다음 인자들은 현재로써는 대부분 0으로 채우며 주석을 참고하라.
0, 0, 0, 0, 0, 0, // color bits ignored
0, // no alpha buffer
0, // shift bit ignored
0, // no accumulation buffer
0, 0, 0, 0, // accumulation bits ignored
16, // 16-bit z-buffer
0, // no stencil buffer
0, // no auxiliary buffer
PFD_MAIN_PLANE, // main layer
0, // reserved
0, 0, 0 // layer masks ignored
};
일단, 픽셀 포멧을 설정하고 ChoosePixelFormat 함수를 호출해 이용 가능한 가장 근접한 픽셀 포멧을 구한다. ChoosePixelFormat 함수는 DC가 주어진 픽셀 포멧의 스펙을 지원하는 적당한 픽셀 포멧을 일치시켜 준다. 반환값이 0이 아님을 확인해야 한다.
int m_nPixelFormat = ::ChoosePixelFormat(m_pDC->GetSafeHdc(), &pfd);
if ( m_nPixelFormat == 0 )
{
return FALSE;
}
이제, 가장 근접한 값을 얻었다면, SetPixelFormat 함수를 호출하는데 이 함수는 인덱스에 의해 지정된 포멧에 지정된 디바이스 컨텍스트의 픽셀 포멧을 서정한다. 마찬가지로 올바로 수행되었는지 확인해야 한다.
if ( ::SetPixelFormat(m_pDC->GetSafeHdc(), m_nPixelFormat, &pfd) == FALSE)
{
return FALSE;
}
이제 모든 것이 올바로 작동되었다면 True 값을 반환한다.
return TRUE;
}
Editing OnSize()
OnSize(), 는 보통 Viewport와 Viewing Frustum을 설정하는 곳인데 이 Viewport와 Frustum이 윈도우의 크기와 연관되어있기 때문이다. 그래서 viewport와 viewing frustum은 OnSize()가 호출될때와 윈도우의 크기가 재조정될때 설정된다. 기본적인 작동은 Viewport를 설정하고 Projection matrix를 선택하고 viewing frustum을 설정하는 것이다. 마지막으로 Modelview matrix를 선택하는 것인데, 이것을 초기화하고 viewing transformation을 설정하는 것이다. 나중에 제공되는 강좌에서 더 자세하게 Viewport와 Matrix들에 대해 알아보자.
void COpenGLView::OnSize(UINT nType, int cx, int cy)
{
CView::OnSize(nType, cx, cy);
// TODO: Add your message handler code here
Aspect 비율을 저장할 변수를 선언한다. 예를 들어서, 윈도우의 너비와 높이의 비율로써 Viewing frustum은 이것에 의존한다.
GLdouble aspect_ratio; // width/height ratio
윈도우의 높이나 폭이 0인 경우 Return 한다.
if ( 0 >= cx || 0 >= cy )
{
return;
}
glViewport 함수는 viewport를 설정한다. Aspect 비율을 계산하고, Projection Matrix를 선택하고 이것을 초기화 한다. Viewing Volume를 설정한다. 이것은 나중의 모든 명령이 Projection Matrix에 영향을 받는다는 것을 의미한다.
// select the full client area
::glViewport(0, 0, cx, cy);
// compute the aspect ratio
// this will keep all dimension scales equal
aspect_ratio = (GLdouble)cx/(GLdouble)cy;
// select the projection matrix and clear it
::glMatrixMode(GL_PROJECTION);
::glLoadIdentity();
// select the viewing volume
::gluPerspective(45.0f, aspect_ratio, .01f, 200.0f);
Modelview Matrix를 선택하고 이것을 초기화 한다. 이것은 나중에 모든 명령이 Modelview matrix에 영향을 받는다는 것을 의미한다.
// switch back to the modelview matrix and clear it
::glMatrixMode(GL_MODELVIEW);
::glLoadIdentity();
}
Editing OnDraw()
그림(장면)을 그릴때(연출할때) OpenGL 프로그램에서 발생하는 이벤트에서의 연속된 초기화 작업이 있는데 다음과 같다.
- 버퍼를 초기화 한다.
- 장면을 연출한다.
- 랜더링 파이프 라인을 열어 실행시킨다. (역자주: 열어 실행 시킨다는 말은, 실제로 화면상에 그린다는 의미이다)
- 더블 버퍼링을 사용할때 뒤 버퍼의 내용을 앞 버퍼와 바꾼다.
다음의 코드가 위에서 언급한 것들을 수행한다.
void COpenGLView::OnDraw(CDC* pDC)
{
COpenGLDoc* pDoc = GetDocument();
ASSERT_VALID(pDoc);
// TODO: add draw code for native data here
먼저 버퍼를 초기화 한다.
// Clear out the color & depth buffers
::glClear( GL_COLOR_BUFFER_BIT | GL_DEPTH_BUFFER_BIT );
RenderScene 함수를 호출한다. 이 함수는 실제로 그리는 코드를 수행한다.
RenderScene();
랜더링 파이프 라인을 열어 실행 시킨다.
// Tell OpenGL to flush its pipeline
::glFinish();
만약 더블 버퍼링이 사용된다면 뒤 버퍼의 내용을 앞 버퍼와 바뀐다.
// Now Swap the buffers
::SwapBuffers( m_pDC->GetSafeHdc() );
}
The RenderScene() function
여기에 어떤 실제적인 그리기 코드(Rendering Code)가 온다. 이 프로그램에서는, 아직 화면상에 아무것도 그릴 것이 없으므로 비워둔다.
void COpenGLView::RenderScene ()
{
}
Editing OnEraseBkgnd() and OnDestroy()
윈도우의 크기를 조절할때, 매우 심한 깜빡 거림을 보게될것이다. 프로그램을 닫고 출력 윈도우에서 VC++ 디버거가 보고하는 메모리 릭이 있는지 살펴보라. 여기서 우리는 2가지 해결해야할 문제가 있다.
깜빡 거림은 윈도우즈가 배경색으로 클라이언트 영역을 칠하고 다음에 OpenGL이 다시 영역을 그리기 때문이다. 이미 OpenGL이 배경을 지우는 작업을 하고 있음으로 윈도우즈가 배경을 지우는 기능을 막아야 한다. OnEraseBkgnd()를 편집하여 이렇게 할수 있다. 다음과 같다.
BOOL COpenGLView::OnEraseBkgnd(CDC* pDC)
{
// TODO: Add your message handler code here and/or call default
//comment out the original call
//return CView::OnEraseBkgnd(pDC);
//Tell Windows not to erase the background
return TRUE;
}
다음 문제는 SetupPixelFormat 함수에서 CClientDC 객체에 대한 메모리 할당에 새로운 연산자를 사용했기 때문이다. 그래서 분명히 delete 연산자를 이용해 메모리를 해제해주어야 한다. 다음과 같다.
OnDestroy() f는 먼저 RC를 Non-Current화하고 RC를 지운 후에 DC를 지운다.
void COpenGLView::OnDestroy()
{
CView::OnDestroy();
// TODO: Add your message handler code here
먼저 RC를 Non-Current화 하는데, wglMakeCurrent에 0, 0 인자를 전달하여 호출해 수행한다.
//Make the RC non-current
if(::wglMakeCurrent (0,0) == FALSE)
{
MessageBox("Could not make RC non-current");
}
다음에 wglDeleteContext() 함수를 호출하여 RC를 지우는데, 이 함수는 인자로써 지울 RC의 헨들을 넘긴다.
//Delete the rendering context
if(::wglDeleteContext (m_hRC)==FALSE)
{
MessageBox("Could not delete RC");
}
다음에 DC를 지우고 NULL값을 할당한다.
//Delete the DC
if(m_pDC)
{
delete m_pDC;
}
//Set it to NULL
m_pDC = NULL;
} CyWebFontCommon.SetBaseColor('333333', 'FFFFFF');CyWebFont.Load("article_view", true);
출처 : [아우님의 블로그] Psyworld
작성자 : 아우
=================================
=================================
=================================
출처: http://egloos.zum.com/p0chan/v/2966757
[ OpenGL Setting for SDI MFC App ]
1. Project for SDI application 생성
2. stdafx.h 파일에 해더 추가
//OpenGL Headers
#include <gl\gl.h> //OpenGL Main Library Header
#include <gl\glu.h> //OpenGL Utility Library Header
#include <gl\glaux.h> //OpenGL Auxiliary Library Header
#include <gl\glut.h> //OpenGL GLUT Library Header
3. project setting->object/modules에 라이브러리 추가
opengl32.lib glu32.lib glut32.lib glaux.lib 추가
4. Window Style 설정
BOOL COpenGLView::PreCreateWindow(CREATESTRUCT& cs)
{
// TODO: Modify the Window class or styles here by modifying
// the CREATESTRUCT cs
// An OpenGL Window must be created with the following flagscs.style |= WS_CLIPSIBLINGS | WS_CLIPCHILDREN;
return CView::PreCreateWindow(cs);
}
5. OnCreate()에서 OpenGL 초기화
// 아래 두 변수는 View Class 의 Member variable로 설정한다.
HGLRC m_hRC; // Rendering Context
CDC* m_pDC; // Device Context// InitializeOpenGL()함수에 초기화 관련 내용을 넣는다.
int COpenGLView::OnCreate(LPCREATESTRUCT lpCreateStruct)
{
if (CView::OnCreate(lpCreateStruct) == -1)
return -1;// TODO: Add your specialized creation code here
// Initialize OpenGL HereInitializeOpenGL();
return 0;
}BOOL COpenGLView::InitializeOpenGL()
{
// Get a DC for the Client Area
m_pDC = new CClientDC(this)// Failure to Get DC
if(m_pDC == NULL)
{
MessageBox("Error Obtaining DC");
return FALSE;
}// Failure to set the pixel format
if(!SetupPixelFormat())
{
return FALSE;
}// Create Rendering Context
m_hRC = ::wglCreateContext (m_pDC->GetSafeHdc());// Failure to Create Rendering Context
if(m_hRC == 0)
{
MessageBox("Error Creating RC");
return FALSE;
}// Make the RC Current
if(::wglMakeCurrent (m_pDC->GetSafeHdc(), m_hRC)==FALSE)
{
MessageBox("Error making RC Current");
return FALSE;
}// Specify Black as the clear color
::glClearColor(0.0f,0.0f,0.0f,0.0f);// Specify the back of the buffer as clear depth
::glClearDepth(1.0f);// Enable Depth Testing
::glEnable(GL_DEPTH_TEST);return TRUE;
}BOOL COpenGLView::SetupPixelFormat()
{
static PIXELFORMATDESCRIPTOR pfd =
{
sizeof(PIXELFORMATDESCRIPTOR), // size of this pfd
1, // version number
PFD_DRAW_TO_WINDOW | // support window
PFD_SUPPORT_OPENGL | // support OpenGL
PFD_DOUBLEBUFFER, // double bufferedPFD_TYPE_RGBA, // RGBA type
24, // 24-bit color depth
0, 0, 0, 0, 0, 0, // color bits ignored
0, // no alpha buffer
0, // shift bit ignored
0, // no accumulation buffer
0, 0, 0, 0, // accumulation bits ignored
16, // 16-bit z-buffer
0, // no stencil buffer
0, // no auxiliary buffer
PFD_MAIN_PLANE, // main layer
0, // reserved
0, 0, 0 // layer masks ignored
};int m_nPixelFormat =
::ChoosePixelFormat(m_pDC->GetSafeHdc(), &pfd);if ( m_nPixelFormat == 0 ) {
return FALSE;
}if ( ::SetPixelFormat(m_pDC->GetSafeHdc(), m_nPixelFormat, &pfd)
== FALSE) {
return FALSE;
}return TRUE;
}
6. OnSize()함수 추가
void COpenGLView::OnSize(UINT nType, int cx, int cy)
{
CView::OnSize(nType, cx, cy);// TODO: Add your message handler code here
GLdouble aspect_ratio; // width/height ratioif ( 0 >= cx || 0 >= cy )
{
return;
}// select the full client area
::glViewport(0, 0, cx, cy);// compute the aspect ratio
// this will keep all dimension scales equal
aspect_ratio = (GLdouble)cx/(GLdouble)cy;// select the projection matrix and clear it
::glMatrixMode(GL_PROJECTION);
::glLoadIdentity();// select the viewing volume
::gluPerspective(45.0f, aspect_ratio, .01f, 200.0f);// switch back to the modelview matrix and clear it
::glMatrixMode(GL_MODELVIEW);
::glLoadIdentity();
}
7. OnDraw()함수 추가
void COpenGLView::OnDraw(CDC* pDC)
{
COpenGLDoc* pDoc = GetDocument();
ASSERT_VALID(pDoc);
// TODO: add draw code for native data here
// Clear out the color & depth buffers
::glClear( GL_COLOR_BUFFER_BIT | GL_DEPTH_BUFFER_BIT );RenderScene();
// Tell OpenGL to flush its pipeline
::glFinish();// Now Swap the buffers
::SwapBuffers( m_pDC->GetSafeHdc() );
}void COpenGLView::RenderScene ()
{
// 실제로 렌더링 하는 부분은 여기에 추가
}
8. OnEraseBkgnd(CDC* pDC) 함수 추가 : 깜박거림 문제 해결을 위해
BOOL COpenGLView::OnEraseBkgnd(CDC* pDC)
{
// TODO: Add your message handler code here and/or call default
// comment out the original call
// return CView::OnEraseBkgnd(pDC);
// Tell Windows not to erase the background
return TRUE;
}
9. OnDestroy() 함수 추가
void COpenGLView::OnDestroy()
{
CView::OnDestroy();// TODO: Add your message handler code here
// Make the RC non-current
if(::wglMakeCurrent (0,0) == FALSE)
{
MessageBox("Could not make RC non-current");
}// Delete the rendering context
if(::wglDeleteContext (m_hRC)==FALSE)
{
MessageBox("Could not delete RC");
}// Delete the DC
if(m_pDC)
{
delete m_pDC;
}// Set it to NULL
m_pDC = NULL;
}
=================================
=================================
=================================
출처: http://www.biz-gis.com/index.php?document_srl=12447&mid=paper
| VC++에서 OpenGL을 사용하기 위한 세팅과정 1 | |
공간분석이란 실세계의 공간지형상 특징을 이용하여 유용한 정보를 획득하는 학문입니다. 이 강좌는 공간분석 알고리즘을 OpenGL과 VC++을 이용하여 실제 구현하는 것을 실습을 통하여 알고리즘에 대한 이해를 돕고자 계획되었습니다. 공간분석 알고리즘을 적용하기 위해서 실세계 지형을 표현하는 일이 먼저 선행되어야 하는 것은 당연하다고 할 수 있습니다. 이러한 이유로 지형을 표현하는 과정을 공간분석 기초 과정으로하였습니다. 본 강좌에서는 지형을 손쉽게 표현하기 위해서 OpenGL(그래픽 라이브러리)을 이용하였습니다. 그리고 그 결과는 아래 그림과 같습니다. 한번 죽~ 따라 해보세요.^^ OpenGL 초기화 강좌는 gisdeveloper.co.kr 사이트의 내용을 대부분 인용하였으며, 공간분석 알고리즘 적용 부분에 해당하는 내용만 추가 및 수정하였음을 밝힙니다. <3D형태의 지형 표현> 1. glut32.dll : windows\system32에 복사(GLUT32.LIB도 복사) 2. glut.h를 C:\Program Files\Microsoft Visual Studio\VC98\Include\GL에 복사 3. glut32.lib를 C:\Program Files\Microsoft Visual Studio\VC98\Lib폴더에 복사 ※ 윈도우는 OpenGL을 지원하기 때문에 기타 필요한 나머지 라이브러리들은 이미 윈도우가 설치 될 때 시스템에 함께 설치된다. 파일 다운로드 |
|
VC++에서 OpenGL을 사용하기 위한 세팅과정 2 |
|
1. MFC AppWizard(exe)를 선택하고 Project Name을 “OpenGL"로 한다. 2. SDI 옵션을 선택하고 Finish 3. Project -> Settings 메뉴에서Link 탭으로 이동하면 아래의 대화상자가 나타난다. Category 콤포박스에서 General을 선택하고 Object/library modules:에 다음의 내용을 젂는다. opengl32.lib glu32.lib glut32.lib glaux.lib Category 콤포박스에서 Input을 선택하고 Object/library modules:에 다음의 내용을 젂는다. opengl32.lib glu32.lib glut32.lib glaux.lib |
|
MFC 환경에서 OpenGL을 사용하기 위한 초기화 과정 |
|
•용어정의 ∙Device Context: 윈도우즈 Graphical Device Interface (GDI)는 화면이나 메모리, 프린터 또는 다른 장치에 무언가를 그리는 기능이다. GDI는 장치의 핸들을 이용하여 그리기를 수행하는데 현재 선택된 장치를 Device Context(DC)라 부른다. ∙Rendering Context Rendering Context(RC)는 GDI의 DC와 동등한 OpenGL의 DC라고 생각하면 된다. 모든 OpenGL 호출은 RC를 통해 그려진다. RC는 배경색이나 현재 사용중인 색 등과 같은 상태 변수를 가지고 있다. 마치 DC가 펜이나 브러쉬 등과 같은 상태 변수를 가지고 있는 것과 같다. ∙Pixel Format Pixel formats은 OpenGL의 작업과 윈도우즈가 수행하는 작업 사이의 해석 층이다. • 초기화 과정 1. ClassWizard를 열고 COpenGLView class를 선택한다. 다음의 메세지 헨들러를 추가한다. -WM_CREATE, WM_DESTROY, WM_SIZE, WM_ERASEBKGND 2. OpenGL 헤더 파일을 위한 include 구문을 stdafx.h 파일에 추가한다. //OpenGL Headers #include #include #include #include 3. PreCreateWindow() 멤버 함수 부분 BOOL COpenGLView::PreCreateWindow(CREATESTRUCT& cs) { // TODO: Modify the Window class or styles here by modifying //윈도우 스타일 설정 cs.style |= WS_CLIPSIBLINGS | WS_CLIPCHILDREN; return CView::PreCreateWindow(cs); } 4. OpenGLView 다음과 같은 멤버 변수를 추가하고 HGLRC m_hRC; //Rendering Context CDC* m_pDC; //Device Context 다음과 같은 멤버 함수를 추가한다. //InitializeOpenGL() 는 디바이스 컨텍스트(DC)를 생성 BOOL InitializeOpenGL(); //픽셀 포맷을 설정 BOOL SetupPixelFormat(); 5. OnCreate()에서 InitializeOpenGL() 함수를 호출하는 부분을 추가 int COpenGLView::OnCreate(LPCREATESTRUCT lpCreateStruct) { if (CView::OnCreate(lpCreateStruct) == -1) return -1; // TODO: Add your specialized creation code here //Initialize OpenGL Here InitializeOpenGL(); return 0; } 6. InitializeOpenGL() 작성 BOOL COpenGLView::InitializeOpenGL() { //Get a DC for the Client Area m_pDC = new CClientDC(this); //Failure to Get DC if(m_pDC == NULL) { MessageBox("Error Obtaining DC"); return FALSE; } //Failure to set the pixel format if(!SetupPixelFormat()) //화면의 픽셀 포멧을 설정 { return FALSE; } //Create Rendering Context //화면 DC를 참조하는 Rendering Context 생성 m_hRC = ::wglCreateContext(m_pDC->GetSafeHdc()); //m_pDC->GetSafeHdc() 화면 DC의 핸들을 얻어온다 //wglCreateContext() OpenGL의 Rendering Context를 얻어오는데 화면 DC와 동일한 픽셀 포멧을 가져야 한다. //Failure to Create Rendering Context if(m_hRC == 0) { MessageBox("Error Creating RC"); return FALSE; } //Make the RC Current //생성된 Rendering Context를 현재 작업하고 있는 쓰레드에 연결 if(::wglMakeCurrent (m_pDC->GetSafeHdc (), m_hRC)==FALSE) { MessageBox("Error making RC Current"); return FALSE; } //wglMakeCurrent()를 이용해 연결시킨 다음부터 화면에 대한 작업이 가능하다. //Specify Black as the clear color ::glClearColor(0.0f,0.0f,0.0f,0.0f); //Specify the back of the buffer as clear depth ::glClearDepth(1.0f); //Enable Depth Testing ::glEnable(GL_DEPTH_TEST); return TRUE; } 7. SetupPixelFormat() 함수 작성 BOOL COpenGLView::SetupPixelFormat() { static PIXELFORMATDESCRIPTOR pfd = { sizeof(PIXELFORMATDESCRIPTOR), // size of this pfd 1, // version number PFD_DRAW_TO_WINDOW | //윈도우에 그림을 그릴 때 PFD_SUPPORT_OPENGL | //OpenGL을 사용하기를 원할 때 PFD_DOUBLEBUFFER, //더블 버퍼링을 원할 때 PFD_TYPE_RGBA, // RGBA type 24, // 24-bit color depth 0, 0, 0, 0, 0, 0, // color bits ignored 0, // no alpha buffer 0, // shift bit ignored |
|
=================================
=================================
=================================
출처: http://m.blog.naver.com/qlfydehd/110083507864
사용 OS : Window Xp Home Edition
사용 compiler : Microsoft Visual Studio 6.0
개발 환경 : MFC 기반
1. compiler를 설치
2. glut.h, glut32.lib, glut32.dll 파일을 확보
3. 아래의 위치에 복사
glut.h [compiler] /include/gl/
예 : C:\Program Files\Microsoft Visual Studio\VC98\Include\GL\glut.h
glut32.lib [compiler] /lib/
예 : C:\Program Files\Microsoft Visual Studio\VC98\Lib/glut32.lib
glut32.dll [system]
예 : C:\Windows\system32\glut32.dll
4. MFC로 새 프로젝트(SDI) 생성
예 : OpenGLMFC(프로젝트 이름)
5. project setting -> Link -> object/modules에 다음 라이브러리 추가
opengl32.lib glu32.lib glut32.lib glaux.lib 추가
6. MFC의 stdafx.h에 glut include
예 : #include <gl\glut.h>
#include <gl\glu.h> //VC 기본 제공
#include <gl\gl.h> //VC 기본 제공
#include <gl\glaux.h> //VC 기본 제공
7. 기본 설치 클래스
ClassView -> COpenGLMFCView에 추가 : Add Windows Message Handler
WM_CREATE (for OnCreate)
WM_DESTROY (for OnDestroy)
WM_SIZE (for OnSize)
예 : OpenGLMFCView.h 에서 확인
// Generated message map functions
protected:
//{{AFX_MSG(COpenGLMFCView)
afx_msg int OnCreate(LPCREATESTRUCT lpCreateStruct);
afx_msg void OnDestroy();
afx_msg void OnSize(UINT nType, int cx, int cy);
//}}AFX_MSG
DECLARE_MESSAGE_MAP()
예 : OpenGLMFCView.cpp 에서 확인
BEGIN_MESSAGE_MAP(COpenGLMFCView, CView)
//{{AFX_MSG_MAP(COpenGLMFCView)
ON_WM_CREATE()
ON_WM_DESTROY()
ON_WM_SIZE()
//}}AFX_MSG_MAP
// Standard printing commands
예 : OpenGLMFCView.h 수정
// Implementation
public:
HDC m_hDC; // 기본 멤버 변수 추가
HGLRC m_hRC; // 기본 멤버 변수 추가
virtual ~COpenGLMFCView();
예 : OpenGLMFCView.cpp 수정
int COpenGLMFCView::OnCreate(LPCREATESTRUCT lpCreateStruct)
{
if (CView::OnCreate(lpCreateStruct) == -1)
return -1;
// TODO: Add your specialized creation code here
int nPixelFormat;
m_hDC = ::GetDC(m_hWnd);
static PIXELFORMATDESCRIPTOR pfd =
{
sizeof(PIXELFORMATDESCRIPTOR),
1,
PFD_DRAW_TO_WINDOW |
PFD_SUPPORT_OPENGL |
PFD_DOUBLEBUFFER,
PFD_TYPE_RGBA,
24,
0,0,0,0,0,0,
0,0,
0,0,0,0,0,
32,
0,
0,
PFD_MAIN_PLANE,
0,
0,0,0
};
nPixelFormat = ChoosePixelFormat(m_hDC, &pfd);
VERIFY(SetPixelFormat(m_hDC, nPixelFormat, &pfd));
m_hRC = wglCreateContext(m_hDC);
return 0;
}
void COpenGLMFCView::OnDestroy()
{
wglDeleteContext(m_hRC);
::ReleaseDC(m_hWnd, m_hDC);
CView::OnDestroy();
// TODO: Add your message handler code here
}
void COpenGLMFCView::OnSize(UINT nType, int cx, int cy)
{
CView::OnSize(nType, cx, cy);
// TODO: Add your message handler code here
VERIFY(wglMakeCurrent(m_hDC, m_hRC));
GLdouble aspect;
if(cy == 0) aspect = (GLdouble) cx;
else aspect = (GLdouble) cx / (GLdouble) cy;
glViewport(0, 0, cx, cy);
glMatrixMode(GL_PROJECTION);
glLoadIdentity();
gluPerspective(60.0f, aspect, 1.0f, 10000.0f);
glMatrixMode(GL_MODELVIEW);
glLoadIdentity();
VERIFY(wglMakeCurrent(NULL, NULL));
}
void COpenGLMFCView::OnDraw(CDC* pDC)
{
CMFCGloveDoc* pDoc = GetDocument();
ASSERT_VALID(pDoc);
// TODO: add draw code for native data here
wglMakeCurrent(m_hDC, m_hRC);
SwapBuffers(m_hDC);
wglMakeCurrent(m_hDC, NULL);
}
8. 간단한 사각형 그리기 Test
예 : OpenGLMFCView.h 수정
// Implementation
public:
void GLRenderScene(); // 함수 추가
HDC m_hDC;
HGLRC m_hRC;
virtual ~COpenGLMFCView();
예 : OpenGLMFCView.cpp 수정
void COpenGLMFCView::OnDraw(CDC* pDC)
{
CMFCGloveDoc* pDoc = GetDocument();
ASSERT_VALID(pDoc);
// TODO: add draw code for native data here
wglMakeCurrent(m_hDC, m_hRC);
GLRenderScene();
SwapBuffers(m_hDC);
wglMakeCurrent(m_hDC, NULL);
}
void COpenGLMFCView::GLRenderScene() // 실제 그림을 그리는 부분
{
glLoadIdentity();
glClearColor(1.0f, 1.0f, 1.0f, 0.0f);
glClear(GL_COLOR_BUFFER_BIT | GL_DEPTH_BUFFER_BIT);
glColor3f(1.0f, 0.0f, 0.0f);
glEnable(GL_DEPTH_TEST);
glColorMaterial(GL_FRONT, GL_AMBIENT_AND_DIFFUSE);
gluLookAt(0.0f, 0.0f, 1000.0f, 0.0f, 10.0f, 0.0f, 0.0f, 1.0f, 0.0f);
// To draw meshes or object or somethin you want, Just code here
//---------------------
glBegin(GL_QUADS);
glVertex3f(-50, -50, 0);
glVertex3f(50, -50, 0);
glVertex3f(50, 50, 0);
glVertex3f(-50, 50, 0);
glEnd();
//-----------------------
glFlush();
}
[출처] OpenGL 설치 방법(MFC)|작성자 잔소리
=================================
=================================
=================================
이번시간에 할 작업은
MFC와 OpenGL을 연동시키는 작업입니다.
앞으로 사용할 예제는 동일한 FrameWork로 시작할 테니
따라하신 후 따로 저장해 두세요.
몇가지 변수와 함수를 만들게 될텐데
지금은 이해가 안가시더라도
순서대로 따라서 해주시면 됩니다.
자세한 설명은 다음번에 포스팅하도록 하곘습니다.
Step 1. MFC 프로젝트 만들기
먼저 프로젝트를 새로 만듭니다.

MFC 선택 - MFC 응용 프로그램 선택!
프로젝트 이름 입력 하시고 확인!
저는 OpenGL로 설정하였습니다.
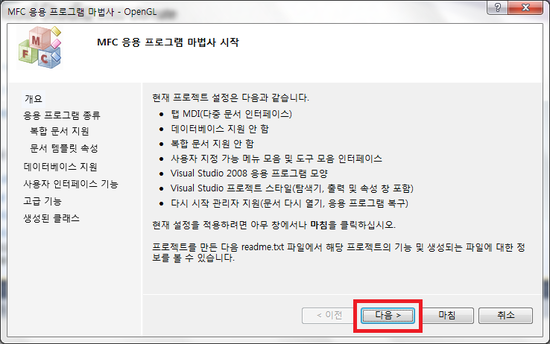
다음 클릭!

단일 문서 설정!
MFC 표준 설정!
마침 꾹!
이러면 프로젝트가 생성됩니다.
다음 하실 작업은
Step 2. OpenGL Setting
지난 포스팅에서 추가한 OpenGL 파일들을 설정해줘야 합니다.
아직 OpenGL 파일을 설치 안했다면
이전 포스팅을 먼저 확인해 주세요
http://blog.naver.com/inocent_xx/80176244033
프로젝트에 OpenGL 관련 .h 파일을 include 시키고,
.lib 파일을 링크 시켜야 합니다.

stdafx.h 파일에 다음과 같이 8줄을 추가 하여 줍니다.
#include <gl\GL.h>
#include <gl\GLU.h>
#include <gl\GLAUX.H>
#include <gl\GLUT.H>
#pragma comment(lib, "opengl32.lib")
#pragma comment(lib, "glaux.lib")
#pragma comment(lib, "glu32.lib")
#pragma comment(lib, "glut32.lib")
그 다음은

OpenGLView.h 파일에 다음과 같이 2줄을 추가 하여 줍니다.
프로젝트 생성시 지정한 프로젝트 이름이 aa였다면
aaView.h 파일에 추가 시켜 주시면 됩니다. ㅎ
HDC m_hDC; // GDI Device Context
HGLRC m_hglRC; // Rendering Context
그 다음엔 view class에 BOOL SetPixelformat(HDC hdc) 멤버 함수를 추가 해줍니다.
BOOLSetPixelformat(HDC hdc) {
    int pixelformat;
    PIXELFORMATDESCRIPTOR pfd = {
        sizeof(PIXELFORMATDESCRIPTOR),
        1, // default version
        PFD_DRAW_TO_WINDOW | // support window
        PFD_SUPPORT_OPENGL | // support OpenGL
        PFD_GENERIC_FORMAT | PFD_DOUBLEBUFFER, // double buffered
        PFD_TYPE_RGBA, // RGBA type
        32, // 32-bit color depth
        0,
        0,
        0,
        0,
        0,
        0, // color bits ignored
        8, // no alpha buffer
        0, // shift bit ignored
        8, // no accumulation buffer
        0,
        0,
        0,
        0, // accum bitsignored
        16, // 16-bit z-buffer
        0, // no stencil buffer
        0, // no auxiliary buffer
        PFD_MAIN_PLANE, // main layer
        0, // reserved
        0,
        0,
        0 // layer masksignored
    };
    if ((pixelformat = ChoosePixelFormat(hdc, & pfd)) == FALSE) {
        MessageBox(“ChoosePixelFormat failed”, “Error”, MB_OK);
        return FALSE;
    }
    if (SetPixelFormat(hdc, pixelformat, & pfd) == FALSE) {
        MessageBox(“SetPixelFormatfailed”, “Error”, MB_OK);
    }
    return TRUE;
}
그 다음엔 onCreate 메시지 핸들러를 생성하고 아래 코드를 추가해 줍니다.{m_hDC = GetDC() -> m_hDC;
    if (!SetPixelformat(m_hDC))
        return –1;

    // create rendering contextand make it current
    m_hglRC = wglCreateContext(m_hDC);
    wglMakeCurrent(m_hDC, m_hglRC);
}
OnDestroy 메시지 핸들러 생성 후 아래 코드를 추가해 줍니다.{
    // deselect rendering context and delete it
    wglMakeCurrent(m_hDC, NULL);
    wglDeleteContext(m_hglRC);
}
Step 3. OpenGL Rendering을 위한 기본 함수 만들기
초기화를 위한 함수를 추가하고 Oncreate에서 호출 한다.
void InitGL (void)
{
glClearColor( 0.f, 0.f, 0.f, 0.5f);
glClearDepth(1.f);
glEnable(GL_DEPTH_TEST);
glDepthFunc(GL_LEQUAL);
glHint(GL_PERSPECTIVE_CORRECTION_HINT, GL_NICEST);
}
영역 설정을 위해 OnSize 메시지 핸들러를 만들고 아래 함수를 호출한다.
void ReSizeGLScene (GLsizei width, GLsizei height)
{
if (height == 0 )
height = 1;
// reset the viewport to new dimentions
glViewport( 0, 0, width, height);
glMatrixMode( GL_PROJECTION);
glLoadIdentity( );
// calculate aspect ratio of the window
gluPerspective (45.f, (GLfloat)width/height, 0.1f, 1000.f );
//set modelview matrix
glMatrixMode(GL_MODELVIEW);
glLoadIdentity( );
}
랜더링 하는 함수로 실제 그림을 그리는 함수를 추가한다.
void DrawGLScene (void)
{
// clear screen and depth buffer
glClear(GL_COLOR_BUFFER_BIT | GL_DEPTH_BUFFER_BIT);
glLoadIdentity( );
// camera view configuration
gluLookAt( 0.f, 0.f, 3.f, 0.f, 0.f, 0.f, 0.f, 1.f, 0.f );
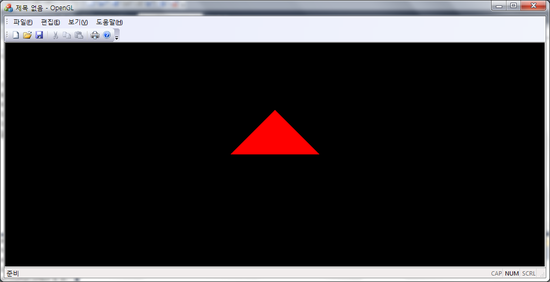
// draw
glColor3f( 1.f, 0.f, 0.f );
glBegin(GL_TRIANGLES);
glVertex3f( 0.5f, 0.f, 0.f );
glVertex3f( 0.f, 0.5f, 0.f );
glVertex3f( -0.5f, 0.f, 0.f );
glEnd();
// swap buffer
SwapBuffers( m_hDC );
}
이제 컴파일하고 실행해보시면 다음과 같은 화면이 나오게 됩니다.

포스팅 하다보니 느끼는건데,,
MFC 사전 지식이 좀 필요 하네요 ㅜㅜ
오늘은 시간이 없어서,,
이정도로만 설명하고
아예 소스 파일을 첨부해놓도록 하겠습니다.
위에 함수를 추가하는 과정은
제가 좀더 쉽게 하실 수 있도록
스샷과 함께
조만간 수정해 놓도록 하겠습니다. ㅎ
OpenGL Frame Work 만들기
[출처] OpenGL Basic FrameWork 만들기(MFC), 간단한 삼각형 그리기|작성자 이피스
=================================
=================================
=================================
출처 http://webnautes.tistory.com/1108
이번 포스팅에서는 윈도우 환경에서 OpenGL 프로그래밍을 하기 위해 필요한 윈도우 및 OpenGL context 생성, 사용자 입력 처리를 위해 MFC를 이용하는 방법을 설명합니다. OpenGL에는 크로스플랫폼 지원을 위해 위에서 언급한 것들에 대한 함수를 구현하기 위한 내용이 없기 때문입니다. 따라서 사용하고자 하는 플랫폼을 지원하는 라이브러리를 이용하여 작성해야 합니다.
주로 아래 사이트를 참고하였고.. 부분적으로 참고한 사이트들은 코드에 명시해놓았습니다. 본 포스팅에선 우선 OpenGL 2.1 버전 기반 코드를 위한 것부터 해보았습니다.
http://www.cs.uregina.ca/Links/class-info/315/WWW/Lab1/MFC/
OpenGL 3.x 버전 코드를 사용하시려면 이번 포스팅을 다 진행한 후, 다음 포스팅을 참고하세요..
[그래픽스&컴퓨터비전/OpenGL & Augmented Reality] - OpenGL과 MFC 연동( glew 사용, dialog 기반, opengl 3.x 코드용)
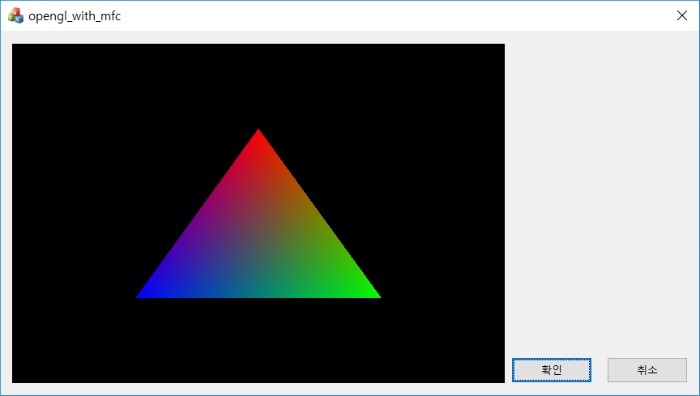
실행결과입니다. MFC 다이얼로그 위에 올려둔 Picture control에 OpenGL의 렌더링 결과가 보이게 됩니다. 타이머를 사용하여 삼각형이 회전하는 애니메이션 효과를 주었습니다.

이제 다이얼로그 프로젝트 생성부터 예제 코드 실행까지 단계별로 설명하겠습니다.
1. Visual Studio 2015에서 다이얼로그 기반의 프로젝트를 생성합니다.


2. glew 라이브러리를 프로젝트 폴더로 복사해줍니다.
https://sourceforge.net/projects/glew/files/glew/에서 현재 최신 버전인 glew-2.0.0-win32.zip을 다운로드 받아 압축을 풀어 줍니다.
이후 중복되는 것을 피하기 위해서 경로를 일부만 적었습니다. 예를 들어 프로젝트관련 경로를 아래처럼 다 표시하는 대신에
C:\Users\webnautes-NoteBook\Documents\VC\opengl_with_mfc\opengl_with_mfc
사용자마다 달라질 수 있는 C:\Users\webnautes-NoteBook\Documents\VC\는 생락하고 프로젝트 폴더 이후부터 경로를 적었습니다.
opengl_with_mfc\opengl_with_mfc
glew 압축을 푼 폴더 glew-2.0.0-win32\glew-2.0.0\bin\Release\x64 경로에 있는 glew32.dll파일을 프로젝트 폴더 opengl_with_mfc\x64\Debug 경로로 복사해줍니다.
프로젝트 폴더 opengl_with_mfc\opengl_with_mfc 경로에 lib폴더를 생성한 후, glew 압축을 푼 폴더 glew-2.0.0-win32\glew-2.0.0\lib\Release\x64 경로에 있는 glew32.lib과 glews32.lib 파일을 복사하여 프로젝트 폴더 opengl_with_mfc\opengl_with_mfc\lib 경로에 붙여넣어 줍니다.
glew 압축을 푼 폴더 glew-2.0.0-win32\glew-2.0.0 경로에 있는 include 폴더를 복사하여 프로젝트 폴더 opengl_with_mfc\opengl_with_mfc 경로에 붙여넣어 줍니다.
3. freeglut 라이브러리를 프로젝트 폴더로 복사해줍니다.
http://www.transmissionzero.co.uk/software/freeglut-devel/에서 freeglut MSVC Package를 다운로드 받아 압축을 풀어줍니다. 현재 버전은 3.0.0입니다.
freeglut 압축을 푼 폴더 freeglut-MSVC-3.0.0-2.mp\freeglut\bin\x64 경로에 있는 freeglut.dll 파일을 복사하여 프로젝트 폴더 opengl_with_mfc\x64\Debug 경로에 붙여넣어 줍니다.
freeglut 압축을 푼 폴더 freeglut-MSVC-3.0.0-2.mp\freeglut\lib\x64 경로에 있는 freeglut.lib 파일을 복사하여 프로젝트 폴더 opengl_with_mfc\opengl_with_mfc\lib경로에 붙여넣어 줍니다.
freeglut 압축을 푼 폴더 freeglut-MSVC-3.0.0-2.mp\freeglut 경로에 있는 include 폴더를 복사하여 프로젝트 폴더 opengl_with_mfc\opengl_with_mfc 경로에 붙여넣어 줍니다
4. 프로젝트 설정
glew와 freeglut 라이브러리 관련 파일들을 프로젝트 폴더로 복사하면 다음과 같은 구조가 됩니다.
opengl_with_mfc(프로젝트 폴더)
│  opengl_with_mfc.sln
│  opengl_with_mfc.VC.db
│
├─opengl_with_mfc
│  │  opengl_with_mfc.aps
│  │  opengl_with_mfc.cpp
│  │  opengl_with_mfc.h
│  │  opengl_with_mfc.rc
│  │  opengl_with_mfc.vcxproj
│  │  opengl_with_mfc.vcxproj.filters
│  │  opengl_with_mfcDlg.cpp
│  │  opengl_with_mfcDlg.h
│  │  ReadMe.txt
│  │  Resource.h
│  │  stdafx.cpp
│  │  stdafx.h
│  │  targetver.h
│  │
│  ├─include
│  │  └─GL
│  │          eglew.h
│  │          freeglut.h
│  │          freeglut_ext.h
│  │          freeglut_std.h
│  │          glew.h
│  │          glut.h
│  │          glxew.h
│  │          wglew.h
│  │
│  ├─lib
│  │      freeglut.lib
│  │      glew32.lib
│  │      glew32s.lib
│  │
│  └─res
│          opengl_with_mfc.ico
│          opengl_with_mfc.rc2
│
└─x64
    └─Debug
            freeglut.dll
            glew32.dll
이제 Visual Studio의 상단에 있는 콤보박스의 x86을 x64로 변경합니다.

5. Piciture 컨트롤러를 추가하고 ID를 IDC_PICTURE로 변경해주었습니다. 그리고나서 Picture 컨트롤러에 변수로 m_picture를 추가해줍니다.

6. opengl_with_mfcDlg.h파일에 프로젝트에서 사용할 헤더파일과 라이브러리 파일를 지정해줍니다.
// opengl_with_mfcDlg.h : 헤더 파일
//

#pragma once

//상대경로로 헤더파일을 지정합니다.
#include ".\include\GL\glew.h"
#include ".\include\GL\wglew.h"
#include ".\include\GL\freeglut.h"
#include ".\include\GL\freeglut_ext.h"

//사용할 라이브러리를 지정해줍니다.
#pragma comment(lib, "freeglut.lib")
#pragma comment(lib, "glew32.lib")
7. opengl_with_mfcDlg.h파일 끝에 멤버함수 및 멤버 변수를 추가해줍니다. (붉은색 줄 부분)
클래스 마법사에서 메시지 WM_DESTROY와 WM_TIMER를 위한 처리기를 추가해주면 OnDestroy함수와 OnTimer함수가 추가됩니다.(파란색 부분)
 // 생성된 메시지 맵 함수
    virtual BOOL OnInitDialog();
    afx_msg void OnSysCommand(UINT nID, LPARAM lParam);
    afx_msg void OnPaint();
    afx_msg HCURSOR OnQueryDragIcon();
    DECLARE_MESSAGE_MAP()

protected:
    // You will add the following stuff!!!

    virtual BOOL GetOldStyleRenderingContext(void);
    virtual BOOL SetupPixelFormat(void);


private:
    //OpenGL Setup
    BOOL GetRenderingContext();
    //Rendering Context and Device Context Pointers
    HGLRC     m_hRC;
    CDC*      m_pDC;

    float angle;
public:
    CStatic m_picture;
    afx_msg void OnDestroy();
    afx_msg void OnTimer(UINT_PTR nIDEvent);
};

Colored by Color Scripter
cs
8. opengl_with_mfcDlg.cpp 파일입니다. 붉은색 부분들이 추가된 코드들입니다.
// opengl_with_mfcDlg.cpp : 구현 파일
//

#include "stdafx.h"
#include "opengl_with_mfc.h"
#include "opengl_with_mfcDlg.h"
#include "afxdialogex.h"

#ifdef _DEBUG
#define new DEBUG_NEW
#endif


// 응용 프로그램 정보에 사용되는 CAboutDlg 대화 상자입니다.

class CAboutDlg : public CDialogEx
{
public:
    CAboutDlg();

// 대화 상자 데이터입니다.
#ifdef AFX_DESIGN_TIME
    enum { IDD = IDD_ABOUTBOX };
#endif

    protected:
    virtual void DoDataExchange(CDataExchange* pDX);    // DDX/DDV 지원입니다.

// 구현입니다.
protected:
    DECLARE_MESSAGE_MAP()
};

CAboutDlg::CAboutDlg() : CDialogEx(IDD_ABOUTBOX)
{
}

void CAboutDlg::DoDataExchange(CDataExchange* pDX)
{
    CDialogEx::DoDataExchange(pDX);
}

BEGIN_MESSAGE_MAP(CAboutDlg, CDialogEx)
END_MESSAGE_MAP()


// Copengl_with_mfcDlg 대화 상자


Copengl_with_mfcDlg::Copengl_with_mfcDlg(CWnd* pParent /*=NULL*/)
    : CDialogEx(IDD_OPENGL_WITH_MFC_DIALOG, pParent)
{
    m_hIcon = AfxGetApp()->LoadIcon(IDR_MAINFRAME);
}

void Copengl_with_mfcDlg::DoDataExchange(CDataExchange* pDX)
{
    CDialogEx::DoDataExchange(pDX);
    DDX_Control(pDX, IDC_PICTURE, m_picture);
}

BEGIN_MESSAGE_MAP(Copengl_with_mfcDlg, CDialogEx)
    ON_WM_SYSCOMMAND()
    ON_WM_PAINT()
    ON_WM_QUERYDRAGICON()
    ON_WM_DESTROY()
    ON_WM_TIMER()
END_MESSAGE_MAP()


// Copengl_with_mfcDlg 메시지 처리기

BOOL Copengl_with_mfcDlg::OnInitDialog()
{
    CDialogEx::OnInitDialog();

    // 시스템 메뉴에 "정보..." 메뉴 항목을 추가합니다.

    // IDM_ABOUTBOX는 시스템 명령 범위에 있어야 합니다.
    ASSERT((IDM_ABOUTBOX & 0xFFF0) == IDM_ABOUTBOX);
    ASSERT(IDM_ABOUTBOX < 0xF000);

    CMenu* pSysMenu = GetSystemMenu(FALSE);
    if (pSysMenu != NULL)
    {
        BOOL bNameValid;
        CString strAboutMenu;
        bNameValid = strAboutMenu.LoadString(IDS_ABOUTBOX);
        ASSERT(bNameValid);
        if (!strAboutMenu.IsEmpty())
        {
            pSysMenu->AppendMenu(MF_SEPARATOR);
            pSysMenu->AppendMenu(MF_STRING, IDM_ABOUTBOX, strAboutMenu);
        }
    }

    // 이 대화 상자의 아이콘을 설정합니다.  응용 프로그램의 주 창이 대화 상자가 아닐 경우에는
    //  프레임워크가 이 작업을 자동으로 수행합니다.
    SetIcon(m_hIcon, TRUE);            // 큰 아이콘을 설정합니다.
    SetIcon(m_hIcon, FALSE);        // 작은 아이콘을 설정합니다.

    // TODO: 여기에 추가 초기화 작업을 추가합니다.

    //OpenGL context 생성
    if (!GetRenderingContext())
    {
        AfxMessageBox(CString("OpenGL 초기화중 에러가 발생하여 프로그램을 실행할 수 없습니다."));
        return -1;
    }

    angle = 0;
    SetTimer(1000, 30, NULL);

    return TRUE;  // 포커스를 컨트롤에 설정하지 않으면 TRUE를 반환합니다.
}

void Copengl_with_mfcDlg::OnSysCommand(UINT nID, LPARAM lParam)
{
    if ((nID & 0xFFF0) == IDM_ABOUTBOX)
    {
        CAboutDlg dlgAbout;
        dlgAbout.DoModal();
    }
    else
    {
        CDialogEx::OnSysCommand(nID, lParam);
    }
}

// 대화 상자에 최소화 단추를 추가할 경우 아이콘을 그리려면
//  아래 코드가 필요합니다.  문서/뷰 모델을 사용하는 MFC 응용 프로그램의 경우에는
//  프레임워크에서 이 작업을 자동으로 수행합니다.

void Copengl_with_mfcDlg::OnPaint()
{
    if (IsIconic())
    {
        CPaintDC dc(this); // 그리기를 위한 디바이스 컨텍스트입니다.

        SendMessage(WM_ICONERASEBKGND, reinterpret_cast<WPARAM>(dc.GetSafeHdc()), 0);

        // 클라이언트 사각형에서 아이콘을 가운데에 맞춥니다.
        int cxIcon = GetSystemMetrics(SM_CXICON);
        int cyIcon = GetSystemMetrics(SM_CYICON);
        CRect rect;
        GetClientRect(&rect);
        int x = (rect.Width() - cxIcon + 1) / 2;
        int y = (rect.Height() - cyIcon + 1) / 2;

        // 아이콘을 그립니다.
        dc.DrawIcon(x, y, m_hIcon);
    }
    else
    {
        CDialogEx::OnPaint();


    }
}

// 사용자가 최소화된 창을 끄는 동안에 커서가 표시되도록 시스템에서
//  이 함수를 호출합니다.
HCURSOR Copengl_with_mfcDlg::OnQueryDragIcon()
{
    return static_cast<HCURSOR>(m_hIcon);
}


void Copengl_with_mfcDlg::OnDestroy()
{
    CDialogEx::OnDestroy();

    // TODO: 여기에 메시지 처리기 코드를 추가합니다.
    if (FALSE == ::wglDeleteContext(m_hRC))
    {
        AfxMessageBox(CString("wglDeleteContext failed"));
    }
}


BOOL Copengl_with_mfcDlg::GetRenderingContext()
{
    //픽처 컨트롤에만 그리도록 DC 생성
    //참고 https://goo.gl/CK36zE
    CWnd* pImage = GetDlgItem(IDC_PICTURE);
    CRect rc;
    pImage->GetWindowRect(rc);
    m_pDC = pImage->GetDC();


    if (NULL == m_pDC)
    {
        AfxMessageBox(CString("Unable to get a DC"));
        return FALSE;
    }


    if (!GetOldStyleRenderingContext())
    {
        return TRUE;
    }

    if (GLEW_OK != glewInit())
    {
        AfxMessageBox(CString("GLEW could not be initialized!"));
        return FALSE;
    }


    //참고 http://gamedev.stackexchange.com/a/30443
    GLint attribs[] =
    {
        // Here we ask for OpenGL 2.1
        WGL_CONTEXT_MAJOR_VERSION_ARB, 2,
        WGL_CONTEXT_MINOR_VERSION_ARB, 1,
        // Uncomment this for forward compatibility mode
        //WGL_CONTEXT_FLAGS_ARB, WGL_CONTEXT_FORWARD_COMPATIBLE_BIT_ARB,
        // Uncomment this for Compatibility profile
        //WGL_CONTEXT_PROFILE_MASK_ARB, WGL_CONTEXT_COMPATIBILITY_PROFILE_BIT_ARB,
        // We are using Core profile here
        WGL_CONTEXT_PROFILE_MASK_ARB, WGL_CONTEXT_CORE_PROFILE_BIT_ARB,
        0
    };


    HGLRC CompHRC = wglCreateContextAttribsARB(m_pDC->GetSafeHdc(), 0, attribs);
    if (CompHRC && wglMakeCurrent(m_pDC->GetSafeHdc(), CompHRC))
        m_hRC = CompHRC;

    return TRUE;
}

BOOL Copengl_with_mfcDlg::GetOldStyleRenderingContext()
{
    //A generic pixel format descriptor. This will be replaced with a more
    //specific and modern one later, so don't worry about it too much.
    static PIXELFORMATDESCRIPTOR pfd =
    {
        sizeof(PIXELFORMATDESCRIPTOR),
        1,
        PFD_DRAW_TO_WINDOW |            // support window
        PFD_SUPPORT_OPENGL |            // support OpenGL
        PFD_DOUBLEBUFFER,               // double buffered
        PFD_TYPE_RGBA,                  // RGBA type
        32,                             // 32-bit color depth
        0, 0, 0, 0, 0, 0,               // color bits ignored
        0,                              // no alpha buffer
        0,                              // shift bit ignored
        0,                              // no accumulation buffer
        0, 0, 0, 0,                     // accum bits ignored
        24,                        // 24-bit z-buffer
        0,                              // no stencil buffer
        0,                              // no auxiliary buffer
        PFD_MAIN_PLANE,                 // main layer
        0,                              // reserved
        0, 0, 0                         // layer masks ignored
    };

    // Get the id number for the best match supported by the hardware device context
    // to what is described in pfd
    int pixelFormat = ChoosePixelFormat(m_pDC->GetSafeHdc(), &pfd);

    //If there's no match, report an error
    if (0 == pixelFormat)
    {
        AfxMessageBox(CString("ChoosePixelFormat failed"));
        return FALSE;
    }

    //If there is an acceptable match, set it as the current
    if (FALSE == SetPixelFormat(m_pDC->GetSafeHdc(), pixelFormat, &pfd))
    {
        AfxMessageBox(CString("SetPixelFormat failed"));
        return FALSE;
    }

    //Create a context with this pixel format
    if (0 == (m_hRC = wglCreateContext(m_pDC->GetSafeHdc())))
    {
        AfxMessageBox(CString("wglCreateContext failed"));
        return FALSE;
    }

    //Make it current.
    if (FALSE == wglMakeCurrent(m_pDC->GetSafeHdc(), m_hRC))
    {
        AfxMessageBox(CString("wglMakeCurrent failed"));
        return FALSE;
    }
    return TRUE;
}

BOOL Copengl_with_mfcDlg::SetupPixelFormat()
{
    //This is a modern pixel format attribute list.
    //It has an extensible structure. Just add in more argument pairs
    //befroe the null to request more features.
    const int attribList[] =
    {
        WGL_DRAW_TO_WINDOW_ARB, GL_TRUE,
        WGL_SUPPORT_OPENGL_ARB, GL_TRUE,
        WGL_ACCELERATION_ARB,   WGL_FULL_ACCELERATION_ARB,
        WGL_DOUBLE_BUFFER_ARB,  GL_TRUE,
        WGL_PIXEL_TYPE_ARB,     WGL_TYPE_RGBA_ARB,
        WGL_COLOR_BITS_ARB,     32,
        WGL_DEPTH_BITS_ARB,     24,
        WGL_STENCIL_BITS_ARB,   8,
        0, 0  //End
    };


    unsigned int numFormats;
    int pixelFormat;
    PIXELFORMATDESCRIPTOR pfd;

    //Select a pixel format number
    wglChoosePixelFormatARB(m_pDC->GetSafeHdc(), attribList, NULL, 1, &pixelFormat, &numFormats);

    //Optional: Get the pixel format's description. We must provide a
    //description to SetPixelFormat(), but its contents mean little.
    //According to MSDN:
    //  The system's metafile component uses this structure to record the logical
    //  pixel format specification. The structure has no other effect upon the
    //  behavior of the SetPixelFormat function.
    //DescribePixelFormat(m_pDC->GetSafeHdc(), pixelFormat, sizeof(PIXELFORMATDESCRIPTOR), &pfd);

    //Set it as the current
    if (FALSE == SetPixelFormat(m_pDC->GetSafeHdc(), pixelFormat, &pfd))
    {
        AfxMessageBox(CString("SelectPixelFormat failed"));
        return FALSE;
    }

    return TRUE;
}


void Copengl_with_mfcDlg::OnTimer(UINT_PTR nIDEvent)
{
    CDialogEx::OnTimer(nIDEvent);

    glClearColor(0.0f, 0.0f, 0.0f, 1.0f);
    glClear(GL_COLOR_BUFFER_BIT);
    glLoadIdentity();

    //z축을 중심으로 설정된 angle로 회전한다.
    glRotatef(angle, 0.0f, 0.0f, 1.0f);

    //중앙이 원점에 오도록 삼각형을 그린다.
    glBegin(GL_TRIANGLES); //3점이 하나의 삼각형을 구성한다. 반시계 방향으로 3점의 vertex를 지정해줘야 한다.
    glColor3f(1.0f, 0.0f, 0.0f); //빨간색 지정
    glVertex3f(-0.5f, -0.5f, 0.0f);    // 왼쪽 아래 vertex
    glColor3f(0.0f, 1.0f, 0.0f); //녹색 지정
    glVertex3f(0.5f, -0.5f, 0.0f);    // 오른쪽 아래 vertex
    glColor3f(0.0f, 0.0f, 1.0f); //파란색 지정
    glVertex3f(0.0f, 0.5f, 0.0f);    // 위쪽 vertex
    glEnd();

    //삼각형 회전각 증가
    angle += 0.5f;

    //화면 업데이트
    SwapBuffers(m_pDC->GetSafeHdc());
}
=================================
=================================
=================================
출처: http://webnautes.tistory.com/1109
이전 포스팅에선 OpenGL 2.x 버전의 코드를 MFC에서 사용하기 위한 내용을 다루었습니다.
이번 포스팅에서는 이전 포스팅 내용대로 진행한 후, OpenGL 3.x 버전의 코드를 MFC에서 사용하기 위해 수정해야 할 부분들만 다룹니다.
아직 OpenGL 3.x 버전은 공부중이라 삼각형이 회전하는 부분은 아직 구현이 안되있습니다.
1. opengl_with_mfcDlg.h 파일에서 freeglut 관련 줄들을 주석처리하고 OpenGL32.lib를 사용하도록 추가해줍니다.
// opengl_with_mfcDlg.h : 헤더 파일
//

#pragma once

//상대경로로 헤더파일을 지정합니다.
#include ".\include\GL\glew.h"
#include ".\include\GL\wglew.h"
//#include ".\include\GL\freeglut.h"
//#include ".\include\GL\freeglut_ext.h"

//사용할 라이브러리를 지정해줍니다.
//#pragma comment(lib, "freeglut.lib")
#pragma comment(lib, "OpenGL32.lib")
#pragma comment(lib, "glew32.lib")
2. opengl_with_mfcDlg.h 파일에 다음 붉은색 세 줄을 추가합니다. angle 변수는 더 이상 사용하지 않기에 제거되었습니다.
// 생성된 메시지 맵 함수
    virtual BOOL OnInitDialog();
    afx_msg void OnSysCommand(UINT nID, LPARAM lParam);
    afx_msg void OnPaint();
    afx_msg HCURSOR OnQueryDragIcon();
    DECLARE_MESSAGE_MAP()

protected:
    // You will add the following stuff!!!

    virtual BOOL GetOldStyleRenderingContext(void);
    virtual BOOL SetupPixelFormat(void);


private:
    //OpenGL Setup
    BOOL GetRenderingContext();
    //Rendering Context and Device Context Pointers
    HGLRC     m_hRC;
    CDC*      m_pDC;

    GLuint vao;
    void defineVAO(GLuint &vao, GLuint &shaderProgram);
    GLuint create_program();
public:
    CStatic m_picture;
    afx_msg void OnDestroy();
    afx_msg void OnTimer(UINT_PTR nIDEvent);
};
3. OnInitDialog 함수에 다음 붉은색 줄들을 추가합니다.
//OpenGL context 생성
    if (!GetRenderingContext())
    {
        AfxMessageBox(CString("OpenGL 초기화중 에러가 발생하여 프로그램을 실행할 수 없습니다."));
        return -1;
    }

    GLuint shaderProgram;
    defineVAO(vao, shaderProgram);

    glUseProgram(shaderProgram);
    glBindVertexArray(vao);

    SetTimer(1000, 30, NULL);

    return TRUE;  // 포커스를 컨트롤에 설정하지 않으면 TRUE를 반환합니다.
}
4. OnDestroy 함수에 다음 붉은색 줄을 추가합니다.
void Copengl_with_mfcDlg::OnDestroy()
{
    CDialogEx::OnDestroy();

    // TODO: 여기에 메시지 처리기 코드를 추가합니다.
    glDeleteVertexArrays(1, &vao);

    if (FALSE == ::wglDeleteContext(m_hRC))
    {
        AfxMessageBox(CString("wglDeleteContext failed"));
    }

}
5. GetRenderingContext함수에 다음 붉은색 줄들을 추가합니다.
BOOL Copengl_with_mfcDlg::GetRenderingContext()
{
    //픽처 컨트롤에만 그리도록 DC 생성
    //참고 https://goo.gl/CK36zE
    CWnd* pImage = GetDlgItem(IDC_PICTURE);
    CRect rc;
    pImage->GetWindowRect(rc);
    m_pDC = pImage->GetDC();


    if (NULL == m_pDC)
    {
        AfxMessageBox(CString("Unable to get a DC"));
        return FALSE;
    }


    if (!GetOldStyleRenderingContext())
    {
        return TRUE;
    }


    //Get access to modern OpenGL functionality from this old style context.
    glewExperimental = GL_TRUE;
    if (GLEW_OK != glewInit())
    {
        AfxMessageBox(CString("GLEW could not be initialized!"));
        return FALSE;
    }


    //Get a new style pixel format
    if (!SetupPixelFormat())
    {
        return FALSE;
    }


    //참고 http://gamedev.stackexchange.com/a/30443
    GLint attribs[] =
    {
        //OpenGL 3.3 사용
        WGL_CONTEXT_MAJOR_VERSION_ARB, 3,
        WGL_CONTEXT_MINOR_VERSION_ARB, 3,
        // Uncomment this for forward compatibility mode
        //WGL_CONTEXT_FLAGS_ARB, WGL_CONTEXT_FORWARD_COMPATIBLE_BIT_ARB,
        // Uncomment this for Compatibility profile
        //WGL_CONTEXT_PROFILE_MASK_ARB, WGL_CONTEXT_COMPATIBILITY_PROFILE_BIT_ARB,
        // We are using Core profile here
        WGL_CONTEXT_PROFILE_MASK_ARB, WGL_CONTEXT_CORE_PROFILE_BIT_ARB,
        0
    };


    HGLRC CompHRC = wglCreateContextAttribsARB(m_pDC->GetSafeHdc(), 0, attribs);
    if (CompHRC && wglMakeCurrent(m_pDC->GetSafeHdc(), CompHRC))
        m_hRC = CompHRC;

    return TRUE;
}
6. OnTimer 함수를 다음처럼 수정합니다.
void Copengl_with_mfcDlg::OnTimer(UINT_PTR nIDEvent)
{
    CDialogEx::OnTimer(nIDEvent);

    glClearColor(0.0f, 0.0f, 0.0f, 1.0f);
    glClear(GL_COLOR_BUFFER_BIT);


    glDrawArrays(GL_TRIANGLES, 0, 3);

    //화면 업데이트
    SwapBuffers(m_pDC->GetSafeHdc());
}
7. opengl_with_mfcDlg.cpp 파일 끝에 다음 코드를 추가해줍니다.
void Copengl_with_mfcDlg::defineVAO(GLuint &vao, GLuint &shaderProgram)
{
    glGenVertexArrays(1, &vao);
    glBindVertexArray(vao);

    float position[] = {
        0.0f,  0.5f, 0.0f, //vertex 1
        0.5f, -0.5f, 0.0f, //vertex 2
        -0.5f, -0.5f, 0.0f //vertex 3
    };

    float color[] = {
        1.0f, 0.0f, 0.0f, //vertex 1 : RED (1,0,0)
        0.0f, 1.0f, 0.0f, //vertex 2 : GREEN (0,1,0)
        0.0f, 0.0f, 1.0f  //vertex 3 : BLUE (0,0,1)
    };


    GLuint position_vbo, color_vbo;

    glGenBuffers(1, &position_vbo);
    glBindBuffer(GL_ARRAY_BUFFER, position_vbo);
    glBufferData(GL_ARRAY_BUFFER, sizeof(position), position, GL_STATIC_DRAW);

    glGenBuffers(1, &color_vbo);
    glBindBuffer(GL_ARRAY_BUFFER, color_vbo);
    glBufferData(GL_ARRAY_BUFFER, sizeof(color), color, GL_STATIC_DRAW);


    shaderProgram = create_program();

    GLint position_attribute = glGetAttribLocation(shaderProgram, "position");
    glBindBuffer(GL_ARRAY_BUFFER, position_vbo);
    glVertexAttribPointer(position_attribute, 3, GL_FLOAT, GL_FALSE, 0, 0);
    glEnableVertexAttribArray(position_attribute);

    GLint color_attribute = glGetAttribLocation(shaderProgram, "color");
    glBindBuffer(GL_ARRAY_BUFFER, color_vbo);
    glVertexAttribPointer(color_attribute, 3, GL_FLOAT, GL_FALSE, 0, 0);
    glEnableVertexAttribArray(color_attribute);

    glBindVertexArray(0);
}

GLuint Copengl_with_mfcDlg::create_program() {

    const GLchar* vertexShaderSource =
        "#version 330 core\n"
        "in vec3 position;"
        "in vec3 color;"
        "out vec3 color_from_vshader;"
        "void main()"
        "{"
        "gl_Position = vec4(position, 1.0);"
        "color_from_vshader = color;"
        "}";

    const GLchar* fragmentShaderSource =
        "#version 330 core\n"
        "in vec3 color_from_vshader;"
        "out vec4 out_color;"
        "void main()"
        "{"
        "out_color = vec4(color_from_vshader, 1.0);"
        "}";


    GLuint vertexShader = glCreateShader(GL_VERTEX_SHADER);
    glShaderSource(vertexShader, 1, &vertexShaderSource, NULL);
    glCompileShader(vertexShader);

    GLint success;
    GLchar infoLog[512];

    glGetShaderiv(vertexShader, GL_COMPILE_STATUS, &success);
    if (!success)
    {
        glGetShaderInfoLog(vertexShader, 512, NULL, infoLog);
        TRACE(CString("ERROR: vertex shader 컴파일 실패 ")+ CString(infoLog) + CString("\n"));
    }

    GLuint fragmentShader = glCreateShader(GL_FRAGMENT_SHADER);
    glShaderSource(fragmentShader, 1, &fragmentShaderSource, NULL);
    glCompileShader(fragmentShader);

    glGetShaderiv(fragmentShader, GL_COMPILE_STATUS, &success);
    if (!success)
    {
        glGetShaderInfoLog(fragmentShader, 512, NULL, infoLog);
        TRACE(CString("ERROR: fragment shader 컴파일 실패 ") + CString(infoLog) + CString("\n"));
    }


    GLuint shaderProgram = glCreateProgram();
    glAttachShader(shaderProgram, vertexShader);
    glAttachShader(shaderProgram, fragmentShader);

    glDeleteShader(vertexShader);
    glDeleteShader(fragmentShader);

    glLinkProgram(shaderProgram);


    glGetProgramiv(shaderProgram, GL_LINK_STATUS, &success);
    if (!success) {
        glGetProgramInfoLog(shaderProgram, 512, NULL, infoLog);

        TRACE(CString("ERROR: shader program 연결 실패 ") + CString(infoLog) + CString("\n"));
    }

    return shaderProgram;
}
실행결과입니다.
=================================
=================================
=================================
출처: http://blog.naver.com/shineyesmile/100044574527
◦1. Drawing Tool 기본 기능.
◦2. Drawing Tool 특징 및 구현 설명.
◦3. Drawing Tool 실행 화면.
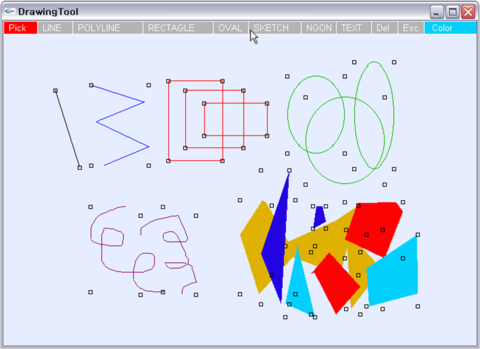
Drawing Tool 기본 기능.
◦기본 그리기 타입
(선택기능) ,(선) ,(다각선) ,(사각형) ,(타원) ,(스케치), (채움 다각형)
◦ ‘Del' :선택된 객체를 지우기.
◦ 'r‘-'t' key : RED 색상 조절 r는 빨간색 값 증가, t는 감소.
◦ 'g‘-'h' key : GREEN 색상 조절 g는 녹색 값 증가, h는 감소.
◦ 'b‘-'n' key : BLUE 색상 조절 b는 파란색 값 증가, n는 감소.
◦ 'Esc' key : 프로그램 종료.
◦프로그램 특징 및 구현 설명
◦윈도우 상단에 직접 메뉴를 그림. openGL pick selection으로 이벤트 처리. 메뉴 선택 기능 구현.
◦사용자가 너무 좁은 범위에서 그리기를 했을 경우 객체로 인정되지 않으며 그리기를 수행하지 않음. 스케치 타입은 제외.
◦다각선과 채움 다각형 타입의 그리기는 마지막에 더블 클릭으로 그리기를 완료하게 되는데, 더블 클릭은 사용자가 동일한 좌표를 연속으로 클릭했을 경우를 검사해서 처리.
◦사용자가 특정타입의 객체 그리기를 완료하지 않은 상태에서 다른 타입으로 변경 불가능.
◦현재 그리기 색상이 메뉴의 오른쪽에 작은 상자로 표시. 색상 조절 키로 변경할 경우 해당색상으로 변경되기 때문에 현재 색상이 무엇인지 알 수 있음.
◦더블 버퍼 적용.
아직 win api 나,, mfc를 잘 사용할 줄 몰라서,, openGL과 발로 짠 그림판입니다.
기본 프로그램 구조는 교수님이 주신 소스를 그대로 이용했습니다.
text기능은 다이알로그를 못띄워서 구현을 못했습니다;; 가끔,,, 프로그램이 먹통되기도
합니다. 수정하면 되는데,,귀찮아서 그냥 내비 뒀습니다. 발로짠 소스라도 필요하시다면,,
쪽지남주세요.
07.12.18
[출처] OpenGL - 간단한 그림판 구현. Drawing Tool.|작성자 태팔이
=================================
=================================
=================================
출처: http://fornangman.tistory.com/7
이번 포스트에서는 MFC 뷰에서 깜빡이는 문제를 해결해 보도록 하겠습니다.
강좌4에서 MFC에서 opengl 셋팅을 했던 소스에 추가 하시면 됩니다.
opengl자체에는 더블버퍼링 설정을 했지만 MFC 뷰에서 깜빡이는 문제가 있네요.
이는 WM_ERASEBKGND메세지 함수를 생성하시고 리턴 값을 TURE로 해주시면 간단하게 해결됩니다. 이유는 알아보고 올리도록 하겠습니다. 아시는 분은 덧글 남기시면 수정할께요.
BOOL CLearn_OpenglView::OnEraseBkgnd(CDC* pDC)
{
// TODO: 여기에 메시지 처리기 코드를 추가 및/또는 기본값을 호출합니다.
//return CView::OnEraseBkgnd(pDC);
return TRUE;
}
출처: http://fornangman.tistory.com/7 [낭만을 찾아서]
=================================
=================================
=================================
출처: http://type-r.tistory.com/92
이 내용은 http://blog.naver.com/silzon 블로그의 내용을 기반으로 구성되었다.
=======================================================================================
glut.h :: program \ Microsoft Visual Studio \ VC98 \ include \ GL 폴더 속에 넣어준다.
Lib files :: program \ Microsoft Visual Studio \ VC98 \ Lib 폴더 속에 넣어준다.
Dll files :: Windows(WINNT) \ system 폴더 속에 넣어준다.
=======================================================================================
Step 1.
Dialog Base 기본 MFC를 구성.
(항상 초기 구성후 Build를 한번 해주어 Classview에서 Class가 사라지는 것을 방지)
Step 2.
CopenGLbaseDlg에 HGLRC 타입의 변수 m_hRC 와 HDC 타입의 변수 m_hDC 변수를 생성.
Step 3.
1) 컨트롤 + w 를 눌러 클래스 위자드를 실행 시킨다.
2) Project: openGLbase, Class name: COpenGLbaseDlg, Object IDs: COpenGLBaseDlg 를 확인 한다.
3) Messages 에서 WM_SIZE 를 더블클릭(반드시 더블클릭!) 후, Edit Code 버튼을 누른다.
4) 다음 코드를 작성한다.
void COpenGLbaseDlg::OnSize(UINT nType, int cx, int cy)
{
CDialog::OnSize(nType, cx, cy);
// TODO: Add your message handler code here
VERIFY(wglMakeCurrent(m_hDC,m_hRC));
GLResize(cx,cy);
VERIFY(wglMakeCurrent(NULL,NULL));
}
Step 4.
1) GLResize() 함수 생성
2) 다음 코드를 작성한다.
void COpenGLbaseDlg::GLResize(int cx, int cy)
{
GLfloat fAspect;
if(cy==0) cy=1;
glViewport(0,0,cx,cy);
fAspect = (GLfloat)cx / (GLfloat)cy;
glMatrixMode(GL_PROJECTION);
glLoadIdentity();
gluPerspective(60.0f, fAspect, 1.0f, 10000.0f);
glMatrixMode(GL_MODELVIEW);
glLoadIdentity();
}
Step 5.
1) 컨트롤 + w 를 눌러 클래스 위자드를 실행 시킨다.
2) Project: openGLbase, Class name: COpenGLbaseDlg, Object IDs: COpenGLBaseDlg 를 확인 한다.
3) Messages 에서 WM_CREATE 를 더블클릭(반드시 더블클릭!) 후, Edit Code 버튼을 누른다.
4) 다음 코드를 작성한다.
int COpenGLbaseDlg::OnCreate(LPCREATESTRUCT lpCreateStruct)
{
if (CDialog::OnCreate(lpCreateStruct) == -1)
return -1;
// TODO: Add your specialized creation code here
int nPixelFormat;
m_hDC = ::GetDC(m_hWnd);
static PIXELFORMATDESCRIPTOR pfd =
{
sizeof(PIXELFORMATDESCRIPTOR),
1,
PFD_DRAW_TO_WINDOW|
PFD_SUPPORT_OPENGL|
PFD_DOUBLEBUFFER,
PFD_TYPE_RGBA,
24,
0,0,0,0,0,0,
0,0,
0,0,0,0,0,
32,
0,
0,
PFD_MAIN_PLANE,
0,
0,0,0
};
nPixelFormat = ChoosePixelFormat(m_hDC, &pfd);
VERIFY(SetPixelFormat(m_hDC,nPixelFormat, &pfd));
m_hRC = wglCreateContext(m_hDC);
VERIFY(wglMakeCurrent(m_hDC,m_hRC));
wglMakeCurrent(NULL,NULL);
return 0;
}
Step 6.
1) 컨트롤 + w 를 눌러 클래스 위자드를 실행 시킨다.
2) Project: openGLbase, Class name: COpenGLbaseDlg, Object IDs: COpenGLBaseDlg 를 확인 한다.
3) Messages 에서 WM_DESTROY 를 더블클릭(반드시 더블클릭!) 후, Edit Code 버튼을 누른다.
4) 다음 코드를 작성한다.
void COpenGLbaseDlg::OnDestroy()
{
wglDeleteContext(m_hRC);
::ReleaseDC(m_hWnd, m_hDC);
CDialog::OnDestroy();
// TODO: Add your message handler code here
}
Step 7.
1) Settings For 에서 Win32 Debug 를 확인한다.
( 만약 Release 모드에서 개발한다면, Win32 Release 로 바꾼다 )
2) Link 탭 클릭
3) Object/librry modules 를 다음과 같이 써준다. - opengl32.lib glu32.lib glut32.lib glaux.lib
( 반드시, MFC 와 자신의 컴퓨터에 OpenGL 이 셋팅이 되어 있어야 된다. )
4) OK 버튼 클릭!
Step 8.
1) 왼쪽 하단의 File view 탭 클릭
2) Header Files 폴더 속에 있는 StdAfx.h 더블 클릭!
3) 다음을 입력
#include <gl/gl.h>
#include <gl/glu.h>
#include <gl/glut.h>
#include <gl/glaux.h>
Step 9.
1) GLRenderScene() 함수 생성
2) 다음 코드를 작성한다.
void COpenGLbaseDlg::GLRenderScene()
{
glClearColor(1.0f, 1.0f, 1.0f, 0.0f);
glClear(GL_COLOR_BUFFER_BIT|GL_DEPTH_BUFFER_BIT);
glColor3f(1.0f, 0.0f, 0.0f);
glPushMatrix();
glEnable(GL_DEPTH_TEST);
glColorMaterial(GL_FRONT,GL_AMBIENT_AND_DIFFUSE);
glShadeModel(GL_FLAT);
glLoadIdentity();
gluLookAt(0.0f, 0.0f, 1000.0f, 0.0f, 10.0f, 0.0f, 0.0f, 1.0f, 0.0f);
//To draw meshes of object of something you want, Just code here
//--------------------------
glBegin(GL_TRIANGLES);
glVertex3f(-100,0,0);
glVertex3f(0,100,0);
glVertex3f(100,0,0);
glEnd();
//--------------------------
glPopMatrix();
glFlush();
}
Step 10.
1) onPaint함수 수정
2) 다음 코드를 작성한다.
void COpenGLbaseDlg::OnPaint()
{
if (IsIconic())
{
CPaintDC dc(this); // device context for painting
SendMessage(WM_ICONERASEBKGND, (WPARAM) dc.GetSafeHdc(), 0);
// Center icon in client rectangle
int cxIcon = GetSystemMetrics(SM_CXICON);
int cyIcon = GetSystemMetrics(SM_CYICON);
CRect rect;
GetClientRect(&rect);
int x = (rect.Width() - cxIcon + 1) / 2;
int y = (rect.Height() - cyIcon + 1) / 2;
// Draw the icon
dc.DrawIcon(x, y, m_hIcon);
}
else
{
CDialog::OnPaint();
wglMakeCurrent(m_hDC, m_hRC);
GLRenderScene();
SwapBuffers(m_hDC);
wglMakeCurrent(m_hDC,NULL);
}
}
=======================================================================================
*SDI기반과 MDI기반에서도 설정 방법은 유사하다.
Step 1.
Library 추가
Step 2.
StdAfx.h에 헤더파일 추가
Step 3.
view클래스에 멤버 전역 변수 두개 추가 (m_hDC, m_hRC)
Step 4.
WM_SIZE 메시지 함수 추가
Step 5.
GLResize 함수 생성
Step 6.
WM_SIZE 메시지 함수인 onCreate 추가
Step 7.
onDraw함수에 내용 추가
(Dialog 베이스에서 onPaint함수에 적용된 내용 추가)
Step 8.
GLRenderScene 함수 생성
void CtestDlg::GLRenderScene()
{
glLoadIdentity(); //행렬을 초기화
glClearColor(1.0f, 1.0f, 1.0f, 0.0f);
glClear(GL_COLOR_BUFFER_BIT|GL_DEPTH_BUFFER_BIT); //현재 버퍼를 비워줌
glColor3f(1.0f, 0.0f, 0.0f); //버텍스의 색깔을 흰색으로 셋팅
glPushMatrix();
glEnable(GL_DEPTH_TEST); //깊이 테스트 On
glColorMaterial(GL_FRONT,GL_AMBIENT_AND_DIFFUSE);
gluLookAt(0.0f, 0.0f, 1000.0f, 0.0f, 10.0f, 0.0f, 0.0f, 1.0f, 0.0f); //카메라 설정
//카메라의 위치는 (0,0,1000)에 있으며, 카메라가 바라보는 곳은(0,10,0)이다.
//카메라의 Up Vector는 (0,1,0)이다.
//To draw meshes of object of something you want, Just code here
//--------------------------
glBegin(GL_QUADS);
glVertex3f(-50,-50,0);
glVertex3f(50,-50,0);
glVertex3f(50,50,0);
glVertex3f(-50,50,0);
glEnd();
//---------------------------
glFlush();
}
Step 9.
WM_DESTROY 메시지 함수인 onDestroy 추가
=================================
=================================
=================================
출처: http://abipictures.tistory.com/373
MFC에서 OpenGL 사용하는 방법에 대한 설명입니다.
설명과 함께 샘플 파일을 업로드 합니다.
MainFrame Class
Step 1: In the Mainframe Class override the initial dimensions of the default Window. Using the CREATESTRUCT we change the dimensions of the window to 400 x 400
BOOL CMainFrame::PreCreateWindow(CREATESTRUCT& cs)
{
// TODO: Modify the Window class or styles here by modifying
// the CREATESTRUCT cs
cs.cx=400;
cs.cy=400;
return CFrameWnd::PreCreateWindow(cs);
}
BOOL CMainFrame::PreCreateWindow(CREATESTRUCT& cs)
{
// TODO: Modify the Window class or styles here by modifying
// the CREATESTRUCT cs
cs.cx=400;
cs.cy=400;
return CFrameWnd::PreCreateWindow(cs);
}
BOOL CMainFrame::OnQueryNewPalette()
{
// TODO: Add your message handler code here and/or call default
CView *pView=GetActiveView();
pView->Invalidate(FALSE);
return CFrameWnd::OnQueryNewPalette();
}
BOOL CMainFrame::PreCreateWindow(CREATESTRUCT& cs)
{
// TODO: Modify the Window class or styles here by modifying
// the CREATESTRUCT cs
cs.cx=400;
cs.cy=400;
return CFrameWnd::PreCreateWindow(cs);
}
View Class
Step 1: Step up the pixel format and create a rendering context
int CMfc_cubeView::OnCreate(LPCREATESTRUCT lpCreateStruct)
{
if (CView::OnCreate(lpCreateStruct) == -1)
return -1;
// TODO: Add your specialized creation code here
PIXELFORMATDESCRIPTOR pfd=
{
sizeof(PIXELFORMATDESCRIPTOR),
1,
PFD_DRAW_TO_WINDOW|
PFD_SUPPORT_OPENGL|
PFD_DOUBLEBUFFER,
PFD_TYPE_RGBA,
24, //24-bit color
0,0,0,0,0,0,
0,0,0,0,0,0,0,
32, //32 bit depth buffer
0,0,
PFD_MAIN_PLANE, //Main layer type
0,
0,0,0
};
CClientDC clientDC(this);
/*
ChoosePixelFormat
Requests a pixel-format index for a pixel format that most closely
matches the format requested. This function's two arguments are a
handle to the DC for which to select the pixel format and the
address of the PIXELFORMATDESCRIPTOR structure that holds the attributes
of the requested pixel format
*/
int pixelFormat =ChoosePixelFormat(clientDC.m_hDC,&pfd);
BOOL success = SetPixelFormat(clientDC.m_hDC,pixelFormat,&pfd);
/*
DescribePixelFormat
Fills a PIXELFORMATDESCRIPTOR structure with information about the given
pixel format. This function's four arguments are a handle to the DC, the
pixel index to examine, and the size and address of PIXELFORMATDESCRIPTOR structure.
*/
DescribePixelFormat(clientDC.m_hDC,pixelFormat, sizeof(pfd),&pfd);
if (pfd.dwFlags & PFD_NEED_PALETTE)
SetupLogicalPalette();
/*
wglCreateContext
Creates a rendering context compatible with the given DC.
*/
m_hRC=wglCreateContext(clientDC.m_hDC);
/*
wglMakeCurrent
Makes a rendering context current, which binds the rendering
context to the given DC. This function's two arguments
are a handle to a DC and the handle to the rendering context.
*/
wglMakeCurrent(clientDC.m_hDC,m_hRC);
//Texture Mapping
//Once you have your DIB loaded and its color tables created, you can
// actually start thinking about your texture mapping
//GL_TEXTURE_2D equates to a two-dimensional texture
//GL_CLAMP for a single image
//GL_REPEAT for a repeating pattern
//GL_TEXTURE_MAG_FILTER determines how a texture is magnified when
// the destination is larger than the texture.
//GL_TEXTURE_MIN_FILTER determines how a texture is reduced
//glTexEnvi set the texturing environment
glTexParameteri(GL_TEXTURE_2D,GL_TEXTURE_WRAP_S,GL_CLAMP);
glTexParameteri(GL_TEXTURE_2D,GL_TEXTURE_WRAP_T,GL_CLAMP);
glTexParameteri(GL_TEXTURE_2D,GL_TEXTURE_MAG_FILTER,GL_NEAREST);
glTexParameteri(GL_TEXTURE_2D,GL_TEXTURE_MIN_FILTER,GL_NEAREST);
glTexEnvi(GL_TEXTURE_ENV,GL_TEXTURE_ENV_MODE,GL_DECAL);
glEnable(GL_DEPTH);
glEnable(GL_TEXTURE_2D);
glClearColor(1.0f,1.0f,1.0f,1.0f);
wglMakeCurrent(clientDC.m_hDC,NULL);
/* CDib is a class used to read Device Independant Bitmaps */
m_pDib = new CDib("snake.BMP");
CreateColorTables(m_pDib);
SetupColorTables();
/* The timer determines the rendering refresh rate in milliseconds*/
SetTimer(1,1,0);
return 0;
}
Step 2: Cleanup resources: Bitmaps, Timers, and device contexts
void CMfc_cubeView::OnDestroy()
{
CView::OnDestroy();
// TODO: Add your message handler code here
KillTimer(1);
delete m_pDib;
/*Frees the Rendering Context. Cleanup of resources*/
wglDeleteContext(m_hRC);
if (m_hPalette)
DeleteObject(m_hPalette);
}
Step 3: Modify the Class style
BOOL CMfc_cubeView::PreCreateWindow(CREATESTRUCT& cs)
{
// TODO: Modify the Window class or styles here by modifying
// the CREATESTRUCT cs
cs.style |= WS_CLIPCHILDREN | WS_CLIPSIBLINGS;
return CView::PreCreateWindow(cs);
}
Step 4: When Invalidate(TRUE) is invoked the OnDraw event is fired. The OnDraw method contains the rendering code portion.
void CMfc_cubeView::OnDraw(CDC* pDC)
{
CMfc_cubeDoc* pDoc = GetDocument();
ASSERT_VALID(pDoc);
// TODO: add draw code for native data here
if (m_hPalette)
{
SelectPalette(pDC->m_hDC,m_hPalette, FALSE);
RealizePalette(pDC->m_hDC);
}
wglMakeCurrent(pDC->m_hDC,m_hRC);
DrawWithOpenGL();
SwapBuffers(pDC->m_hDC);
wglMakeCurrent(pDC->m_hDC,NULL);
}
Step 5: The OnSize method defines the current viewport, defines the PROJECTION Model and Object Model, and light sources.
void CMfc_cubeView::OnSize(UINT nType, int cx, int cy)
{
CView::OnSize(nType, cx, cy);
// TODO: Add your message handler code here
CClientDC clientDC(this);
wglMakeCurrent(clientDC.m_hDC,m_hRC);
glViewport(0,0,cx,cy);
glMatrixMode(GL_PROJECTION);
glLoadIdentity();
glFrustum(-1.0,1.0,-1.0,1.0,2.0,9.0);
glMatrixMode(GL_MODELVIEW);
glLoadIdentity();
GLfloat light0Ambient[]={0.0f,0.0f,0.0f,1.0f};
GLfloat light0Diffuse[]={1.0f,1.0f,1.0f,1.0f};
GLfloat light0Position[]={0.0f,0.0f,0.0f,1.0f};
glLightfv(GL_LIGHT0,GL_AMBIENT,light0Ambient);
glLightfv(GL_LIGHT0,GL_DIFFUSE, light0Diffuse);
glLightfv(GL_LIGHT0,GL_POSITION,light0Position);
glEnable(GL_LIGHTING);
glEnable(GL_LIGHT0);
glTranslatef(0.0f,0.0f,-6.0f);
wglMakeCurrent(NULL,NULL);
}
Step 6: On Timer event is invoke every X predefine miliseconds
void CMfc_cubeView::OnTimer(UINT nIDEvent)
{
// TODO: Add your message handler code here and/or call default
if (m_cube_animate==1 )
{
m_cube_spin+=2;
}
if (m_icosa_animate==1)
{
m_icosa_spin+=2;
}
Invalidate(FALSE);
CView::OnTimer(nIDEvent);
}
Step 7: Your Rendering Code
void CMfc_cubeView::DrawWithOpenGL()
{
glShadeModel(GL_SMOOTH);
glEnable(GL_DEPTH_TEST);
glClearColor(0.0f,0.0f,0.0f,1.0f);
glClear(GL_COLOR_BUFFER_BIT | GL_DEPTH_BUFFER_BIT);
AnimateCube();
}
Step 8: The Animated Cube Example
void CMfc_cubeView::AnimateCube()
{
GLfloat glfMaterialColor[]={0.2f,0.8f,0.5f,1.0f};
GLvoid* pTextureBits = (GLvoid*) m_pDib->GetDibBitsPtr();
GLint width = m_pDib->GetDibWidth();
GLint height = m_pDib->GetDibHeight();
glPushMatrix();
glTexImage2D(GL_TEXTURE_2D,0,3,width,height,0,GL_COLOR_INDEX,
GL_UNSIGNED_BYTE,pTextureBits);
glClear(GL_COLOR_INDEX|GL_DEPTH_BUFFER_BIT);
glRotatef(m_cube_spin,1.0,1.0,1.0);
glScalef (0.5,0.5,0.5); /* modeling transformation */
//glMaterialfv(GL_FRONT,GL_AMBIENT_AND_DIFFUSE,glfMaterialColor);
glBegin(GL_POLYGON);
//glNormal3f(0.0f,0.0f,1.0f);
//vertice 1
glTexCoord2f(0.0f,1.0f);
glVertex3f(1.0f,1.0f,1.0f);
//vertice 2
glTexCoord2f(0.0f,0.0f);
glVertex3f(-1.0f,1.0f,1.0f);
//vertice 3
glTexCoord2f(1.0f,0.0f);
glVertex3f(-1.0f,-1.0f,1.0f);
//vertice 4
glTexCoord2f(1.0f,1.0f);
glVertex3f(1.0f,-1.0f,1.0f);
glEnd();
glBegin(GL_POLYGON);
//glNormal3f(0.0f,0.0f,-1.0f);
//vertice 1
glTexCoord2f(0.0f,1.0f);
glVertex3f(1.0f,1.0f,-1.0f);
//vertice 2
glTexCoord2f(0.0f,0.0f);
glVertex3f(1.0f,-1.0f,-1.0f);
//vertice 3
glTexCoord2f(1.0f,0.0f);
glVertex3f(-1.0f,-1.0f,-1.0f);
//vertice 4
glTexCoord2f(0.0f,0.0f);
glVertex3f(-1.0f,1.0f,-1.0f);
glEnd();
glBegin(GL_POLYGON);
//glNormal3f(-1.0f,0.0f,0.0f);
//vertice 1
glTexCoord2f(0.0f,1.0f);
glVertex3f(-1.0f,1.0f,1.0f);
//vertice 2
glTexCoord2f(0.0f,0.0f);
glVertex3f(-1.0f,1.0f,-1.0f);
//vertice 3
glTexCoord2f(1.0f,0.0f);
glVertex3f(-1.0f,-1.0f,-1.0f);
//vertice 4
glTexCoord2f(1.0f,1.0f);
glVertex3f(-1.0f,-1.0f,1.0f);
glEnd();
glBegin(GL_POLYGON);
//glNormal3f(1.0f,0.0f,0.0f);
//vertice 1
glTexCoord2f(0.0f,1.0f);
glVertex3f(1.0f,1.0f,1.0f);
//vertice 2
glTexCoord2f(0.0f,0.0f);
glVertex3f(1.0f,-1.0f,1.0f);
//vertice 3
glTexCoord2f(1.0f,0.0f);
glVertex3f(1.0f,-1.0f,-1.0f);
//vertice 4
glTexCoord2f(1.0f,1.0f);
glVertex3f(1.0f,1.0f,-1.0f);
glEnd();
glBegin(GL_POLYGON);
//glNormal3f(0.0f,1.0f,0.0f);
//vertice 1
glTexCoord2f(0.0f,1.0f);
glVertex3f(-1.0f,1.0f,-1.0f);
//vertice 2
glTexCoord2f(0.0f,0.0f);
glVertex3f(-1.0f,1.0f,1.0f);
//vertice 3
glTexCoord2f(1.0f,0.0f);
glVertex3f(1.0f,1.0f,1.0f);
//vertice 4
glTexCoord2f(1.0f,1.0f);
glVertex3f(1.0f,1.0f,-1.0f);
glEnd();
glBegin(GL_POLYGON);
//glNormal3f(0.0f,-1.0f,0.0f);
//vertice 1
glTexCoord2f(0.0f,1.0f);
glVertex3f(-1.0f,-1.0f,-1.0f);
//vertice 2
glTexCoord2f(0.0f,0.0f);
glVertex3f(1.0f,-1.0f,-1.0f);
//vertice 3
glTexCoord2f(1.0f,0.0f);
glVertex3f(1.0f,-1.0f,1.0f);
//vertice 4
glTexCoord2f(1.0f,1.0f);
glVertex3f(-1.0f,-1.0f,1.0f);
glEnd();
glPopMatrix();
}
void CMfc_cubeView::CreateColorTables(CDib *pDib)
{
LPRGBQUAD pColorTable = pDib->GetDibRGBTablePtr();
for(UINT i=0; i<256; ++i)
{
m_red[i]=(GLfloat) pColorTable[i].rgbRed/255;
m_green[i]=(GLfloat) pColorTable[i].rgbGreen/255;
m_blue[i]=(GLfloat) pColorTable[i].rgbBlue/255;
}
}
void CMfc_cubeView::SetupColorTables()
{
CClientDC clientDC(this);
wglMakeCurrent(clientDC.m_hDC,m_hRC);
glPixelMapfv(GL_PIXEL_MAP_I_TO_R,256,m_red);
glPixelMapfv(GL_PIXEL_MAP_I_TO_G,256,m_green);
glPixelMapfv(GL_PIXEL_MAP_I_TO_B,256,m_blue);
glPixelTransferi(GL_MAP_COLOR,TRUE);
wglMakeCurrent(clientDC.m_hDC,m_hRC);
}
void CMfc_cubeView::SetupLogicalPalette()
{
struct
{
WORD Version;
WORD NumberOfEntries;
PALETTEENTRY aEntries[256];
}logicalPalette={0x300,256};
BYTE reds[]={0,36,72,109,145,182,218,255};
BYTE greens[]={0,36,72,109,145,182,218,255};
BYTE blues[]={0,85,170,255};
for(int colorNum=0; colorNum<256; ++colorNum)
{
logicalPalette.aEntries[colorNum].peRed=reds[colorNum&0x07];
logicalPalette.aEntries[colorNum].peGreen=greens[(colorNum>>0x03)&0x07];
logicalPalette.aEntries[colorNum].peBlue=blues[(colorNum>>0x06)&0x03];
logicalPalette.aEntries[colorNum].peFlags=0;
}
m_hPalette=CreatePalette ((LOGPALETTE*)&logicalPalette);
}
=================================
=================================
=================================
출처: http://tommyhsm.tistory.com/74
최근에 매프레임 영상을 출력해줘야 하는 부분에 있어서 여러방법을 시도해보면서 느꼈던 점을 정리한다.
일단 나의 상황은 매 프레임 얻어온 영상을 갱신하거나 OpenGL을 Render() 시켜야만 하는 상황이었다.
그래서 선택한 사항들은...
1. OnTimer() 이용
2. Thread 생성
3. OnKickIdle()
4. 다이얼로그를 modal 말고 modaless로 생성 이었다.
하지만 여기에는 여러 문제점들이 발생했으니..
1. OnTimer() 이용
일단 제일 중요한게 퍼포먼스이다.
영상이 뚝뚝 끊기고 렉이 생기는데.. 무슨말이 필요한가.
테스트 후 바로 삭제!! Pass~
2. Thread 생성
일단 Thread 를 생성 후 이벤트 핸들러를 통해 접근 하려고 했지만.. 무슨일인지 모르게 Render() 함수로는 들어가지지만.. OpenGL 화면이 더이상 Render 되지않아 갱신이 되지 않았다. 무슨문제인지는 모르겠다...;; 그래서 Pass~
3. OnKickIdle()
Dialog 기반에서 OnIdle() 대신 널리 쓰이는 방법이 OnKickIdle() 이다.
이는 SDI 방법에서 주로 쓰는 OnIdle()과 같은기능??을 한다고 본다. (주관적인 생각!!)
어째뜬 이를 통해 Render() 시키니 잘~~된다. 정말 기뼜다.
하지만... 종료시 무슨 문제인지 모르겠지만, 계속 프로그램이 뻑난다.
메모리쪽도 아니고, NULL Pointer 로의 접근도 아니고.. 음... 도대체가 알수가 없었다.
이놈때문에 나의 금쪽같은 주말을 날렸지만 결국 해결 못했다... 젠장..!! 역시 Pass~
4. 다이얼로그를 modal 말고 modaless로 생성
낙담한 상태로 구글링을 하다가 MFC Dialog 기반일때 Modal 말고 modaless 로 생성하여 Idle() 돌리는법!! 이라고 소개 되어있는 곳을 검색하게 되었다.
올레!!!!!!
사이트 : http://blog.naver.com/oneofall?Redirect=Log&logNo=60110572078
여기서 제시한 방법은..
App::InitInstance() 함수내에서
원래는 (다이얼로그 클래스 이름을 CMyDlg 라고 하겠다.)
----------------------------------------------------------------
CMyDlg dlg;

m_pMainWnd = & dlg;

INT_PTR nResponse = dlg.Domodal();

if (nResponse == IDOK)

{

} else if (nResponse == IDCANCEL)

{

}

return FALSE;
----------------------------------------------------------------
위와 같은 소스로 되어 있는데 이걸
CMyDlg * dlg = new CMyDlg;
dlg -> Create(다이얼로그 리소스 ID);
m_pMainWnd = dlg;
return TRUE; // 이것을 주의 하자 꼭 TRUE 로 리턴해야 실행하자마자 종료되지 않는다.
라고 되어있다. (사이트 참조!)
이말 즉슨 , Domodal() 하지않고, 동적생성하여 Modaless 상태로 따로따로 생성하면 SDI 처럼 OnIdle()을 사용할수 있다는 말이었다.
그리고 종료시 메모리 누수 때문에, App::ExitInstance() 에서 delete dlg; 를 해주라는 친절한 설명까지...
이제는 OpenGL Render()도 잘되고, 영상도 출력 잘되고.. 너무 만족한다.
나같은 실수나 과오를 똑같이 저지르지 말라는 생각에 이렇게 해결되자마자 급 작성중.. 얼마나 열불 터졌으면.. 에효!!
그래도 실수하면서 배운다 는 말이 맞기는 한거 같다.
=================================
=================================
=================================
출처: http://openshareit.tistory.com/entry/OpenGL-MFC
MFC로 만든 뷰에 OpenGL을 합성하는 소스입니다.
지인의 도움을 통해 구글에서 얻었어요^^
출처: http://openshareit.tistory.com/entry/OpenGL-MFC [Open AR]
=================================
=================================
=================================
'프로그래밍 관련 > 3D,2D DRAW 관련' 카테고리의 다른 글
| OpenGL 텍스쳐 로드 그리기 관련 (0) | 2020.09.15 |
|---|---|
| OpenGL에서 텍스쳐 로딩, 스레드 thread 에서의 텍스처 로딩 관련 (0) | 2020.09.15 |
| OpenGL 오픈지엘 기초 그리기, 알파, 점, 선, 면, 삼각, 사각, 다각형, 그림판, 자유곡선, 지우개(마스크) 관련 (0) | 2020.09.15 |
| FreeImage Library 셋팅 관련 (0) | 2020.09.15 |
| OpenGL 오픈지엘 텍스쳐, 화질 개선 밉맵 필터링 Texture Filtering and Mipmapping 관련 (0) | 2020.09.15 |


댓글 영역