=======================
=======================
=======================
OpenGL 개발 셋팅 할때 헤드(.h)파일 Lib파일 모두 적용해보고
아래 프로그램 OpenGL Extensions Viewer 가 잘 잘동되는지 확인해 보자
OpenGL Extensions Viewer 설치 링크
http://realtech-vr.com/admin/glview
=======================
=======================
=======================
출처: http://alleysark.tistory.com/257
소개에 앞서 잡소리..
입문자를 위한 OpenGL 강좌를 써보려한다. OpenGL 강좌야 찾아보면 수두룩 하다지만 대부분의 강좌는 예전 API 명세(OpenGL 2.0)를 기초로 진행한다. 물론 최신 API 명세는 복잡하고 더 정교해졌기 때문에 예전 API로 진행되는 강좌가 입문자들에겐 훨씬 쉽다고 말할 수 있다. 하지만 시대는 변하고 API는 점점 더 발전했으며 앞으로 예전 API는 더 이상 지원하지 않을것이라는 공식적인 입장이 발표된 현재, 다소 쉽다고 느껴지는 구시대의 강좌가 정말로 현명한 선택일런지는 잘 판단해야할 부분이다.
개인적으로는 새롭게 공부하는 분들은 최신 API에 맞춰 공부를 하는게 바람직하다고 생각한다. 그런데 안타깝게도 여전히 많은 분들이 예전에 쓰여진 강좌를 보고 OpenGL을 공부한다. 심지어 대학에서도 예전 버전으로 가르치니 말 다했다. 가장 정확한 방법은 OpenGL 공식 페이지(http://www.opengl.org/)에서 최신 라이브러리 명세 문서를 찾아 공부하는 것이겠지만, 당연하게도 영어로 쓰여있고, 재미도 없게 구성되어있다. 그렇다 보니 웹을 통해 강좌를 찾게되고, 옛 시대의 강좌를 보게된다.
...그런고로 OpenGL 4.5에 맞춰 입문자를 위한 강좌를 써보자고 계획했다. 나 스스로도 깊이 있게 아는게 아니기 때문에 최대한 OpenGL 4.5 core spec.을 참고해 가며 진행할 예정이다.
소개
그래서 OpenGL이 뭔데? OpenGL은 Khronos(http://www.khronos.org)에서 만들기 시작한, 그래픽스 하드웨어를 위한 열린(open) 그래픽스 라이브러리(Graphics Library) 이다. 대응되는 Microsoft의 DirectX와 다르게 관련된 많은 업체가 함께 참여하여 표준안을 만들어간다.
중요한 점은 크로스 플랫폼(cross-platform)을 지원한다는 것이며, 점점 개방되어가는 이 시대에 MS의 OS에만 국한된 DirectX에 비해 주목받는것은 사실이다. 게다가 성능도 굉장히 많이 향상돼서 'OpenGL은 느리다'라는 관념은 깨진지 오래되었다. (그렇다곤 해도 최적화된 DirectX 어플리케이션을 따라가긴 힘들다고 본다.)
또한 모바일 플랫폼의 부상과 함께 등장한 OpenGL ES, 그리고 웹 그래픽 표준으로 자리잡은 WebGL 등 OpenGL의 활동범위는 점점 넓어져 가고 있으며 그에 따라 수요도 증가하고있다.
준비
강좌를 본격적으로 시작하기 전에 개발 환경에 대해 몇 가지 설명하려 한다. 우선 이 강좌는 OpenGL 4.5 명세에 최대한 맞춰 진행될 것이기 때문에 코드를 직접 실행해 보려면 이 명세를 지원하는 그래픽 카드를 사용해야한다(요즘의 PC라면 다 지원 할 것이다). 그리고 윈도우 이벤트 등 부차적인 개발사항을 최소화 하기 위해 GLFW 라는 유틸리티 라이브러리를 활용하려 한다. 또한 모든 예제 코드는 MS Windows7 OS의 VisualStudio 2013 환경에서 작성 및 테스트 될 것이다.
* OpenGL 설치
정상적인 그래픽 드라이버를 설치했다면 기본적으로 GL이 설치되어 있을것이다. 혹시라도 GL/GL.h 파일을 포함할 수 없다면 자신의 그래픽카드 제조사에 맞는 그래픽 드라이버를 설치했는지 확인해보자.
* GLEW 설치
윈도우 컨텍스트를 다루기 위해서는 기본적인 GL 만으론 부족하다. 이를 위해서 GLEW(OpenGL Extension Wrangler)라는 확장 라이브러리를 제공한다. http://glew.sourceforge.net/ 에서 바이너리를 받아 경로를 설정하면 된다.
프로젝트를 생성할 때 마다 매번 경로설정하는 작업이 귀찮다면 아래 경로에 파일들을 넣어둬도 괜찮다.
(경로는 조금 다를 수 있지만 대체로 비슷한 형태이다. 잘 모르겠으면 gl.h 파일을 찾아 같은 곳에 넣어주면 된다.)
- C:\Program Files (x86)\Windows Kits\8.1\Include\um\gl 에 glew\include\GL 의 파일들 넣기
- C:\Program Files (x86)\Windows Kits\8.1\Lib\winv6.3\um\x86 에 glew\lib\Release\Win32 의 파일들 넣기
- C:\Program Files (x86)\Windows Kits\8.1\Lib\winv6.3\um\x64 에 glew\lib\Release\x64 의 파일들 넣기
그리고 새로 만든 프로젝트의 실행 경로 아래 glew\bin\Release\Win32\glew32.dll 을 복사하여 넣어두는 것으로 glew에 대한 준비는 끝난다.
* OpenGL 버전 확인
GLEW를 설정한 후 내려받은 GLEW폴더 안에 bin\Release\Win32\glewinfo.exe 를 실행해보자. 그러면 opengl과 glew 정보를 포함하는 파일 glewinfo.txt가 생성된다. 파일을 열어 GL_VERSION_4_5 까지 모두 지원하는지 확인하면 된다. 만약 최신 GL 버전을 사용할 수 없다면 그래픽 카드를 교체해야한다.
* GLFW 설치
사실 기본적인 OpenGL 만으로는 그리기 위한 컨텍스트 혹은 윈도우를 생성하거나 다룰 수 없다. 윈도우 핸들러를 통해 직접 디바이스 컨택스트를 생성하고 설정해주는 꽤 복잡한 작업을 거쳐야만 한다. (이때 GLEW가 사용된다.) 하지만 복잡하고 크게 중요한 부분이 아니므로 이 강좌에서는 GLFW라는 유틸리티 라이브러리를 사용하여 윈도우를 다룰것이다. GLFW 설치법은 따로 정리해뒀다(http://alleysark.tistory.com/258). GLEW와 마찬가지로 실행 결로 아래 glfw3.dll을 복사하여 넣어두자.
* GLM 설치
물체를 다루는데는 벡터와 행렬 연산을 포함해서 상당히 다양한 수학적 연산이 필요하다. OpenGL Mathematics GLM은 이를 위한 라이브러리이다. GLM은 header only 라이브러리이기 때문에 http://glm.g-truc.net/0.9.6/index.html에서 다운받아 헤더만 포함해주면 된다.
테스트
이정도로 기본적인 준비는 끝났다. 아래 코드가 제대로 동작하는지 빌드해보자. 새하얀 창이 뜬다면 성공이다.
| <p>#define GLFW_DLL #define GLFW_INCLUDE_GLU #include <GL/glew.h> #include <GLFW/glfw3.h> #include <iostream> #pragma comment(lib, "opengl32.lib") #pragma comment(lib, "glew32.lib") #pragma comment(lib, "glfw3dll.lib") void InitApp() { // 클리어 색상(배경색) 지정 glClearColor(1, 1, 1, 1); } void ErrorCallback(int error, const char* description) { std::cout << description << std::endl; } void KeyCallback(GLFWwindow* window, int key, int scancode, int action, int mods) { if (key == GLFW_KEY_ESCAPE && action == GLFW_PRESS) glfwSetWindowShouldClose(window, GL_TRUE); } void WindowSizeChangeCallback(GLFWwindow* window, int width, int height) { glViewport(0, 0, width, height); } int main() { // GLFW 윈도우 핸들러 GLFWwindow* window = NULL; // 에러 핸들러 등록 glfwSetErrorCallback(ErrorCallback); // GLFW 초기화 if (!glfwInit()) exit(EXIT_FAILURE); // 윈도우 생성 window = glfwCreateWindow(640, 480, "Tutorial 00: Test", NULL, NULL); if (!window) { // 만약 윈도우 생성에 실패했다면 어플리케이션 종료 glfwTerminate(); exit(EXIT_FAILURE); } // 컨텍스트 생성 glfwMakeContextCurrent(window); // swap 간격 조정 glfwSwapInterval(1); // 키 핸들러 등록 glfwSetKeyCallback(window, KeyCallback); // 윈도우 사이즈 변경 핸들러 등록 glfwSetWindowSizeCallback(window, WindowSizeChangeCallback); // GLEW 초기화 glewInit(); // 어플리케이션의 초기화 InitApp(); // 주 렌더링 루프. 윈도우가 종료되기 전까지 반복한다. while (!glfwWindowShouldClose(window)) { // 버퍼 지우기 glClear(GL_COLOR_BUFFER_BIT | GL_DEPTH_BUFFER_BIT); // 여기에 Update/Render 코드 // 렌더 버퍼 교체. (그린 결과를 디스플레이하는 명령) glfwSwapBuffers(window); // 윈도우 이벤트 (키 스트로크 등) 폴링. glfwPollEvents(); } // 윈도우 제거 glfwDestroyWindow(window); // GLFW 종료 glfwTerminate(); return 0; } </p> |
출처: http://alleysark.tistory.com/257 [앨리삵]
소스코드
앞으로 강좌가 진행되면서 여러 프로그램을 만들어볼텐데 강좌 안에 모든 코드를 삽입하기란 쉽지 않으므로 전체 코드는 github에 올릴 예정이다. 필요하다면 가져다 쓰시길.
https://github.com/alleysark/OpenGL-Tutorials
출처: http://alleysark.tistory.com/257 [앨리삵]
=======================
=======================
=======================
출처: http://kbaek2.tistory.com/entry/OpenGL-Installation
OpenGL Installation
여기서는 Microsoft Windows 운영체계에서 Visual Studio C++ 2010 을 사용하는 경우에 OpenGL 설치방법에 대해서 간단히 설명하기로 한다.
설치된 Program 및 Folder:
Visual Studio .NET 2010 SDK 를 설치함에 따라, 다음의 OpenGL Library 와 Header 파일들은 다음의 적합한 위치에 설치된다.
- gl.h, glu.h - C:\Program Files (x86)\Microsoft SDKs\Windows\v7.0A\Include\gl
- opengl32.lib, glu32.lib - C:\Program Files (x86)\Microsoft SDKs\Windows\v7.0A\Lib
- opengl32.dll, glu32.dll - C:\Windows\System32
64bit Visual Studio SDK 를 사용하는 경우에 64bit 용 .lib 파일들은 C:\Program Files (x86)\Microsoft SDKs\Windows\v7.0A\Lib\x64 에 .dll 파일들은 C:\Windows\SysWOW64 에 설치되어 있다.
참고로 Microsoft 사는 1995년 이후, GLU (Graphic Library Utility) version 1.22 만을 제공하고 있어, 이후의 업그레이드 된 GLU version 을 사용하기 위해서는 Linux 환경에서 OpenGL을 사용하는 것이 바람직하다.
필수 설치 Program:
OpenGL 프로그래밍의 편리를 위해 다음 3개의 필수요소를 다운로드하여 설치하는것이 바람직하다.
GLUT (The OpenGL Utility Toolkit), FreeGLUT,
GLEW (The OpenGL Extension Wrangler Library)
GLUT : http://user.xmission.com/~nate/glut.html - glut-3.7.6-bin.zip
FreeGLUT : http://freeglut.sourceforge.net/ - freeglut-MSVC-2.8.0-1.mp.zip
GLEW : http://glew.sourceforge.net/install.html - glew-1.9.0-win32.zip 또는 glew-1.9.0-win64.zip
위의 버젼은 2012년 12월 까지의 버젼으로 최신 version 이 나왔으면 이를 확인하여 설치하는것이 좋다.
모두다 이미 컴파일된 Binary 파일이므로 굳이 Source 파일을 다운받아 Window 에서 컴파일 할 필요가 없다.
먼저 GLUT 파일을 풀어
.h 파일들은 C:\Program Files (x86)\Microsoft SDKs\Windows\v7.0A\Include\gl 에
.lib 파일들은 C:\Program Files (x86)\Microsoft SDKs\Windows\v7.0A\Lib 에
.dll 파일들은 C:\Windows\System32 에 복사하면 된다.
다음에 FreeGLUT 및 GLEW 을 풀어서 위의 과정을 되풀이 한다. FreeGLUT 을 설치할 겨우 이미 설치된 같은 이름의 파일이 있으면 덮어 씌우면 된다.
주의 사항:
64 bit Windows 운영체계내에서 32 bit Visual Studio 를 설치했다면, 위의 모든 폴더 (C:\Windows\SysWOW64 및 ~\Lib\x64 포함) 에 위의 32 bit 용 파일들을 복사해야 한다. 만일 각각의 64 bit 용 폴더에 64 bit 파일들을 설치할 경우 컴파일시 에러를 유발 시킬 수 있다.
Test Program:
위의 파일들이 완전히 설치되었으면 다음의 Source Code를 가지고 Test 해보자.
Visual Studio C++ 를 Console Mode 에서 새 프로젝트를 생성한 후 다음의 Code를 입력한다.
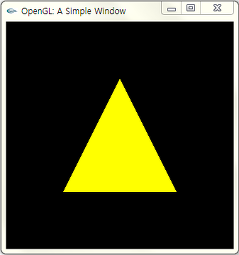
| /** Simple OpenGL Program *===================== * * Program: simple_OpenGL.cpp * * by (BeH) * * A simple, introductory OpenGL program. * *====================== */ #include <stdio.h> #include <stdlib.h> #include <gl/glew.h> #include <gl/glut.h> // function prototypes void showOpenGLInfo( void ); void display( void ); /******************************************************************************! * Main OpenGL program ******************************************************************************! */ int main( int argc, char *argv[] ) { // init GLUT and create Window glutInit( &argc, argv ); glutInitDisplayMode( GLUT_SINGLE | GLUT_RGB | GLUT_DEPTH ); glutInitWindowSize( 320, 320 ); glutInitWindowPosition( 100, 100 ); glutCreateWindow( "OpenGL: A Simple Window" ); showOpenGLInfo(); // register callbacks glutDisplayFunc( display ); // enter GLUT event processing cycle glutMainLoop(); return 0; } /******************************************************************************! * show OpenGL Info through the Console ******************************************************************************! */ void showOpenGLInfo( void ) { if (glewInit() != GLEW_OK) { fprintf( stderr, "Error: %s\n", glewGetErrorString(glewInit()) ); exit(0); } fprintf( stderr, "OpenGL Vender: %s\n", glGetString(GL_VENDOR) ); fprintf( stderr, "OpenGL Version: %s\n", glGetString(GL_VERSION) ); fprintf( stderr, "GLU Version: %s\n", gluGetString(GLU_VERSION) ); fprintf( stderr, "GLEW Version: %s\n", glewGetString(GLEW_VERSION) ); return; } /******************************************************************************! * draw graphics ******************************************************************************! */ void display( void ) { glClearColor( 0.0f, 0.0f, 0.0f, 1.0f ); glClear( GL_DEPTH_BUFFER_BIT | GL_COLOR_BUFFER_BIT ); glColor4f( 1.0, 1.0, 0.0, 1.0 ); glBegin( GL_TRIANGLES ); glVertex3f( -0.5,-0.5, 0.0 ); glVertex3f( 0.5,-0.5, 0.0 ); glVertex3f( 0.0, 0.5, 0.0 ); glEnd(); glFlush(); } |
위의 Source Code 를 입력한 후 .NET Framework 의 옵션을 다음과 같이 변경한다.
메뉴의 "프로젝트(P) -> ~~~ 속성(P)" 로 간 다음, ~~~속성 페이지에서
"구성속성 -> 링커 -> 입력" 의 오른쪽 "추가종속성" 오른쪽 란에 마우스를 클릭하면 아래 화살표가 나온다. 아래 화살표를 클릭하여 <편집...> 을 누른다음 다음의 4 줄을 Typing 하여 집어넣는다. 모든게 완료되면 확인 버튼을 누르고 난 다음 컴파일 한다.
opengl32.lib
glu32.lib
glut32.lib
glew32.lib
별로 많이 사용되지는 않지만 "glaux.lib" 를 사용할 때가 있으면 이것도 함께 추가종속을 시켜야 한다.
프로젝트를 할 때마다 이 과정을 반복하는 일이 불편할 경우에 또는 보편적인 프로그램을 할 경우에는 프로그램에서 pragma 를 사용해 #include <...> 라인 다음에 다음과 같이 라인을 첨가해도 된다.
#pragma comment(lib, "glew32.lib")
#pragma comment(lib, "glut32.lib")
#pragma comment(lib, "OpenGL32.lib")
#pragma comment(lib, "glu32.lib")
#pragma comment(lib, "glaux.lib")
컴파일시 만약 다음과 같은 error message 가 뜬다면 아래와 같이 해결한다.
error C2664: 'MessageBoxW' : 매개 변수 2을(를) 'const char [29]'에서 'LPCWSTR'(으)로 변환할 수 없습니다.
가리킨 형식이 관련이 없습니다. 변환하려면 reinterpret_cast, C 스타일 캐스트 또는 함수 스타일 캐스트가 필요합니다.
메뉴의 "프로젝트(P) -> ~~~ 속성(P)" 로 간 다음, ~~~속성 페이지에서
"구성속성 -> 일반 -> 문자집합"의 "유니코드 문자 집합 사용" 을 "멀티바이트 문자 집합 사용" 으로 변경한다.
또 다른 방법으로는 프로그램의 "MessageBox" 대신에 "MessageBoxA" 를 사용하거나, 또는 "MessageBox" 내의 Text 부분 (" " 부분) 을 TEXT() 매크로를 사용, Message( hWnd, TEXT("End of Program"), TEXT("End Message"), MB_OK ); 의 형태로 사용한다.
컴파일이 완성된 후 Run 하면 Information 창과 함께 다음과 같은 결과물 창이 나타나면 설치가 완벽하게 된 것이다.
다른 유용한 Libraries:
여기에 더해, GLFW : http://www.glfw.org/ 도 살펴보는것도 좋을듯 하다.
Shading Laguage 인 GLSL 을 한다면... MIT 에서 개발한 GLM (Graphics Library Mathematics) Header file을 설치하는것이 바람직 하다.
GLM (OpenGL Mathematics) : http://glm.g-truc.net/
- GLM is a header only C++ mathematics library for graphics software based on the OpenGL Shading Language (GLSL) specification.
파일을 다운받아 C:\Program Files (x86)\Microsoft SDKs\Windows\v7.0A\Include\ 아래에 \GLM 폴더를 만들고 그 안에 위의 파일을 풀어 넣으면 된다.
다음은 OpenGL 과 연계된 이미지 및 멀티미디어에 대한 Site 이다.
SOIL (Simple OpenGL Image Library) : http://www.lonesock.net/soil.html
SOIL provides a way to load an image file in PNG, JPG and a few other formats, designed for OpenGL integration. It's a pretty minimal library with no dependency. It's used under the hood by SFML (although SFML also uses libjpeg and libpng directly).
SFML (Simple & Fast Multimedia Library) : http://www.sfml-dev.org/
SFML is a free multimedia C++ API that provides low and high level access to graphics, input, audio, etc.
Reference:
http://visualambition.wordpress.com/2010/08/12/glut-and-visual-studio-2010/#comments
Windows 용 OpenGL 설치파일 모음:
출처: http://kbaek2.tistory.com/entry/OpenGL-Installation [fluidfeel]
=======================
=======================
=======================
출처: http://poorman.tistory.com/135
0. OpenGL 실행에 필요한 라이브러리
- GL ( OpenGL Core Library) : 렌더링 기능을 제공하는 함수 라이브러리
- GLU ( OpenGL Utility Library) : GL 함수로 작성되어 있는 고급기능을 제공하는 함수들의 집합
- GLUT ( OpenGL Utility Toolkit) : 사용자 입력을 받거나 화면 윈도우를 제어하기 위한 함수로 운영체제를 호출
윈도우와 Visual C가 설치되어 있다면 OpenGL, GLU 라이브러리는 이미 설치되어 있으므로, GLUT 라이브러리만 다운로드 받아서 설치
1. GLUT 라이브러리 다운로드
OpenGL 공식홈 : https://www.opengl.org/resources/libraries/glut/
2. GLUT 설치 (Visual Studio 2010)
1) glut.h
C:\Program Files\Microsoft SDKs\Windows\v7.0A\Include\gl 에 복사
2) glut32.lib
C:\Program Files\Microsoft SDKs\Windows\v7.0A\Lib 에 복사
3) glut32.dll
C:\Windows\System32 에 복사
3. 프로젝트 생성
1) Win32 콘솔 응용 프로그램 -> 프로젝트명 적고 확인 -> 빈 프로젝트에 체크 -> 마침
2) 리소스 파일 -> 마우스 우측 클릭 -> 추가 -> 새 항목 -> 파일명.cpp -> 추가
4. 프로젝트 속성 - 라이브러리 추가
1) 프로젝트 속성 -> 링커 -> 입력 -> 추가 종속성 -> 편집
2) opengl 라이브러리 (아래 3개) 입력 후 확인
opengl32.lib
glut32.lib
glu32.lib
5. 프로젝트 실행
1) 소스 코드 작성 (참조 : OpenGL로 배우는 컴퓨터 그래픽스, 주우석 저, 한빛미디어)
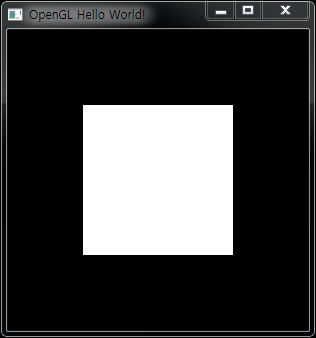
| #include <gl/glut.h> void Display() { glClear(GL_COLOR_BUFFER_BIT); glBegin(GL_POLYGON); glVertex3f(-0.5,-0.5,0.0); glVertex3f(0.5,-0.5,0.0); glVertex3f(0.5,0.5,0.0); glVertex3f(-0.5,0.5,0.0); glEnd(); glFlush(); } int main() { glutCreateWindow("OpenGL Hello World!"); glutDisplayFunc(Display); glutMainLoop(); return 0; } |
2) 실행 화면 (F5)
참조 : http://babytiger.tistory.com/entry/OpenGL-%EC%84%A4%EC%B9%98
출처: http://poorman.tistory.com/135 [poorman]
=======================
=======================
=======================
glut 을 다운 받았다고 생각하고..(이건 쉽게 받을 수 있다 openGL다운받는거니까..)
다운 받는 방법은 http://kuroikuma.tistory.com/113
OpenGL 설치 및 테스트
OpenGL 라이브러리의 종류 - GL(OpenGL Core Library) : 렌더링 기능을 제공하는 함수 라이브러리로 지엘은 단지 렌더링 기능만 수행할 ...
kuroikuma.tistory.com
위 링크를 참고.
다른 블로그들 보면 대부분
visual studio에 속성 시트가 아닌
system32폴더에 막 집어넣고 그러는데 이거 버전충돌나고 난리날 것이다.
그냥
비쥬얼스튜디오 키고
1. 상단의 보기
2. 다른창 -> 속성관리자
3. 속성관리자에서 Debug|Win32 에 새로운 속성시트 하나를 openGL_Debug 라는 이름으로 만든다
4. openGL_Debug 더블클릭
5. C/C++ 일반 - 추가 포함 디렉터리 - D:\glut\include 쓰기(본인 경로)
6. 링커 - 일반 - 추가 라이브러리 디렉터리 - D:\glut\lib 쓰기(본인 경로)
7. 링커 - 입력 - 추가 종속성 - glut32.lib 쓰기
8. 바탕화면에 내컴퓨터 우클릭 - 속성 - 고급 시스템 설정 - 환경변수 - 밑에 시스템 path - D:\glut\bin\; 추가 입력(다 지우면 망한다..)
9. 비쥬얼 스튜디오 껐다 키고 아래 코드로 테스트
10. 잘되는가? 그럼 즐겨찾는 폴더에 openGL_Debug를 넣어 놓고 다른 비쥬얼 스튜디오에서 프로젝트 새로 만들 때 그냥 기존 속성시트 불러오기를 한다.
11. 잘되셨으면 축하드려요
#include <gl\glut.h>
void Display() {
glClear(GL_COLOR_BUFFER_BIT);
glBegin(GL_POLYGON);
glVertex3f(-0.5, -0.5, 0.0);
glVertex3f(0.5, -0.5, 0.0);
glVertex3f(0.5, 0.5, 0.0);
glVertex3f(-0.5, 0.5, 0.0);
glEnd();
glFlush();
}
int main() {
glutCreateWindow("OpenGL Hello World!");
glutDisplayFunc(Display);
glutMainLoop();
return 0;
}
[출처] [OpenGL] Visual Studio 2015에 OepGL설치|작성자 JaeHa
=======================
=======================
=======================
출처: http://kuroikuma.tistory.com/113
OpenGL 라이브러리의 종류
- GL(OpenGL Core Library)
: 렌더링 기능을 제공하는 함수 라이브러리로 지엘은 단지 렌더링 기능만 수행할 뿐 사용자의 입력을 받는 기능과 출력하는 기능이 없다.
- GLU(OpenGL Utility Library)
: GL 함수로 작성되어 있는 고급기능을 제공하는 함수들의 집합
- GLUT(OpenGL Utility Toolkit)
: 사용자 입력을 받거나 화면 윈도우를 제어하기 위한 함수로 운영체제를 호출한다.
Visual Studio 의 경우
OpenGL 다운로드
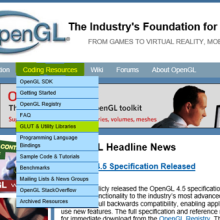
| https://www.opengl.org/ |
OpenGL 공식 홈페이지에 들어가면 상단에 Coding Resources 메뉴에 GLUT & Utility Libraries 항목이 있다.
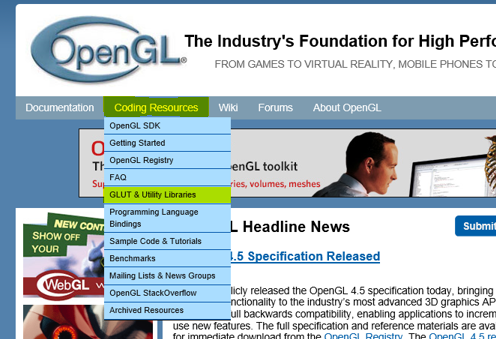
Coding Resources > GLUT & Utility Libraries 항목에 들어오면 오른쪽 메뉴에 GLUT 가 있는데 이 페이지로 이동하자.
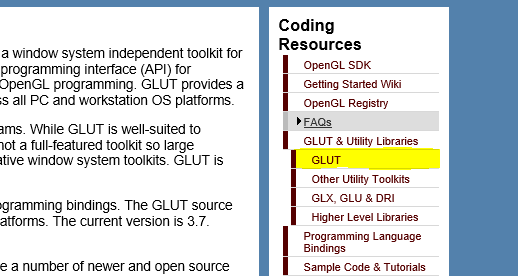
GLUT 페이지의 맨 하단에 보면 OpenGL 라이브러리를 다운 받을 수 있다.
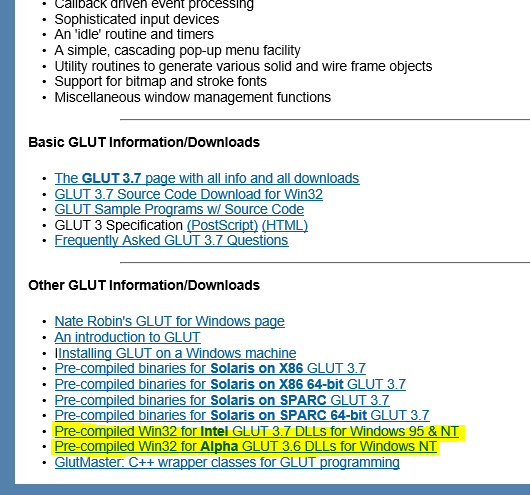
파일의 내용은 다음과 같이 구성되어 있다.
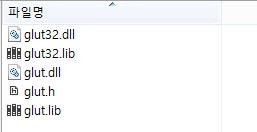
여기에서 각각의 파일들을 복사를 해서 옮겨 주어야 한다.
복사를 해 줘야하는 위치는 os의 bit와 visual studio 버전에 따라 다른듯 하다.
운영체제의 bit 종류에 따라 "Program Files"에 (x86)이 붙은 경로일 수 있고 안붙은 경로일 수 있으며,
visual studio의 버전에 따라 각각의 파일을 복사해줘야 하는 위치가 바뀔 수 있다
그리고 visual studio가 설치되어 있는 디렉토리에 각각의 파일을 복사하면 된다.
visual studio의 버전에 따라 디렉토리 경로가 "Windows Kits\8.1\" 가 아닐 수 있음을 주의 하자.
visual studio의 버전에 따라 설치된 경로를 알고 있다면 OpenGL을 사용하기가 쉽다.
"gult.h"
이 파일은
"C:\Program Files (x86)\Windows Kits\8.1\Include\um\gl"
위치에 복사해 준다. 나는 windows8.1 64bit에 visual studio 2013 버전을 사용하기때문에 다음과 같은 위치에 저장했다
"glut.lib", "glut32.lib"
이 파일은
"C:\Program Files (x86)\Windows Kits\8.1\Lib\winv6.3\um\x86"
위치에 복사해 준다.
"glut.dll", "glut32.dll"
이 파일은
"C:\Windows\System32"
위치에 복사해 준다.
그리고 MS Visual Studio를 실행하고 프로젝트를 생성해서 프로젝트 속성에 있는 링커항목에
입력 항목으로 들어가서 추가 종속성에
glut32.lib;
glu32.lib;
opengl32.lib;
를 입력하여 링커 시켜주어야 한다.
Eclipse 의 경우
MinGW 다운로드
하기 링크를 통해 다운 받고 설치한다.
설치후엔 환경변수 설정을 해줘야 한다.
| http://www.mingw.org/ |
Eclipse CDT 설치
help > install new software... 메뉴를 통해 CDT 설치
| http://download.eclipse.org/tools/cdt/releases/8.8.1 |
FreeGLUT 다운로드
하기 Freeglut를 다운받고 "C:\Windows\System32" 경로에 "freeglut.dll" 복사 해둔다.
freegult의 파일 내용 중 bin, include, lib 내용의 mingw에도 각각의 해당 경로에 복사해준다.
| http://freeglut.sourceforge.net/index.php#download |
Eclipse link 설정
프로젝트의 properties에서 c/c++ build > settings > tool settings > mingw c++ linker의 libraries (-l)에
opengl32
glu32
freeglut
내용 추가 해준다.
*추가적으로 FreeGult를 사용하면 빌드된 exe 파일과 freeglut.dll 파일이 같은 디렉토리에 존재해야한다.
Test 방법
#include <gl⁄glut.h>
void MyDisplay()
{
glClear(GL_COLOR_BUFFER_BIT); //색 버퍼 비우기
glBegin(GL_POLYGON); //다각형 그리기
//다각형의 꼭지점 포인트
glVertex3f(-0.5, -0.5, 0.0);
glVertex3f(0.5, -0.5, 0.0);
glVertex3f(0.5, 0.5, 0.0);
glVertex3f(-0.5, 0.5, 0.0);
glEnd(); //다각형 그리기 종료
glFlush(); //버퍼의 내용을 화면에 뿌리고 새로운 내용이 버퍼에 쓰여짐.
}
int main(void)
//int main(int argc, char *argv[]) //freegult를 사용한 경우 main 함수의 인자값을 받아 init이 필요하다.
{
// glutInit(&argc, argv); //freegult를 사용한 경우 main 함수의 인자값을 받아 init이 필요하다.
glutCreateWindow("OpenGL Drawing Exaple");
glutDisplayFunc(MyDisplay); //디스플레이 이벤트에 대한 콜백 함수로 등록
glutMainLoop(); //main() 무한루프
return 0;
}
설치가 잘 되었는지 테스트는 아래 소스와 같이 하면 된다.
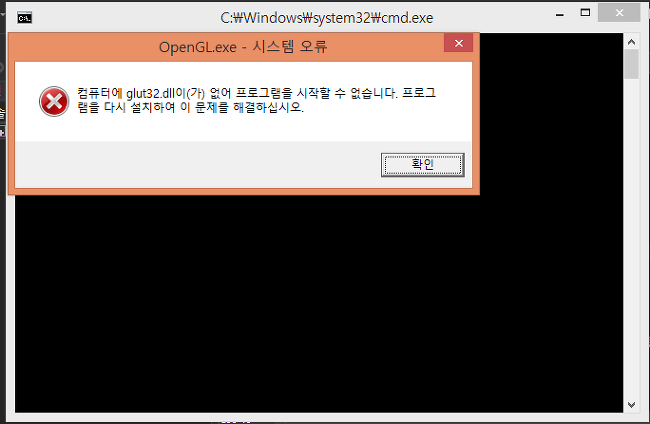
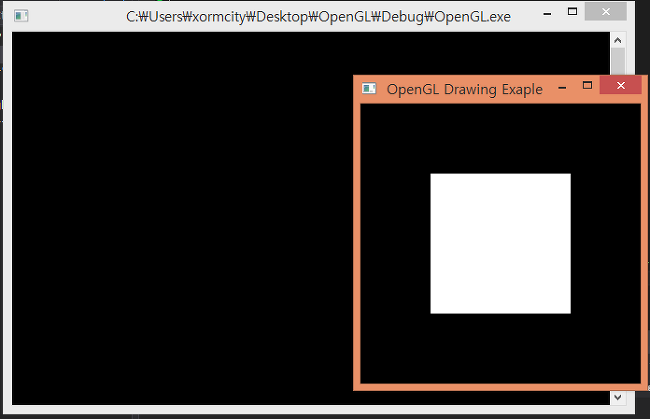
만약 컴파일 하고 실행했을때 다음과 같은 오류가 난다면 컴파일된 실행파일의 위치에 glut32.dll파일을 복사해서 넣어주면 해결된다. 아니면 "C:\Windows\SysWOW64" 디렉토리에 "glut.dll", "glut32.dll" , FreeGLUT 인
경우 "freeglut.dll" 파일을 복사해서 넣어주면 매번 번거롭게 실행파일 위치에 복사해 줄 필요가 없이 바로 실행 된다.
실행을 해보면 다음과 같은 아무 문제 없이 올바른 결과물이 출력된다.
출처: http://kuroikuma.tistory.com/113 [쿠로이의 노트]
=======================
=======================
=======================
출처: http://www.c-sharpcorner.com/UploadFile/f5a10c/getting-started-with-opengl-in-visual-cpp/
Download 100% FREE Spire Office APIs
Introduction
I have been coding OpenGL in C++ from a year but I used other IDE's. In this article we will see about setting up the Visual Studio for OpenGL to run OpenGL programs using Visual C++. So what is OpenGL?
OpenGL is a software interface to graphics hardware. This interface consists of about 150 distinct commands that you use to specify the objects and operations needed to produce interactive three-dimensional applications.
OpenGL is designed as a streamlined, hardware-independent interface to be implemented on many different hardware platforms.
In essence, it is a 3D graphics and modeling library that is extremely portable and very fast. Using OpenGL, you can create elegant and beautiful 3D graphics with nearly the visual quality of a raytracer.
The greatest advantage to using OpenGL is that it is orders of magnitude faster than a ray-tracer. It uses algorithms carefully developed and optimized by Silicon Graphics, Inc. (SGI), an acknowledged world leader in computer graphics and animation.
To run OpenGL programs using VC++ you need OpenGL header files & libraries.
Most of the common OpenGL libraries are:
- gl (Graphics Library),
- glu (Graphics Library Utility) &
- glut (Graphics Library Utility Toolkit).
In this article we will also see some important methods.
The following are the articles for basics of OpenGL in C#.
The syntax is same as in C++ but in C++ there is no class.
Procedure
First you need freeglut libraries, otherwise you cannot run OpenGL program that contain glut functions.
Microsoft SDK provides gl & glu libraries but don't glut, so you must add it externally to your project.
Go to the following link to directly download freeglut libraries for Windows.
Once you downloaded the freeglut libraries extract all files. Now,
- Copy freeglut.dll file from freeglut-MSVC-3.0.0-2.mp\freeglut\bin folder to C:\Windows folder.
- Create freeglut named folder in C:\Program Files\Common Files.
- Copy include & lib folders from freeglut-MSVC-3.0.0-2.mp\freeglut folder to C:\Program Files\Common Files\freeglut folder because you want to add these header files & libraries to your project. There is no restriction to copy these folders only in C:\Program Files\Common Files path. You can copy or can use these files from wherever you want in your project.
Once these all actions are completed then let's start setting up Visual Studio for glut.
- Start Visual Studio & click on New Project.
- Select Visual C++ & Win32 Console Application & enter your project name & click OK.
- Win32 Application Wizard - Click Next.
- Uncheck the Precompiled header checkbox. We don't need this.
- Click Finish.
Once project is created. - Go to your Project Properties.
- Select VC++ Directories as in the following image.

As you can see in the above image, Include Directories & Library Directories. In Include Directories we need to add the path of include folder which we have just copied to C:\Program Files\Common Files\freeglut path.
Same action for Library Directories for lib folder.- So first let's add freeglut header files to Include Directories. Click on Edit as shown in above image.
Now, copy and paste path of include folder of freeglut folder to Include Directories as in the following image:
Here my path is C:\Program Files\Common Files\freeglut\include. 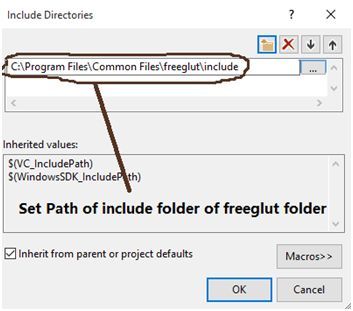
- Same action for Library Directories.
Copy and paste path of lib folder of freeglut folder to Library Directories as in the following image:
Here my path is C:\Program Files\Common Files\freeglut\lib. 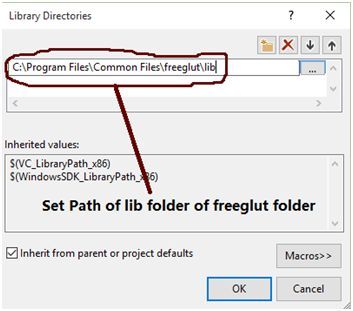
- Once it is completed Click Apply & OK.
Coding
First you must define the Windows.h header file before defining the OpenGL header files otherwise error will occur.
You need 4 header files,
- #include<Windows.h>
- #include<gl/GL.h>
- #include<gl/GLU.h>
- #include<gl/glut.h>
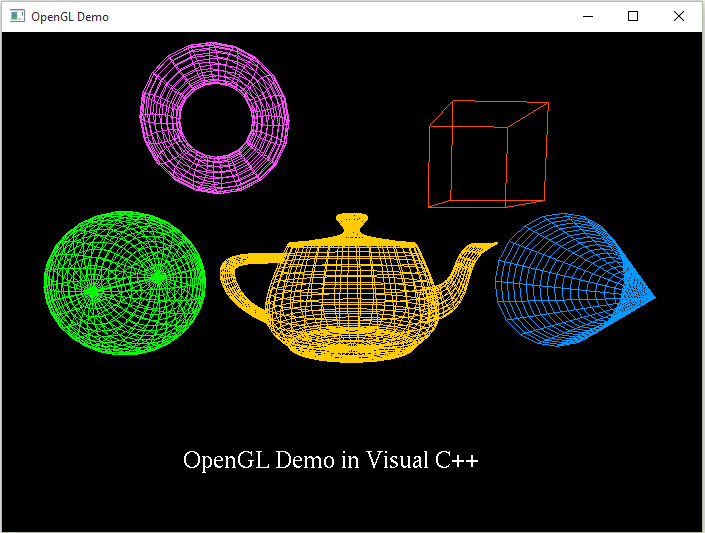
In this code we will draw some common objects defined by glut like Sphere, Teapot, Cone, etc.
Read all comments in the code for better understanding.
Let's see some important functions:
- glClearColor(): This function clear the background with color RGB.
- glPushMatrix(): This function pushes the coordinates onto stack.
- glTranslatef(): This function set the position to the next object to be drawn for float.
- glColor3f(): It specify the color to the object & takes 3 float values of RGB.
- glutWireTeapot(); This function draws a wired Teapot. If you want to draw solid then useglutSolidTeapot().
Same for other objects. See in the following complete code.
You can see syntax when the mouse hovers on that specific function in Visual Studio.
As you know every C++ program has a main function, here it takes a command line argument.
Here's the main function that can be defined in OpenGL C++ to create a Window & set all methods for execute.
- int main(int argc, char** argv)
- {
- glutInit(&argc, argv);
- glutInitDisplayMode(GLUT_DOUBLE | GLUT_RGB);
- glutInitWindowSize(700, 500);
- glutInitWindowPosition(250, 50);
- glutCreateWindow("OpenGL Demo");
- Init_OpenGL();
- glutDisplayFunc(Display_Objects);
- glutReshapeFunc(Reshape);
- glutMainLoop();
- return 0;
- }
- glutInit(): This function initialize the glut & takes to parameters.
- glutInitDisplayMode(): This set's the mode of the display whether they are RGB or other.
- glutInitWindowSize(): This set's the size(width & height) to the created window.
- glutInitWindowPosition(): Set position to the created window.
- glutCreateWindow(): This creates a window with text.
- glutDisplayFunc(): This function displays all the objects on window that is drawn & takes a function name as a parameter.
- glutReshapeFunc(): This function is used when the drawn objects are to be resize automatically when window is resized.it also take function name as a parameter.
- glutMainLoop(): This function is used to redisplay the objects on the window when window is resize or maximize.
There are many functions provided by glut library like glutKeyboardFunc() & glutMouseFunc() etc.
Here's the complete code.
Copy & paste the following code to your created project code.
If everything is fine and there are no errors then run your project.
#include<Windows.h>
// first include Windows.h header file which is required
#include<stdio.h>
#include<gl/GL.h>   // GL.h header file
#include<gl/GLU.h> // GLU.h header file
#include<gl/glut.h>  // glut.h header file from freeglut\include\GL folder
#include<conio.h>
#include<stdio.h>
#include<math.h>
#include<string.h>
// Init_OpenGL() function
void Init_OpenGL()
{
    // set background color to Black
    glClearColor(0.0, 0.0, 0.0, 0.0);
    // set shade model to Flat
    glShadeModel(GL_FLAT);
}

// Display_Objects() function
void Display_Objects(void)
{
    // clearing the window or remove all drawn objects
    glClear(GL_COLOR_BUFFER_BIT);
    /*glPushMatrix(), which copies the current matrix and adds
    the copy to the top of the stack, and
    glPopMatrix(), which discards the top matrix on the stack*/
    glPushMatrix();
    //the glTranslatef() routine in the display list alters the position of the next object to be drawn
    glTranslatef(0.0, 0.0, 0.0);
    // set color to object glColor3f(red,green,blue);
    glColor3f(1.0, 0.8, 0.0);
    // draw a wire tea pot
    glutWireTeapot(1.0);

    // draw a wire sphere
    glTranslatef(-2.5, 0.0, 0.0);
    glColor3f(0.0, 1.0, 0.0);
    glutWireSphere(0.8, 30, 30);

    // draw a wire cone
    glTranslatef(5.0, 0.0, 0.0);
    glColor3f(0.0, 0.6, 1.0);
    glutWireCone(0.8, 1.5, 20, 20);

    // draw a wire cube
    glTranslatef(-1.0, 1.4, 0.0);
    glColor3f(1.0, 0.3, 0.0);
    glutWireCube(1.0);

    // draw a wire torus
    glTranslatef(-3.0, 0.4, 0.0);
    glColor3f(1.0, 0.3, 1.0);
    glutWireTorus(0.2, 0.6, 20, 20);

    // draw a text
    glTranslatef(-2.5, -4.0, 0.0);

    char str[] = {"OpenGL Demo in Visual C++"};

    glColor3f(1.0, 1.0, 1.0);
    // set position to text
    glRasterPos2f(2.0, 0.0);

    for (int i = 0; i < strlen(str); i++)
    {
        // draw each character
        glutBitmapCharacter(GLUT_BITMAP_TIMES_ROMAN_24, str[i]);
    }

    //you can draw many objects here like polygons,lines,triangles etc

    glPopMatrix();
    glutSwapBuffers();
}
// Reshape() function
void Reshape(int w, int h)
{
    //adjusts the pixel rectangle for drawing to be the entire new window
    glViewport(0, 0, (GLsizei)w, (GLsizei)h);
    //matrix specifies the projection transformation
    glMatrixMode(GL_PROJECTION);
    // load the identity of matrix by clearing it.
    glLoadIdentity();
    gluPerspective(60.0, (GLfloat)w / (GLfloat)h, 1.0, 20.0);
    //matrix specifies the modelview transformation
    glMatrixMode(GL_MODELVIEW);
    // again  load the identity of matrix
    glLoadIdentity();
    // gluLookAt() this function is used to specify the eye.
    // it is used to specify the coordinates to view objects from a specific position
    gluLookAt(-0.3, 0.5, 5.0, 0.0, 0.0, 0.0, 0.0, 1.0, 0.0);
}

// main function
int main(int argc, char** argv)
{
    // initialize glut
    glutInit(&argc, argv);
    glutInitDisplayMode(GLUT_DOUBLE | GLUT_RGB);
    // set window size
    glutInitWindowSize(700, 500);
    // set window location
    glutInitWindowPosition(250, 50);
    // create window with window text
    glutCreateWindow("OpenGL Demo");
    // call Init_OpenGL() function
    Init_OpenGL();
    // call glutDisplayFunc() function & pass parameter as Display_Objects() function
    glutDisplayFunc(Display_Objects);
    // call glutReshapeFunc() function & pass parameter as Reshape() function
    glutReshapeFunc(Reshape);
    //glutMainLoop() is used to redisplay the objects
    glutMainLoop();
    return 0;
}
=======================
=======================
=======================
'프로그래밍 관련 > 3D,2D DRAW 관련' 카테고리의 다른 글
| OpenGL 오픈지엘3D 2D처럼 이용하기 관련, How do I position a 2D camera in OpenGL? (0) | 2020.09.15 |
|---|---|
| OpenGL "FreeTypeFont", "FTGL" 문자, 폰트 그리기 관련 (0) | 2020.09.15 |
| OpenGL 오픈지엘 투영변환 해상도 크기에 그리기,2D, glOrtho, glViewport, gluLookAt 관련 (0) | 2020.09.15 |
| FreeImage Library 를 이용하여 이미지 따로 저장 관련 (0) | 2020.09.15 |
| OpenGL 텍스쳐 로드 그리기 관련 (0) | 2020.09.15 |


댓글 영역