
출처: http://blog.grafixartist.com/material-design-tabs-with-android-design-support-library/
Material Design Tabs with Android Design Support Library
This is my third post where I continue to bring you more from the Design Support Library. Let’s look at adding a Material Design Tab strip for our apps with on scroll animations.
Tabs make it easy to explore and switch between different views. Provides a way for displaying grouped content. – source
Material Design Tabs made easy
You can see Material Design tabs popularly on the Play Store app, and more recently on WhatsApp as well (after their Material Design update).


Implementing the Tab earlier, we had to rely on external libraries. Let’s not forget the hide on scroll animations which we had to make ourselves.
Also read:
- Parallax Scrolling Tabs with Design Support Library
- Flexible space with header image pattern
- Quick Material Design Navigation Drawer with Design Support
When you’re done reading this post, you’ll be able to create amazing Material Design tabs for your apps like the ones above. So let’s get to it!
Layout
Upon closer inspection on how the Tabs actually behave, you would have noticed each Tab upon being active brings in another screen (Fragment). We either tap a Tab, or swipe left or right to access the adjacent Tab. It sits anchored to the bottom of the Toolbar.
In essence, the entirety of those Tab screens are Fragments, which will be handled by aViewPager (think of it like a gallery slideshow).
Before we dive into all of that, let’s setup our main layout first. Our layout structure will be defined like this.
<android.support.design.widget.CoordinatorLayout >
    <android.support.design.widget.AppBarLayout >
        <android.support.v7.widget.Toolbar />
        <!-- The Tab rests directly below the Toolbar, attached below it -->
        <android.support.design.widget.TabLayout />
    </android.support.design.widget.AppBarLayout>
    <!-- Helps handing the Fragments to load for each Tab -->
    <android.support.v4.view.ViewPager />
</android.support.design.widget.CoordinatorLayout>
Note the new widgets I’m using. These are from the Design Support Library. If you’re not familiar with these new widgets, I suggest you go through this post.
That’s the skeleton of our activity layout. Let’s start defining it now. Open your Activity’slayout.xml
<android.support.design.widget.CoordinatorLayout xmlns:android="http://schemas.android.com/apk/res/android"
    xmlns:app="http://schemas.android.com/apk/res-auto"
    android:layout_width="match_parent"
    android:layout_height="match_parent">
    <android.support.design.widget.AppBarLayout
        android:layout_width="match_parent"
        android:layout_height="wrap_content"
     android:theme="@style/ThemeOverlay.AppCompat.Dark.ActionBar">
        <android.support.v7.widget.Toolbar
            android:layout_width="match_parent"
            android:layout_height="?attr/actionBarSize"
            android:background="?attr/colorPrimary"
            app:layout_scrollFlags="scroll|enterAlways"
            app:popupTheme="@style/ThemeOverlay.AppCompat.Light" />
        <android.support.design.widget.TabLayout
            android:layout_width="match_parent"
            android:layout_height="wrap_content" />
    </android.support.design.widget.AppBarLayout>
    <android.support.v4.view.ViewPager
        android:layout_width="match_parent"
        android:layout_height="match_parent"
        app:layout_behavior="@string/appbar_scrolling_view_behavior" />
</android.support.design.widget.CoordinatorLayout>
The scroll flags for the Toolbar specify how it must behave upon scroll (i.e. its animation). “scroll|enterAlways” says make my Toolbar react to scroll events. Hide it when scrolling down, and reveal it when scrolling back up.
This behavior will be indicated by our ViewPager which will be hold our Fragments. The Fragments hold our scrollable view. So when we scroll down a list, the Toolbar knows when to react.

Setting up TabLayout
That’s our main layout. Open up the Activity.java
Toolbar toolbar = (Toolbar) findViewById(R.id.tabanim_toolbar);
 setSupportActionBar(toolbar);
 ViewPager viewPager = (ViewPager) findViewById(R.id.tabanim_viewpager);
 setupViewPager(viewPager);
 TabLayout tabLayout = (TabLayout) findViewById(R.id.tabanim_tabs);
 tabLayout.setupWithViewPager(viewPager);
Start off by setting up your Toolbar. Then define the ViewPager. We’ll attach an adapter to in the setupViewPager() method. Finally define the TabLayout, and attach the view pager to it.
Remember that we must attach an adapter to the ViewPager before attaching the ViewPager itself to the Tab.
setupViewPager() method
Here I will simply initialize a ViewPagerAdapter (our custom adapter class which I will explain in a moment) and add 3 fragments to it. For simplicity’s sake, I will be attached the same Fragment thrice which different backgrounds.
In a real app scenario, you would be attaching different once. Say you got 3 tabs: Games, Movies, Books. Then you should be loading their respective fragments here in ORDER of the tabs.
private void setupViewPager(ViewPager viewPager) {
      ViewPagerAdapter adapter = new ViewPagerAdapter(getSupportFragmentManager());
      adapter.addFrag(new DummyFragment(getResources().getColor(R.color.accent_material_light)), "CAT");
      adapter.addFrag(new DummyFragment(getResources().getColor(R.color.ripple_material_light)), "DOG");
      adapter.addFrag(new DummyFragment(getResources().getColor(R.color.button_material_dark)), "MOUSE");
      viewPager.setAdapter(adapter);
  }
Cat, Dog and Mouse (for the lack of better names) will be the names of my 3 Tabs.
Defining our Adapter
Remember that ViewPagerAdapter I told you about? Let’s create a class for it now, extend FragmentPagerAdapter and implement the required methods.
We need to store, first our Fragments itself, and the Fragment titles (for the Tabs). We’ll do this with a List.
private final List<Fragment> mFragmentList = new ArrayList<>();
private final List<String> mFragmentTitleList = new ArrayList<>();
Our entire Adapter class will look like this:
class ViewPagerAdapter extends FragmentPagerAdapter {
        private final List<Fragment> mFragmentList = new ArrayList<>();
        private final List<String> mFragmentTitleList = new ArrayList<>();
        public ViewPagerAdapter(FragmentManager manager) {
            super(manager);
        }
        @Override
        public Fragment getItem(int position) {
            return mFragmentList.get(position);
        }
        @Override
        public int getCount() {
            return mFragmentList.size();
        }
        public void addFrag(Fragment fragment, String title) {
            mFragmentList.add(fragment);
            mFragmentTitleList.add(title);
        }
        @Override
        public CharSequence getPageTitle(int position) {
            return mFragmentTitleList.get(position);
        }
    }
Note that addFrag() is my own custom method which I’m using to add Fragments and its titles to the adapter.

Tab Fragment
Now that we’ve done all this, you might be wondering what is ‘DummyFragment’ and why its showing an error?
DummyFragment is to be your Fragment (obvious from the name), which holds the layout content. This is what we see when we swipe to each Tab. Ideally, you should be loading a different Fragment for each tab. The layout could be anything. But I don’t want to complicate things.
Just be sure for testing, to make a list long enough so that its scrollable, making the Quick Return animation work.
I encourage you to create your own layouts for the Tab Fragment. You could refer mine, but if you’re like “Hey, I can do this!”, then good job! Scroll down to the next section.
public static class DummyFragment extends Fragment {
       int color;
       SimpleRecyclerAdapter adapter;
       public DummyFragment() {
       }
       @SuppressLint("ValidFragment")
       public DummyFragment(int color) {
           this.color = color;
       }
       @Override
       public View onCreateView(LayoutInflater inflater, ViewGroup container, Bundle savedInstanceState) {
           View view = inflater.inflate(R.layout.dummy_fragment, container, false);
           final FrameLayout frameLayout = (FrameLayout) view.findViewById(R.id.dummyfrag_bg);
           frameLayout.setBackgroundColor(color);
           RecyclerView recyclerView = (RecyclerView) view.findViewById(R.id.dummyfrag_scrollableview);
           LinearLayoutManager linearLayoutManager = new LinearLayoutManager(getActivity().getBaseContext());
           recyclerView.setLayoutManager(linearLayoutManager);
           recyclerView.setHasFixedSize(true);
           List<String> list = new ArrayList<String>();
           for (int i = 0; i < VersionModel.data.length; i++) {
               list.add(VersionModel.data[i]);
           }
           adapter = new SimpleRecyclerAdapter(list);
           recyclerView.setAdapter(adapter);
           return view;
       }
   }
Tab Listener
We can interact with the TabLayout and dictate what must happen when selecting a Tab, unselecting, reselecting and so forth.
While we’re staying on topic, let me show you how we can add such a listener to it.
tabLayout.setOnTabSelectedListener(new TabLayout.OnTabSelectedListener() {
            @Override
            public void onTabSelected(TabLayout.Tab tab) {
                viewPager.setCurrentItem(tab.getPosition());
                switch (tab.getPosition()) {
                    case 0:
                        showToast("One");
                        break;
                    case 1:
                        showToast("Two");
                        break;
                    case 2:
                        showToast("Three");
                        break;
                }
            }
            @Override
            public void onTabUnselected(TabLayout.Tab tab) {
            }
            @Override
            public void onTabReselected(TabLayout.Tab tab) {
            }
        });
Note viewPager.setCurrentItem(tab.getPosition()) handles changing the Fragment based on Tab click.
Yes, all it takes is to use setOnTabSelectedListenerwith TabLayout.OnTabSelectedListener().
Just to demonstrate, I’ll be showing a simple Toast upon tapping each Tab. Note that this works not only when tapping the Tab, but also when swiping left or right! In essence, a Toast pops each time the Fragment loads into view.
23.0.0 FIX:
With the release of Android Marshmallow, libraries got updated to 23.0.0 including the Design Support Library. This update somehow broke the tab listener in a viewpager + tab combination. So if click listener for the tabs stops working for you, here is a suggested workaround for it, suggested by Chris Banes himself.
Material Design Tabs in Action
Let’s take a breath and break down what we’ve accomplished so far:
- Created our main TabLayout
- Initialized a ViewPager and attached an Adapter (ViewPagerAdapter) to it
- Attached the ViewPager to our Tabs
- Created the Fragment content to supply our ViewPager with
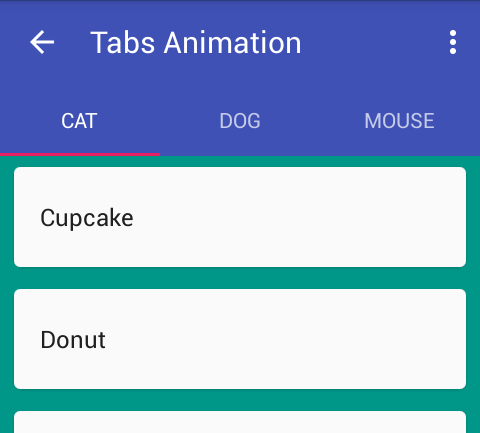
Finally with all that code behind us, lets run our app and see how it looks like.
That’s it! We’ve got some great looking Material Design Tabs (without a third party library), created the needed adapter and even got those snazzy on scroll animations for our Toolbar. Note the Tab underline highlight takes our colorAccent by default. Also, did you just notice we got those animations to work just by defining it in XML? No Java (Cheers!).
Thats what Android Design Support library allows us to do. Making the easy stuff easier.
Find this code sample on GitHub.
출처: http://stackoverflow.com/questions/13583885/actionbar-tabs-dont-fill-the-tabbar
After hours of trying I finally found a method to separate the actionbar tabbar from the actionbar manualy. actionbar convert tabs to list navigation if there is no room But now there is one problem left. The tabs don't fill the tabbar.

EDIT The tabs are added to the actionbar by: ActionBar.Tab relatieTab = actionBar.newTab().setText("Relaties"); actionBar.addTab(relatieTab);
---------------------------------------------------------------------------------------------------------------------------------------------------------------------------------------
Use the following to customize the tabs in action bar:
style name="MyAppActionBarTabStyle" parent="@android:style/Widget.ActionBar.TabView">
    <item name="android:background">@drawable/actionbar_tabindicator</item>
    <item name="android:minWidth">40dip</item>
    <item name="android:maxWidth">40dip</item>
    <item name="android:layout_width">0dip</item>
    <item name="android:layout_weight">1</item>
</style>
make sure that the activity where you are setting these navigation tabs has the following in its @android:theme
<style name="MyAppTheme" parent="android:style/Theme.Holo.Light">
    <item name="android:actionBarTabStyle">@style/MyAppActionBarTabStyle</item>
</style>
I still could not figure how how to detect whether the tabbar is separate i.e. below main action bar or merged (when in landscape OR larger screens even in portrait)
Another interesting thing to know is how to prevent tab bar from collapsing to a spinner when space is not enough.
As and when I find out answers to my questions above, will update the post. Until then hope the styles help few other ppl
---------------------------------------------------------------------------------------------------------------------------------------------------------------------------------------
I just solved this problem today.
They key was using <item name="android:padding">0dp</item> like so...
<style name="MyActionBar"
    parent="@android:style/Widget.Holo.Light.ActionBar">
</style>

<style name="LoginActionBar"
    parent="@style/MyActionBar">
    <item name="android:actionBarTabStyle">@style/LoginActionBarTabs</item>
</style>

<style name="LoginActionBarTabs"
    parent="@android:style/Widget.Holo.ActionBar.TabView">
    <item name="android:padding">0dp</item>
</style>
You don't need that many styles, but I didn't want to take any chunks out, which may have lead to confusion.
I also see that you already worked around this, but I figured I'd add my answer for the next person to come looking for this.
---------------------------------------------------------------------------------------------------------------------------------------------------------------------------------------
출처: http://stackoverflow.com/questions/30721498/tabs-in-tablayout-not-filling-up-entire-actionbar
Tabs in TabLayout not filling up entire ActionBar
I am using a TabLayout and ViewPager to display ActionBar tabs following the guide here, however my tabs are squished to the left side of the ActionBar, shown below:
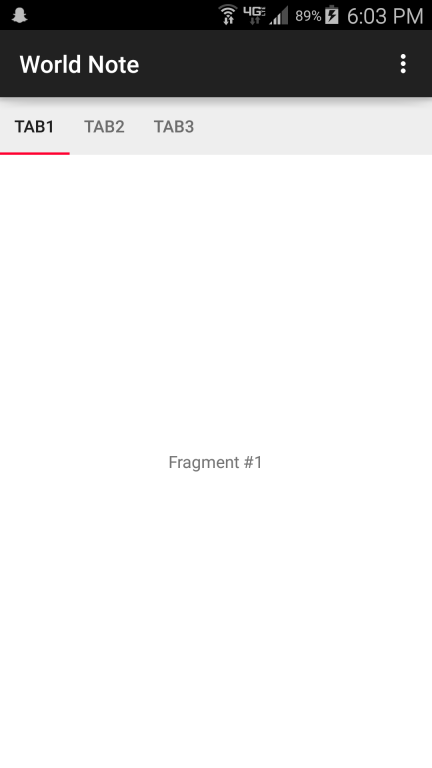
and I would like them to take up the whole bar with equal widths. I've made only a few minor changes to the guide:
In activity_main.xml a style was created to show the ActionBar
<android.support.design.widget.TabLayout
        android:id="@+id/sliding_tabs"
        android:layout_width="match_parent"
        android:layout_height="wrap_content"
        style="@style/AppTheme"
        app:tabMode="scrollable" />
Here is the styles.xml code
<style name="AppTheme" parent="Theme.AppCompat.Light.DarkActionBar">
    <item name="windowActionBar">true</item>
    <item name="tabIndicatorColor">#ffff0030</item>
</style>
Also, my MainActivity now extends AppCompatActivity instead of a FragmentActivity.
---------
You can read this TabLayout.
GRAVITY_CENTER Gravity used to lay out the tabs in the center of the TabLayout.
GRAVITY_FILL Gravity used to fill the TabLayout as much as possible.
MODE_FIXED Fixed tabs display all tabs concurrently and are best used with content that benefits from quick pivots between tabs.
MODE_SCROLLABLE Scrollable tabs display a subset of tabs at any given moment, and can contain longer tab labels and a larger number of tabs.
Set this in your code or your layout xml.
app:tabGravity="center"
app:tabMode="fixed"
or
tabLayout.setTabGravity(TabLayout.GRAVITY_CENTER);
tabLayout.setTabMode(TabLayout.MODE_FIXED);
Generally, using the code like blow can work without setting tabGravity and tabMode.
<android.support.design.widget.AppBarLayout
    android:id="@+id/appbar"
    android:layout_width="match_parent"
    android:layout_height="wrap_content"
    android:theme="@style/ThemeOverlay.AppCompat.Dark.ActionBar">

    <android.support.v7.widget.Toolbar
        android:id="@+id/toolbar"
        android:layout_width="match_parent"
        android:layout_height="?attr/actionBarSize"
        android:background="?attr/colorPrimary"
        app:popupTheme="@style/ThemeOverlay.AppCompat.Light"
        app:layout_scrollFlags="scroll|enterAlways" />

    <android.support.design.widget.TabLayout
        android:id="@+id/tabs"
        android:layout_width="match_parent"
        android:layout_height="wrap_content" />

</android.support.design.widget.AppBarLayout>
| I took out the line app:tabMode="scrollable" and it resolved the issue. – clever_trevor Jun 9 at 22:43 | |
| I too can confirm that removing app:tabMode="" from the XML file resolved everything. Changing the tabMode value would still make the the tabs appear squished. It was only resolved by not including this attribute at all. – ChallengeAccepted Sep 2 at 10:12 |
Try adding this to MainActivity:
tabLayout.setTabMode(TabLayout.MODE_FIXED);
tabLayout.setTabGravity(TabLayout.GRAVITY_FILL);
----------
Add - app:tabGravity="fill" property in the xml.
For Example -
<android.support.design.widget.TabLayout
        android:id="@+id/tablayout"
        android:layout_width="match_parent"
        android:layout_height="wrap_content"
        app:tabGravity="fill" />
탭 부분 width에 꽉차게 보이게 하기
Tab not taking full width on Tablet device [Using android.support.design.widget.TabLayout]
I have setup tabs as UPDATE 29/05/2015 this post. Tabs take full width on my Nexus 4 mobile but on nexus 7 tablet it in center and not cover full screen width. Naxus 7 screenshot

Naxus 4 screenshot

----------------------------------------------------------------------------------------------------------------------------------------------------------------------------
A "simpler" answer borrowed from Kaizie would just be adding app:tabMaxWidth="0dp" in your TabLayout xml:
<android.support.design.widget.TabLayout
            android:layout_width="match_parent"
            android:layout_height="wrap_content"
            app:tabMaxWidth="0dp"
            app:tabGravity="fill"
            app:tabMode="fixed" />
----------------------------------------------------------------------------------------------------------------------------------------------------------------------------
tab을 스크롤 하고 싶으면 위에서 app:tabMode 에서 -> app:tabMode="scrollable" 이런식으로 바꾸어주면 된다
----------------------------------------------------------------------------------------------------------------------------------------------------------------------------
I had the same problem and i checked the TabLayout style, and i found that its default style is Widget.Design.TabLayout which has different implementations (normal, landscape and sw600dp).
The one we need is the one for tablets (sw600dp) which has the following implementation:
<style name="Widget.Design.TabLayout" parent="Base.Widget.Design.TabLayout">
        <item name="tabGravity">center</item>
        <item name="tabMode">fixed</item>
    </style>
From this style we will use "tabGravity" (which possible values are "center" or "fill") using the "fill" value.
But we need to go deeper, and then we see that this one extends from Base.Widget.Design.TabLayout, which implementation is:
<style name="Base.Widget.Design.TabLayout" parent="android:Widget">
    <item name="tabMaxWidth">@dimen/tab_max_width</item>
    <item name="tabIndicatorColor">?attr/colorAccent</item>
    <item name="tabIndicatorHeight">2dp</item>
    <item name="tabPaddingStart">12dp</item>
    <item name="tabPaddingEnd">12dp</item>
    <item name="tabBackground">?attr/selectableItemBackground</item>
    <item name="tabTextAppearance">@style/TextAppearance.Design.Tab</item>
    <item name="tabSelectedTextColor">?android:textColorPrimary</item>
</style>
So, from this style we will need to override "tabMaxWidth". In my case i set it to 0dp, so it has no limit.
And my style looked like this:
<style name="MyTabLayout" parent="Widget.Design.TabLayout">
        <item name="tabGravity">fill</item>
        <item name="tabMaxWidth">0dp</item>
    </style>
And then the tab bar will fill the whole screen from side to side.
---
To force tabs to take up the full width (split into equal sizes), apply the following to the TabLayoutview:
TabLayout tabLayout = (TabLayout) findViewById(R.id.your_tab_layout);
tabLayout.setTabGravity(TabLayout.GRAVITY_FILL);
tabLayout.setTabMode(TabLayout.MODE_FIXED);
액션바 탭부분 커스텀하게 꾸미기
출처: http://stackoverflow.com/questions/17893664/how-to-customize-the-font-of-action-bar-tabs
How to customize the font of Action Bar tabs
How to set the text font for the ActionBar tabs, is there a way to deal with the textview of each tab?
--
first you need a Typeface
Typeface droidSerifMonoTF = Typeface.createFromAsset(getAssets(), "fonts/DroidSerif.ttf");remmber that the font locations is in the assets directory (in this example it's in /assets/fonts/DroidSerif.ttf)
than, for all the tabs, create a textview, assign it the typeface and give it as a custom view to the actionbar's tab:
  for (int i = 0; i < mSectionsPagerAdapter.getCount(); i++) {
            TextView t = new TextView(this);
            t.setText(mSectionsPagerAdapter.getPageTitle(i) );
            t.setTypeface(droidSansMonoTF);

            actionBar.addTab(actionBar.newTab()
                    .setCustomView(t)
                    .setTabListener(this));

        }
-----------------------------------------------------------------------------------------------------------------------------------------------------
액션바 탭부분 커스텀하게 꾸미기
출처: https://guides.codepath.com/android/ActionBar-Tabs-with-Fragments
ActionBar Tabs with Fragments
Fragments and Tabs
There are several ways to setup tabs with fragments. The easiest is using ActionBar tabs. Note: Standard ActionBar tabs are not supported in Gingerbread, so many people use ActionBarSherlock when Gingerbread must be supported. Google has also released a support AppCompatActivity class which can be used for compatible tabs. Thankfully, both the support approaches are more or less identical in code with a few class name tweaks.
Note: As of Android 5.0, ActionBar Tabs is now officially deprecated. Tabs should now be built using the TabLayout.
Without Gingerbread Support
To setup tabs using ActionBar and fragments that are not gingerbread compatible, you need to add a TabListenerimplementation to your application which defines the behavior of a tab when activated. A good default implementation is justadding this to FragmentTabListener.java
Once you have created the FragmentTabListener from this snippet within your app, setup the ActionBar and define which tabs you would like to display and attach listeners for each tab:
public class MainActivity extends FragmentActivity {

	@Override
	protected void onCreate(Bundle savedInstanceState) {
		super.onCreate(savedInstanceState);
		setContentView(R.layout.activity_main);
		setupTabs();
	}

	private void setupTabs() {
		ActionBar actionBar = getActionBar();
		actionBar.setNavigationMode(ActionBar.NAVIGATION_MODE_TABS);
		actionBar.setDisplayShowTitleEnabled(true);

		Tab tab1 = actionBar
			.newTab()
			.setText("First")
			.setIcon(R.drawable.ic_home)
			.setTabListener(
				new FragmentTabListener<FirstFragment>(R.id.flContainer, this, "first",
								FirstFragment.class));

		actionBar.addTab(tab1);
		actionBar.selectTab(tab1);

		Tab tab2 = actionBar
			.newTab()
			.setText("Second")
			.setIcon(R.drawable.ic_mentions)
			.setTabListener(
			    new FragmentTabListener<SecondFragment>(R.id.flContainer, this, "second",
								SecondFragment.class));

		actionBar.addTab(tab2);
	}
}
Now you have fragments that work for any Android version above 3.0. If you need gingerbread support, check out the approaches below.
With AppCompatActivity Support
Google has released an updated support library "android-support-v7-appcompat" which includes official support for the ActionBar with Gingerbread compatibility. To use this, first, we need to upgrade to latest support library by opening the Android SDK Manager and verifying we have the latest "Android Support Library".
Now, we need to import the support library as a library project following the usual steps. File => Import => Existing Android Code... and then go to your sdk folder and select sdk => extras => android => support => v7 => appcompat.

Now, for your app, right-click and select "Properties..." and then add "android-support-v7-appcompat" as a library.

Make sure to setup your app to use the correct support theme within the AndroidManifest.xml:
<?xml version="1.0" encoding="utf-8"?>
<manifest xmlns:android="http://schemas.android.com/apk/res/android"
    package="com.codepath.apps.codepathbootcampapp"
    ...>
    <application
        android:theme="@style/Theme.Base.AppCompat.Light.DarkActionBar"
        ...>
</manifest>
For these compatibility items, you also need to be careful to change the menu items to use a custom prefix inres/menu/example.xml for the showAsAction instead of android:showAsAction:
<?xml version="1.0" encoding="utf-8"?>
<menu
  xmlns:android="http://schemas.android.com/apk/res/android"
  xmlns:myapp="http://schemas.android.com/apk/res-auto">
    <item android:id="@+id/item_menu_ok"
          android:icon="@drawable/ic_action_ok"
          android:title="@string/ok"
          myapp:showAsAction="ifRoom"></item>
    <item android:id="@+id/item_menu_cancel"
          android:icon="@drawable/ic_action_cancel"
          android:title="@string/cancel"
          myapp:showAsAction="ifRoom"></item>
</menu>
To setup tabs using ActionBar and fragments, you need to add a TabListener implementation to your application which defines the behavior of a tab when activated. A good default implementation is just adding this toSupportFragmentTabListener.java.
Once you have created the SupportFragmentTabListener from this snippet within your app, setup the ActionBar and define which tabs you would like to display and attach listeners for each tab:
public class MainActivity extends AppCompatActivity {

	@Override
	protected void onCreate(Bundle savedInstanceState) {
		super.onCreate(savedInstanceState);
		setContentView(R.layout.activity_main);
		setupTabs();
	}

	private void setupTabs() {
		ActionBar actionBar = getSupportActionBar();
		actionBar.setNavigationMode(ActionBar.NAVIGATION_MODE_TABS);
		actionBar.setDisplayShowTitleEnabled(true);

		Tab tab1 = actionBar
		    .newTab()
		    .setText("First")
		    .setIcon(R.drawable.ic_home)
		    .setTabListener(new SupportFragmentTabListener<FirstFragment>(R.id.flContainer, this,
                        "first", FirstFragment.class));

		actionBar.addTab(tab1);
		actionBar.selectTab(tab1);

		Tab tab2 = actionBar
		    .newTab()
		    .setText("Second")
		    .setIcon(R.drawable.ic_mentions)
		    .setTabListener(new SupportFragmentTabListener<SecondFragment>(R.id.flContainer, this,
                        "second", SecondFragment.class));
		actionBar.addTab(tab2);
	}

}
With ActionBarSherlock
Using ActionBarSherlock, the code looks almost exactly the same but automatically supports gingerbread and below. First you must download ActionBarSherlock.zip. Import the code into Eclipse and mark the project as a library. Next, add the library to your application. Watch the video on the FAQ page for a detailed guide.
With ActionBarSherlock installed and added to your app, add the gist code as the SherlockTabListener within your application.
Once you have created the SherlockTabListener from this snippet within your app, setup the ActionBar and define which tabs you would like to display and attaches listeners for each tab:
public class ActionBarSherlockActivity extends SherlockFragmentActivity {

	@Override
	protected void onCreate(Bundle savedInstanceState) {
		super.onCreate(savedInstanceState);
		setContentView(R.layout.activity_action_bar_sherlock);
		setupTabs();
	}

	private void setupTabs() {
		ActionBar actionBar = getSupportActionBar();
		actionBar.setNavigationMode(ActionBar.NAVIGATION_MODE_TABS);
		actionBar.setDisplayShowHomeEnabled(true);
		actionBar.setDisplayShowTitleEnabled(true);

		Tab tabFirst = actionBar
			.newTab()
			.setText("First")
			.setIcon(R.drawable.ic_launcher)
			.setTabListener(
				new SherlockTabListener<FirstFragment>(R.id.flContainer, this, "First",
								FirstFragment.class));

		actionBar.addTab(tabFirst);
		actionBar.selectTab(tabFirst);

		Tab tabSecond = actionBar
			.newTab()
			.setText("Second")
			.setIcon(R.drawable.ic_launcher)
			.setTabListener(
				new SherlockTabListener<SecondFragment>(R.id.flContainer, this, "Second",
							SecondFragment.class));

		actionBar.addTab(tabSecond);
	}
}
With this approach you can have easy tab navigation switching quickly between fragments.
Reference a Fragment in the Activity
If you need to reference a fragment instance from within the activity, you can refer to the fragment by it's "tag". For example, if you created the following tab:
private final String FIRST_TAB_TAG = "first";
Tab tab1 = actionBar
  ...
  .setTabListener(new FragmentTabListener<FirstFragment>(R.id.flContainer, this,
      FIRST_TAB_TAG, FirstFragment.class));
You have assigned the tag FIRST_TAB_TAG to that fragment during construction and you can access the fragment for this tab later using findFragmentByTag:
FirstFragment fragmentFirst = getSupportFragmentManager().findFragmentByTag(FIRST_TAB_TAG);This will return the fragment instance embedded for that tab.
Communicating Arguments to Fragment
In certain cases we need to be able to pass arguments into the tab fragments during their construction. Fortunately, theFragmentTabListener can accept an optional Bundle argument which will be passed into the fragment automatically during creation:
// Construct the bundle passing in arguments
Bundle firstBundle = new Bundle();
args.putInt("someInt", someInt);
args.putString("someTitle", someTitle);
// Pass bundle into the tab listener constructor
Tab tab1 = actionBar
  ...
  .setTabListener(new FragmentTabListener<FirstFragment>(
      R.id.flContainer, this, "First", FirstFragment.class,
      firstBundle)); // <-- Bundle passed here
Then within the FirstFragment we can access these arguments with getArguments:
public class FirstFragment extends Fragment {
   @Override
   public void onCreate(Bundle savedInstanceState) {
       super.onCreate(savedInstanceState);
       // Get back arguments
       int SomeInt = getArguments().getInt("someInt", 0);
       String someTitle = getArguments().getString("someTitle", "");
   }
}
Tab Selection
Once the ActionBar has been set to ActionBar.NAVIGATION_MODE_TABS navigation mode, we can look at the currently selected tab index with getSelectedNavigationIndex():
// Returns tab index currently selected
getSupportActionBar().getSelectedNavigationIndex();
We can set the currently selected tab by index with setSelectedNavigationItem:
// sets current tab by index to the first tab on the bar
getSupportActionBar().setSelectedNavigationItem(0);
We can also access arbitrary tabs, check the number of tabs or remove them:
// returns the tab object at position 0
getSupportActionBar().getTabAt(0);
// returns the total number of tabs
getSupportActionBar().getTabCount();
// Removes the first tab
getSupportActionBar().removeTabAt(0);
// Returns the currently selected tab object
getSupportActionBar().getSelectedTab();
// Select a tab given the tab object
getSupportActionBar().selectTab(someTabObject);
Using these methods described above, we can modify the tabs and their selected states at runtime.
Note: Occasionally, you might attempt to switch the current tab and load a fragment in the wrong event (for exampleonActivityResult) and encounter an error such as IllegalStateException: cannot perform this action after onSaveInstanceState. This is typically tied to replacing fragments onto the content pane at a time where state loss could occur. Read this article for a detailed description of the issue. See this solution for one common approach to solving this.
Styling Tabs
There are several different ways of styling the tabs within the ActionBar. The easiest way to style the ActionBar tabs is using the nifty Android ActionBar Style Generator. This utility will allow you to easily drop-in a new skin for the ActionBar.
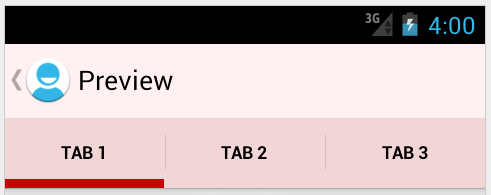
Doing custom styling of the ActionBar requires using the Styles system for declaring the look of the ActionBar and tabs more manually by setting various tab related styles and themes. There are actually a few related styles for different sections of the ActionBar Tabs:
- actionBarTabBarStyle – This determines the style of the overall tab bar which contains the tabs.
- actionBarTabStyle – This determines the style of the individual tabs themselves including the indicator.
- actionBarTabTextStyle - This determines the style of the tab text.
We can tweak the styles of these by building a custom theme in the res/values-v14/styles.xml:
<style name="MyTheme" parent="@android:style/Theme.Holo.Light">
    <item name="android:actionBarTabBarStyle">@style/MyTheme.ActionBar.TabBar</item>
    <item name="android:actionBarTabStyle">@style/MyTheme.ActionBar.TabView</item>
    <item name="android:actionBarTabTextStyle">@style/MyTheme.ActionBar.TabText</item>
</style>

<style name="MyTheme.ActionBar.TabBar" parent="android:style/Widget.Holo.Light.ActionBar.TabBar">
    <!-- This is an ORANGE background -->
    <item name="android:background">@drawable/tab_bar_background</item>
</style>

<style name="MyTheme.ActionBar.TabView" parent="android:style/Widget.Holo.ActionBar.TabView">
    <!-- This is a GREEN background -->
    <item name="android:background">@drawable/tab_view_background</item>
</style>

<style name="MyTheme.ActionBar.TabText" parent="android:style/Widget.Holo.ActionBar.TabText">
    <!-- This is a WHITE tab color -->
    <item name="android:textColor">@android:color/white</item>
</style>
The result of these styles is this with the actionBarTabBarStyle set orange, the actionBarTabStyle set green and theactionBarTabTextStyle set purple (selected) or white:

Customize Tabs with Indicator Colors
To customize the tabs including bottom indicators, we will be overriding actionBarTabStyle which determines the style of the tabs themselves. The tab is the area that includes the text, its background, and the little indicator colored bar under the text. If you want to customize the indicator, you need to alter this style.
First, we need to create the tab_bar_background drawable which defines the tab drawables for each state. This will be a selector drawable, which has different layer-lists applied depending on whether the tab is selected or not. Inres/drawable/tab_bar_background.xml we can add:
<?xml version="1.0" encoding="utf-8"?>
<selector xmlns:android="http://schemas.android.com/apk/res/android">
  <!-- UNSELECTED TAB STATE -->
  <item android:state_selected="false" android:state_pressed="false">
      <layer-list xmlns:android="http://schemas.android.com/apk/res/android">
        <!-- Bottom indicator color for the UNSELECTED tab state -->
        <item android:top="-5dp" android:left="-5dp" android:right="-5dp">
             <shape android:shape="rectangle">
                 <stroke android:color="#65acee" android:width="2dp"/>
             </shape>
        </item>
      </layer-list>
  </item>
  <!-- SELECTED TAB STATE -->
  <item android:state_selected="true" android:state_pressed="false">
    <layer-list xmlns:android="http://schemas.android.com/apk/res/android">
       <!-- Tab background color for the SELECTED tab state -->
       <item>
          <shape>
              <solid android:color="#cef9ff"/>
          </shape>
       </item>
       <!-- Bottom indicator color for the SELECTED tab state -->
       <item android:top="-5dp" android:left="-5dp" android:right="-5dp">
           <shape android:shape="rectangle">
               <stroke android:color="#5beea6" android:width="2dp"/>
           </shape>
       </item>
    </layer-list>
  </item>
</selector>
Each state applies a different layer-list representing the different tab states. The indicator under the active tab comes from the background drawable. To draw the indicator, we created a layer-list for a rectangle shape with a 2dp stroke around the exterior, then offset the rectangle so that the top, left and right sides are outside the bounds of the view, so we will only see the bottom line.
Finally, we need to set the background for the tabs to the tab_bar_background drawable in res/values-v14/styles.xml:
<style name="MyTheme" parent="android:Theme.Holo.Light">
    <item name="android:actionBarTabStyle">@style/MyTheme.ActionBar.TabView</item>
</style>

<style name="MyTheme.ActionBar.TabView" parent="android:style/Widget.Holo.ActionBar.TabView">
    <item name="android:background">@drawable/tab_bar_background</item>
</style>
With these steps in place, we now have fully customized tabs with this result:

We may also want to customize the tab text color based on the selected state of the tab. This allows the tab to be one color when selected and another color when unselected. To do this, we need to define a color selector inres/color/selector_tab_text.xml:
<?xml version="1.0" encoding="utf-8"?>
<selector xmlns:android="http://schemas.android.com/apk/res/android">
    <!-- SELECTED COLOR -->
    <item android:state_selected="true"
        android:color="#6e62ff"/>
    <!-- UNSELECTED COLOR -->
    <item android:state_selected="false"
        android:color="#f8fff4"/>
</selector>
and then we can apply this color selector to the tab text color within res/values/styles.xml:
<style name="MyTheme" parent="@android:style/Theme.Holo.Light">
    <item name="android:actionBarTabTextStyle">@style/MyTheme.ActionBar.TabText</item>
</style>

<style name="MyTheme.ActionBar.TabText" parent="android:style/Widget.Holo.ActionBar.TabText">
    <!-- This is a PURPLE text color when selected and a WHITE color otherwise -->
    <item name="android:textColor">@color/selector_tab_text</item>
</style>
The result of these styles is that the text color is purple when tab is selected and white otherwise.

Browse the Styling the ActionBar official guide for a basic overview. If you are serious about wrestling tabs styles into submission though, check out these resources as well:
- Check out this article for a detailed look at styling tabs in the action bar
- This second article details how to style tabs as well with several examples.
- You can supply a custom view for each tab in truly custom cases that radically changes the look and feel of the tab.
- Consider replacing tabs with the ViewPager and using a third-party tab indicator which more easily achieves the desired effect.
Note that fully customizing tabs requires an understanding of Drawables as well.
Styling Tabs with ActionBarSherlock
If you are using ActionBarSherlock, you will need to do the following to custom style your tabs:
Change background color of tab container:
You will need to customize android:actionBarTabBarStyle in order to achieve this. actionBarTabBarStyle determines the style of the overall tab bar. It includes the whole container that includes all of the tabs.
- Create style for "Widget.Sherlock.Light.ActionBar.TabView" in res/values-v14/styles.xml.
- Reference this style for "actionBarTabBarStyle".
In res/values/styles.xml:
<style name="AppBaseTheme" parent="android:Theme.Holo.Light.DarkActionBar">
        <!-- API 14 theme customizations can go here. -->
        <item name="android:actionBarTabBarStyle">@style/ActionBarTabStyle</item>
        <item name="actionBarTabBarStyle">@style/ActionBarTabStyle</item>
</style>

<style name="ActionBarTabStyle" parent="Widget.Sherlock.Light.ActionBar.TabView">
    <item name="android:background">@color/white</item>
</style>
Format ActionBarSherlock Tab Text
Customize "android:actionBarTabBarStyle" in res/values-v14/styles.xml as follows:
<style name="AppBaseTheme" parent="android:Theme.Holo.Light.DarkActionBar">
    <!-- API 14 theme customizations can go here. -->
    ...
    <item name="android:actionBarTabTextStyle">@style/ActionBarTabTextStyle</item>
    <item name="actionBarTabTextStyle">@style/ActionBarTabTextStyle</item>
</style>

<style name="ActionBarTabTextStyle" parent="Widget.Sherlock.ActionBar.TabText">
    <item name="android:textColor">@color/actionbar_color_selector</item>
    <item name="android:fontFamily">sans-serif-light</item>
    <item name="android:textSize">16sp</item>
    <item name="android:textAllCaps">false</item>
</style>
To define a selector to choose different text color based on tab state, create res/color/actionbar_color_selector.xml:
<?xml version="1.0" encoding="utf-8"?>
<selector xmlns:android="http://schemas.android.com/apk/res/android">
    <item android:state_selected="true" android:color="@color/red" />
    <item android:color="@color/black" />
</selector>
Sometimes its required to change the text typeface depending on the tab state. e.g. You might want to change the text typeface to bold for the selected tab. We can achieve this in the 'onTabSelected' and 'onTabUnselected' methods in 'SherlockTabListener.java' class.
public void onTabSelected(Tab tab, FragmentTransaction ft) {
    ...
	String formattedName = "<b>" + tab.getText() + "</b>";
	tab.setText(Html.fromHtml(formattedName));
}

public void onTabUnselected(Tab tab, FragmentTransaction ft) {
	if (mFragment != null) {
		String formattedName = tab.getText().toString();
		tab.setText(Html.fromHtml(formattedName));
		// Detach the fragment, because another one is being attached
		ft.detach(mFragment);
	}
}
Format ActionBarSherlock Indicator
Override 'actionBarTabStyle' - it determines the style of the tabs themselves. The tab is the area that includes the text, its background, and the little indicator bar under the text. If you want to customize the indicator, you need to alter this one.
- Create the tab_bar_background drawable. This will be a state list drawable, which has different visual appearance depending on whether the tab is selected and/or pressed. In the state list, we’ll reference two other drawables for when the button is selected, and we’ll just use a plain color for the unselected states.
In res/drawable/tab_bar_background.xml:
<?xml version="1.0" encoding="utf-8"?>

<selector xmlns:android="http://schemas.android.com/apk/res/android">
  <item android:state_focused="false" android:state_selected="false" android:state_pressed="false" android:drawable="@color/transparent"/>
  <item android:state_focused="false" android:state_selected="true" android:state_pressed="false" android:drawable="@drawable/tab_bar_background_selected"/>
  <item android:state_selected="false" android:state_pressed="true" android:drawable="@color/tab_highlight"/>
  <item android:state_selected="true" android:state_pressed="true" android:drawable="@drawable/tab_bar_background_selected_pressed"/>
</selector>- We’ll also need to create a colors.xml file to define the two colors we used in the state list drawable:.
In res/values/colors.xml:
<?xml version="1.0" encoding="utf-8"?>
<resources>
    <color name="transparent">#000000</color>
    <color name="tab_highlight">#65acee</color>
</resources>- Now, we need to create the drawables for the different backgrounds. The indicator under the active tab comes from the background drawable, so in our custom version, we’ll include an indicator in the proper color. To do this, I used a hack where I create a layer list with a rectangle shape with a 2dp stroke around the exterior, then offset the rectangle so that the top, left and right sides are outside the bounds of the view, so you only see the bottom line. In the case of the “pressed” version, the fill color is set on the rectangle to indicate that it is pressed.
In res/drawable/tab_bar_background_selected.xml:
<?xml version="1.0" encoding="utf-8"?>

<layer-list xmlns:android="http://schemas.android.com/apk/res/android">
    <item android:top="-5dp" android:left="-5dp" android:right="-5dp">
        <shape android:shape="rectangle">
            <stroke android:color="#65acee" android:width="2dp"/>
        </shape>
    </item>
</layer-list>
In res/drawable/tab_bar_background_selected_pressed.xml:
<?xml version="1.0" encoding="utf-8"?>

<layer-list xmlns:android="http://schemas.android.com/apk/res/android">
    <item android:top="-5dp" android:left="-5dp" android:right="-5dp">
        <shape android:shape="rectangle">
            <stroke android:color="#65acee" android:width="2dp"/>
        </shape>
    </item>
</layer-list>- Finally, we need to set the background for the tabs to the “tab_bar_background” drawable in res/values-v14/styles.xml:
<style name="AppBaseTheme" parent="android:Theme.Holo.Light.DarkActionBar">

    <!-- API 14 theme customizations can go here. -->
    ...
    <item name="android:actionBarTabStyle">@style/Widget.Sherlock.Light.ActionBar.Tab</item>
    <item name="actionBarTabStyle">@style/Widget.Sherlock.Light.ActionBar.Tab</item>
</style>

<style name="Widget.Sherlock.Light.ActionBar.Tab">
    <item name="android:background">@drawable/tab_bar_background</item>
</style>
With those steps, you now have fully customized tabs!
---------------------------------------------------------------------------------------------------------------------------------------------------------------------------------------------
출처: http://gwpark.tistory.com/1991
Navigation Tab 폰트 바꾸기
DEVELOPMENT/Android 2014.02.25 07:39 Posted by gwpark
먼저, 외부 폰트 파일을 \assets\fonts\ 에 카피한다.
(이 글에선 \assets\fonts\CONSOLA.TTF 를 사용한다.)
[ \res\layout\my_nav_tab.xml ]
<TextView
    xmlns:android="http://schemas.android.com/apk/res/android"
    android:id="@+id/my_nav_tab_title"
    android:layout_width="match_parent"
    android:layout_height="match_parent"
    android:textColor="#000"
    android:paddingTop="12dp" />
[ Change Font Programmatically ]
ActionBar actionBar = getActionBar();

for(int i = 0; i < actionBar.getTabCount(); i++) {
    LayoutInflater inflater = LayoutInflater.from(this);
    View customView = inflater.inflate(R.layout.my_nav_tab, null);

    TextView textView = (TextView)customView.findViewById(
            R.id.my_nav_tab_title);
    textView.setText(actionBar.getTabAt(i).getText());

    Typeface font = Typeface.createFromAsset(getAssets(),
            "fonts/CONSOLA.TTF");
    textView.setTypeface(font);

    actionBar.getTabAt(i).setCustomView(customView);
}
출처: http://sourcey.com/android-custom-centered-actionbar-with-material-design/
The Android ActionBar is now easier to customise than ever, due to the fact that the old ActionBar element has been replaced with the more versitile Toolbar. Since Toolbarinherits directly from ViewGroup, you can essentially style or add any element you want to the ActionBar. That is, with the exception of a few gotchas, but you’re in luck because this article is here so you don’t get got!
Just a foreward to say that this article makes the assumption that you are using the support library - and if you’re not then you’re only targeting about 10% of devices which is more than a little strange.
OK, let’s code.
Below is the completed Toolbar layout. Go ahead and add it to your project, and you can make changes from there.
/res/layout/toolbar.xml
<?xml version="1.0" encoding="utf-8"?>
<android.support.v7.widget.Toolbar
    xmlns:android="http://schemas.android.com/apk/res/android"
    xmlns:app="http://schemas.android.com/apk/res-auto"
    android:id="@+id/toolbar"
    android:layout_width="match_parent"
    android:layout_height="?attr/actionBarSize"
    android:background="?attr/colorPrimary"
    app:popupTheme="@style/ThemeOverlay.AppCompat.Light"
    app:layout_scrollFlags="scroll|enterAlways"
    app:layout_collapseMode="pin">
    <FrameLayout
        android:layout_width="match_parent"
        android:layout_height="match_parent">

        <!-- This is a centered logo -->
        <ImageView
            android:id="@+id/toolbar_logo"
            android:src="@drawable/logo"
            android:layout_width="wrap_content"
            android:layout_height="fill_parent"
            android:layout_marginRight="?attr/actionBarSize"
            android:layout_marginTop="4dp"
            android:layout_marginBottom="4dp"
            android:layout_gravity="center" />

        <!-- This is a centered title -->
        <!--
        <TextView
            android:id="@+id/toolbar_title"
            android:orientation="horizontal"
            android:layout_width="wrap_content"
            android:layout_height="fill_parent"
            android:layout_marginRight="?attr/actionBarSize"
            android:layout_gravity="center"
            android:gravity="center_vertical"
            android:visibility="gone"
            android:text="@string/app_name"
            android:textColor="@color/white"
            style="@style/TextAppearance.AppCompat.Widget.ActionBar.Title.Inverse"
            />
            -->

        <!-- This is a custom left side button -->
        <!--
        <ImageButton
            android:id="@+id/btn_settings"
            android:layout_width="?attr/actionBarSize"
            android:layout_height="?attr/actionBarSize"
            android:layout_marginRight="?attr/actionBarSize"
            android:layout_gravity="start|center_vertical"
            android:visibility="invisible"
            android:src="@drawable/ic_settings_white_24dp"
            style="@style/Widget.AppCompat.ActionButton" />
            -->

        <!-- This is a custom right side button -->
        <!--
        <ImageButton
            android:id="@+id/btn_search"
            android:layout_width="?attr/actionBarSize"
            android:layout_height="?attr/actionBarSize"
            android:layout_gravity="end"
            android:src="@drawable/ic_magnify_white_24dp"
            style="@style/Widget.AppCompat.ActionButton" />
            -->

    </FrameLayout>
</android.support.v7.widget.Toolbar>
Below is a very minimal MainActivity.java class which shows how to override the default ActionBar as simple as possible, and outlines some options that can be used to configure how the ActionBar behaves.
MainActivity.java
public class MainActivity extends AppCompatActivity {
    @Override
    protected void onCreate(Bundle savedInstanceState) {
        super.onCreate(savedInstanceState);
        setContentView(R.layout.activity_main); // an example activity_main.xml is provided below

        // Always cast your custom Toolbar here, and set it as the ActionBar.
        Toolbar tb = (Toolbar) findViewById(R.id.toolbar);
        setSupportActionBar(tb);

        // Get the ActionBar here to configure the way it behaves.
        final ActionBar ab = getSupportActionBar();
        //ab.setHomeAsUpIndicator(R.drawable.ic_menu); // set a custom icon for the default home button
        ab.setDisplayShowHomeEnabled(true); // show or hide the default home button
        ab.setDisplayHomeAsUpEnabled(true);
        ab.setDisplayShowCustomEnabled(true); // enable overriding the default toolbar layout
        ab.setDisplayShowTitleEnabled(false); // disable the default title element here (for centered title)
    }
}
Centering the Title or Logo
Our custom ActionBar layout uses a centered title element by default (or logo depending on your preference of text or image as a title). This deviates from the Android stardard a little, which is to left align the title text and position it just to the right of the home button. Many apps still opt for the centered title design though, probably because it has been made popular on iOS.
A common gotcha here is that if we are aligning the title element with center gravity, and we are using any of the default toolbar buttons, then our custom toolbar will be pushed to the side of the default buttons, causing our title centering will be off by the width of the default button (unless of course you are using the default buttons on either side, in which case our cusorm toolbar will still be centered). To counter this, just add android:layout_marginLeft|Right="?attr/actionBarSize"to the custom TextView or ImageView that’s acting as the centered title. Easy.
If you don’t want a centered title and would prefer to use the default left aligned ActionBar title, then just remove the toolbar_logo and toolbar_logo elements from the toolbar.xml file, and remove the call to ab.setDisplayShowTitleEnabled(false); from your MainActivity.java.
Material Design Buttons
To make your custom buttons play nicely inside the ActionBar and have transparent ripple effects just add the Widget.AppCompat.ActionButton style to each ImageButton, like so:
<ImageButton
    android:id="@+id/btn_search"
    android:layout_width="?attr/actionBarSize"
    android:layout_height="?attr/actionBarSize"
    android:src="@drawable/ic_magnify_white_24dp"
    style="@style/Widget.AppCompat.ActionButton" />
A m ore complete example has already been provided in the toolbar.xml file above.
Obviously, if you wanted to extend the default Widget.AppCompat.ActionButton style, you could do so via styles.xml:
   <style name="AppTheme.ActionButton" parent="Widget.AppCompat.ActionButton">
        <!-- Your custom styles here -->
    </style>
To enable your custom style just replace style="@style/Widget.AppCompat.ActionButton"with style="@style/AppTheme.ActionButton".
Using AppBarLayout with the CoordinatorLayout
If you’re going for a real Material Design interface, then you will probably want to utilise the CoordinatorLayout class, and wrap your custom toolbar inside an AppBarLayout. The CoordinatorLayout lets you sprinkle some magic UX powder into your app by intelligently positioning and interacting with elements based on current scroll position. In the context of the ActionBar, the CoordinatorLayout provides the ability to automaticly expand and collapse the toolbar with parralax background images.
An example layout would look like so:
/res/layout/appbar.xml
<?xml version="1.0" encoding="utf-8"?>
<android.support.design.widget.AppBarLayout
    xmlns:android="http://schemas.android.com/apk/res/android"
    xmlns:app="http://schemas.android.com/apk/res-auto"
    android:id="@+id/appbar"
    android:layout_width="match_parent"
    android:layout_height="wrap_content"
    android:theme="@style/ThemeOverlay.AppCompat.Dark.ActionBar"
    android:fitsSystemWindows="true">

    <!--
      Make your toolbar expandable with CollapsingToolbarLayout
      Note that a centered ActionBar won't play nicely with the CollapsingToolbarLayout
    -->
    <!--
    <android.support.design.widget.CollapsingToolbarLayout
        android:id="@+id/collapsing_toolbar"
        android:layout_width="match_parent"
        android:layout_height="match_parent"
        app:layout_scrollFlags="scroll|exitUntilCollapsed"
        android:fitsSystemWindows="true"
        app:contentScrim="?attr/colorPrimary"
        app:expandedTitleMarginStart="48dp"
        app:expandedTitleMarginEnd="64dp">
        -->

        <!-- Add a parallax background image if using CollapsingToolbarLayout -->
        <!--
        <ImageView
            android:id="@+id/backdrop"
            android:src="@drawable/backdrop"
            android:layout_width="match_parent"
            android:layout_height="match_parent"
            android:scaleType="centerCrop"
            app:layout_collapseMode="parallax" />
            -->

        <!-- Include our custom Toolbar -->
        <include layout="@layout/toolbar" />

    <!--
    </android.support.design.widget.CollapsingToolbarLayout>
    -->

</android.support.design.widget.AppBarLayout>
/res/layout/main_activity.xml
<?xml version="1.0" encoding="utf-8"?>
<android.support.design.widget.CoordinatorLayout
    xmlns:android="http://schemas.android.com/apk/res/android"
    xmlns:app="http://schemas.android.com/apk/res-auto"
    android:id="@+id/coordinator"
    android:layout_width="match_parent"
    android:layout_height="match_parent"
    android:fitsSystemWindows="true">

    <!-- Include the AppBarLayout -->
    <include layout="@layout/appbar" />

    <FrameLayout
        android:id="@+id/main_fragment"
        android:layout_width="match_parent"
        android:layout_height="match_parent"
        app:layout_behavior="@string/appbar_scrolling_view_behavior">

        <!-- Add you content here -->

    </FrameLayout>

</android.support.design.widget.CoordinatorLayout>
That should get you started. Please drop a line if you have anything to add, or just want to say thanks. Now go fourth and create!
Watch the Video
The guys and gals over at Webucator have created a video tutorial from this post. Check it out:
출처: http://androidhuman.tistory.com/559
안드로이드 5.0이 공개된 이후, 구글 앱들에 머티리얼 디자인이 속속히 적용되기 시작했습니다.
그 중 대표적인 예가 플레이 스토어 앱인데요, 머티리얼 디자인이 적용된 것 외에 네비게이션 드로어 상태 버튼이 빙글빙글 돌아가는 애니메이션이 추가되었습니다.

머티리얼 디자인이 적용된 네비게이션 드로어. (출처: http://chrisrenke.com/drawerarrowdrawable/)
적용하는 방법은 크게 다음과 같이 정리할 수 있습니다.
- targetSdkVersion=21
- compile 'com.android.support:appcompat-v7:21.0.0'
- import android.support.v7.app.ActionBarDrawerToggle
간단한 예제를 통해 적용 절차를 알아보겠습니다.
프로젝트 설정
새 프로젝트를 생성한 후, 애플리케이션 모듈의 build.gradle 을 확인하여 targetSdkVersion과 appcompat-v7 버전을 다음과 같이 설정합니다.
최신 버전의 안드로이드 스튜디오로 프로젝트를 생성한 경우 이미 아래와 같이 설정되어 있을 것입니다.
android {
compileSdkVersion 21
buildToolsVersion "21.1.1"
defaultConfig {
applicationId "com.androidhuman.example.materialdrawer"
minSdkVersion 9
targetSdkVersion 21
versionCode 1
versionName "1.0"
}
buildTypes {
release {
minifyEnabled false
proguardFiles getDefaultProguardFile('proguard-android.txt'), 'proguard-rules.pro'
}
}
}
dependencies {
compile fileTree(dir: 'libs', include: ['*.jar'])
compile 'com.android.support:appcompat-v7:21.0.0'
}
액티비티 레이아웃 구성
다음으로, 네비게이션 드로어를 포함한 액티비티 레이아웃을 구성합니다.
이번 예제에선 기존의 액션바 대신 안드로이드 5.0부터 새로 등장한 툴바(Toolbar)를 사용하여 기존의 액션바를 대체합니다.
툴바는 액션바와 완벽하게 동일한 역할을 하지만, 뷰(View) 형태로 구성되어 있어 액티비티 혹은 프래그먼트 레이아웃 내 어떤 곳이라도 자유롭게 배치할 수 있습니다. 이번 예제를 통해 툴바의 사용법이 궁금하셨던 분들은 참고하시면 좋을 것 같네요.
[activity_main.xml]
| <LinearLayout xmlns:android="http://schemas.android.com/apk/res/android" xmlns:tools="http://schemas.android.com/tools" android:layout_width="match_parent" android:layout_height="match_parent" android:orientation="vertical"> <android.support.v7.widget.Toolbar android:id="@+id/toolbar" android:layout_width="match_parent" android:layout_height="wrap_content" android:minHeight="?attr/actionBarSize" /> <android.support.v4.widget.DrawerLayout android:id="@+id/drawer_layout" android:layout_width="match_parent" android:layout_height="match_parent" tools:context=".MainActivity"> <FrameLayout android:id="@+id/container" android:layout_width="match_parent" android:layout_height="match_parent" android:background="#303F9F"/> <View android:id="@+id/drawer" android:layout_width="240dp" android:layout_height="match_parent" android:layout_gravity="start" android:background="#3F51B5" /> </android.support.v4.widget.DrawerLayout> </LinearLayout> |
툴바를 제외한 DrawerLayout 구성 부분은 기존과 동일합니다. DrawerLayout 내에 메인 컨텐츠를 표시할 부분(@+id/container)과 드로어에 표시될 부분(@+id/drawer)을 정의해 주었습니다.
액션바를 툴바로 대체하기로 했으므로, 중복을 방지하기 위해 액티비티의 테마를 액션바가 없는 테마로 변경해야 합니다. 따라서, 예제 프로젝트 애플리케이션에서 사용하는 테마인 AppTheme를 다음과 같이 액션바가 없는 테마를 상속하도록 변경합니다.
[styles.xml]
| <resources> <!-- Base application theme. --> <style name="AppTheme" parent="Theme.AppCompat.NoActionBar"> <!-- Customize your theme here. --> </style> </resources> |
네비게이션 드로어 설정
이제 액티비티 코드를 작성할 차례입니다. ActionBarActivity를 상속하는 액티비티를 생성한 후, 다음과 같이 코드를 작성합니다.
[MainActivity.java]
| public class MainActivity extends ActionBarActivity { Toolbar toolbar; DrawerLayout dlDrawer; ActionBarDrawerToggle dtToggle; @Override protected void onCreate(Bundle savedInstanceState) { super.onCreate(savedInstanceState); setContentView(R.layout.activity_main); toolbar = (Toolbar) findViewById(R.id.toolbar); dlDrawer = (DrawerLayout) findViewById(R.id.drawer_layout); setSupportActionBar(toolbar); dtToggle = new ActionBarDrawerToggle(this, dlDrawer, R.string.app_name, R.string.app_name); dlDrawer.setDrawerListener(dtToggle); } |
setSupportActionBar() 메서드는 인자로 받은 툴바를 액티비티의 액션바로 대체하는 역할을 합니다. 기본으로 제공되는 액션바 외에 별도로 툴바를 사용하고 싶다면 이 메서드를 호출하지 않고 툴바만 단독으로 사용하는 것도 가능합니다.
다음으로, 네비게이션 드로어 상태를 알려주는 아이콘을 표시하기 위해 ActionBarDrawerToggle을 생성하고 있습니다. 기존과 다를 바가 없어보이는데, 기존에는 support-v4 패키지 내의 ActionBarDrawerToggle을 사용했지만 이젠 support-v7 패키지의 ActionBarDrawerToggle을 사용합니다.
v7 서포트 패키지를 사용하면서 v4 패키지 내의 ActionBarDrawerToggle을 사용할 경우, 네비게이션 드로어 상태에 따른 애니메이션이 더 이상 표현되지 않으므로 이를 v7 패키지로 변경해 주어야 합니다.
중요한 부분의 구현은 위에서 모두 끝났습니다.
이제 ActionBarDrawerToggle 동작을 위한 나머지 코드들을 추가합니다.
[MainActivity.java]
| @Override public boolean onCreateOptionsMenu(Menu menu) { getMenuInflater().inflate(R.menu.menu_main, menu); return true; } @Override protected void onPostCreate(Bundle savedInstanceState) { super.onPostCreate(savedInstanceState); // Sync the toggle state after onRestoreInstanceState has occurred. dtToggle.syncState(); } @Override public void onConfigurationChanged(Configuration newConfig) { super.onConfigurationChanged(newConfig); dtToggle.onConfigurationChanged(newConfig); } @Override public boolean onOptionsItemSelected(MenuItem item) { if (dtToggle.onOptionsItemSelected(item)) { return true; } return super.onOptionsItemSelected(item); } |
예제가 완성되었습니다. 애플리케이션을 실행하면 다음과 같이 머티리얼 디자인이 적용된 네비게이션 드로어가 동작하는 모습을 확인할 수 있습니다.

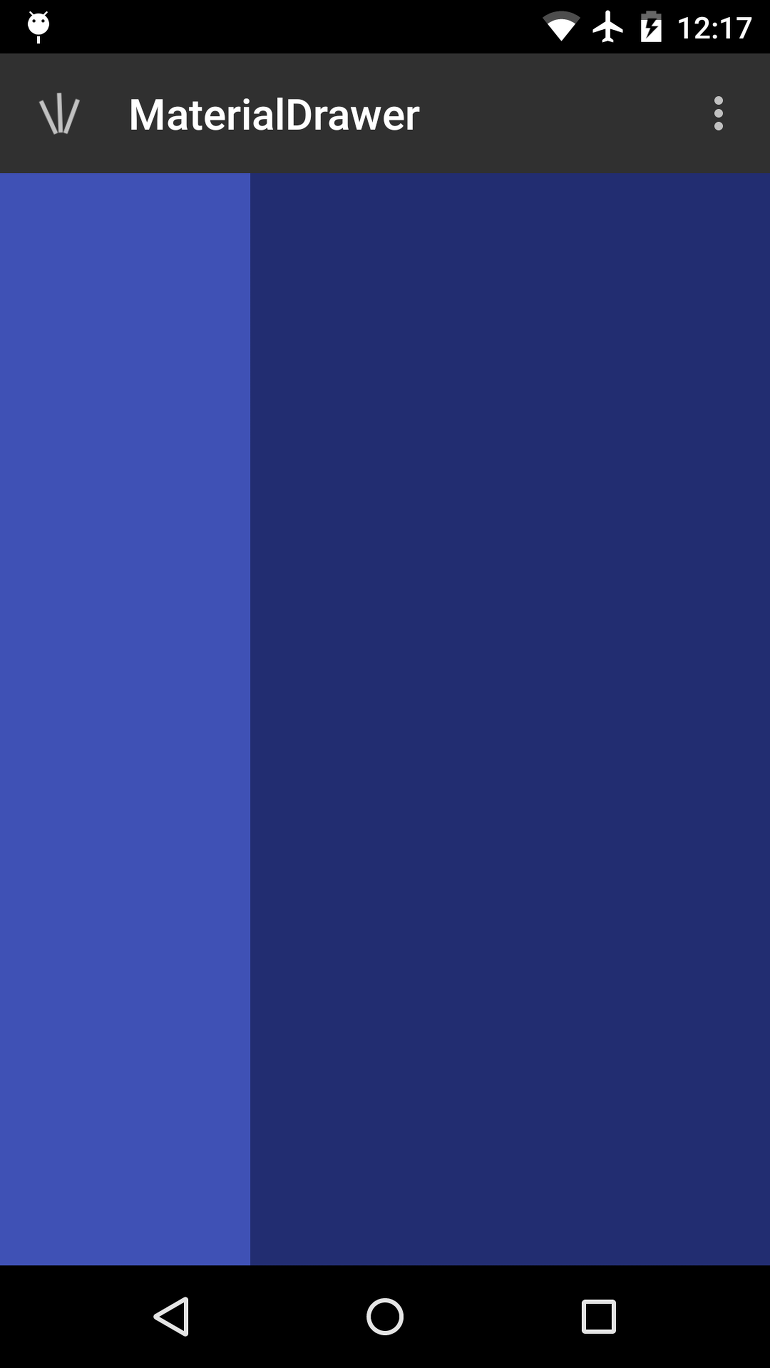
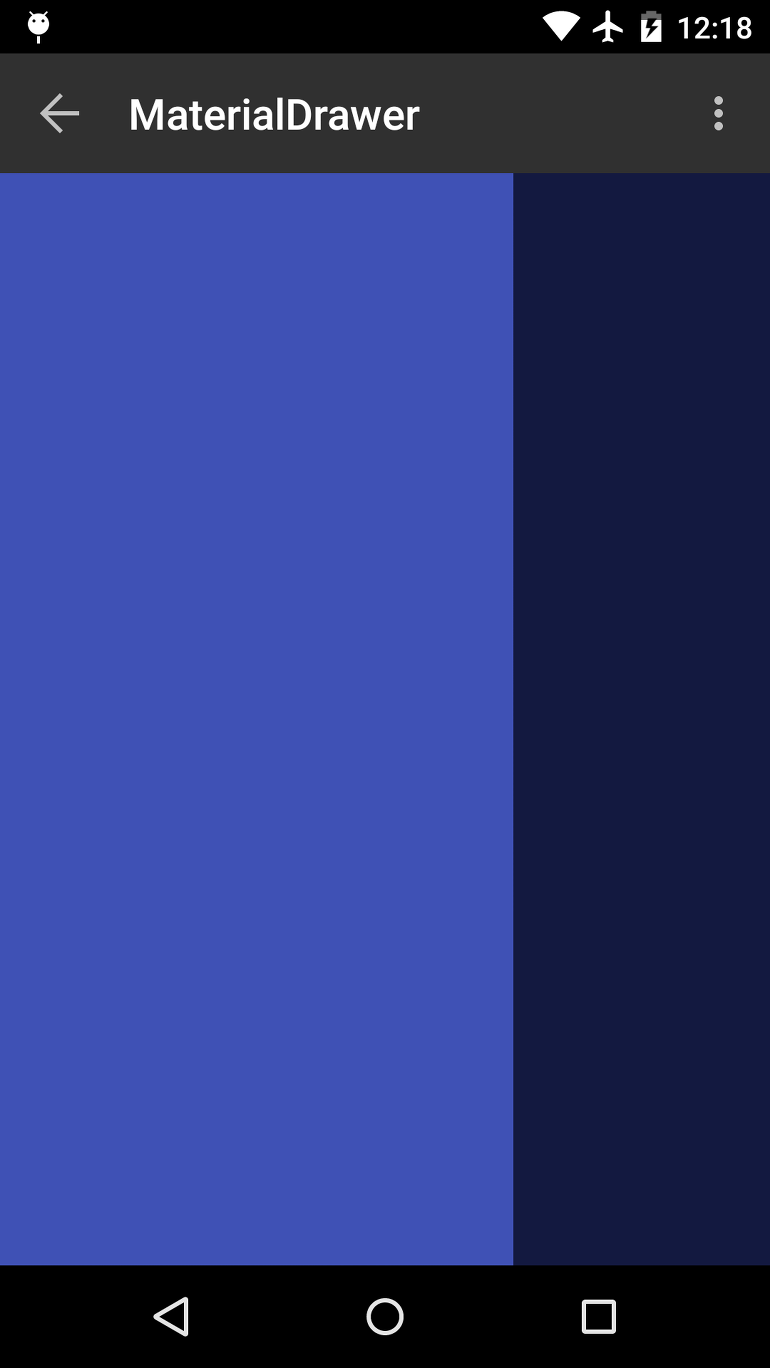
이 포스트에서 작성한 예제 코드는 다음 주소에서 확인하실 수 있습니다.
https://github.com/kunny/blog_samples/tree/master/Android/2014-11-16_Material_Navigation_Drawer
액션 바 요소
탭
탭은 애플리케이션 뷰와 함께 표시되며 뷰의 탐색과 전환을 쉽게 해줍니다. 사용자의 빈번한 뷰 전환이 예상될 경우 탭을 사용하세요.

두가지 타입의 탭이 있습니다: 고정 탭 및 스크롤 탭.
스크롤 탭(Scrollable tabs)
스크롤 탭은 언제나 바 전체를 차지해 중앙에 현재 활성화된 뷰 항목을 표시하기 때문에 독립된 바 안에 배치될 필요가 있습니다. 스크롤 탭은 많은 탭을 뷰로 표시하기 위해 수평 방향으로 스스로 스크롤 될 수 있습니다.
많은 뷰가 필요하거나 애플리케이션에서 뷰를 동적으로 추가하기 때문에 뷰가 얼마나 많이 필요한지 확실하지 않다면 (예를 들어, 메시징 애플리케이션에서 사용자가 각 대화를 오갈 수 있습니다) 스크롤 탭을 사용하세요. 스크롤 탭은 언제나 사용자가 탭 위에서 뿐 아니라 컨텐츠 영역 내에서도 좌나 우로 스와이프해 뷰 간을 탐색할 수 있게 해야 합니다.
Google Play의 스크롤 탭.
고정 탭(Fixed tabs)
고정 탭은 항상 화면 상에 표시되며, 스크롤 탭과 같은 방식으로 이동할 수 없습니다. 메인 액션 바의 고정 탭은 화면 방향이 바뀔 때 상단 바로 이동될 수 있습니다.

홀로 다크 및 홀로 라이트로 표시한 기본 고정 탭.
스피너(Spinners)
스피너는 사용자가 애플리케이션에서 뷰 간을 전환할 수 있도록 해주는 드롭다운 메뉴입니다.
메인 액션 바에 탭 대신 스피너를 사용해야 하는 경우:
- 탭 바를 표시하기 위해 수직 화면 표시 공간을 줄이고 싶지 않아요.
- 사용자가 뷰를 자주 전환할 것 같지 않아요.

캘린더 애플리케이션의 액션 바 스피너.
액션 버튼
액션 바 위의 액션 버튼은 애플리케이션의 중요한 활동들을 총괄합니다. 어떤 버튼이 더 자주 사용될지 생각해보고 그에 맞춰 순서를 구성하세요. 사용 가능한 화면 공간에 따라, 시스템은 더 중요한 액션을 액션 버튼으로 보여주고 나머지는 액션 오버플로우로 이동시킵니다. 액션 바 및 액션 오버플로우는 언제나 사용 가능한 액션들만을 표시해야 합니다. 만일 현재 어떤 액션을 사용할 수 없는 경우라면, 감추세요. 사용 불가 상태로 표시하지 마세요.

Gmail 애플리케이션 전역에 사용하는 액션 버튼의 샘플링.
어떤 액션이 우선 순위인지에 대한 가이드로, FIT 방식을 사용하세요.
F — 주기(Frequent)
- 사용자가 이 화면에 들어왔을 때 이 액션을 적어도 7할 이상 사용할까요?
- 사용자가 이 액션을 일반적으로 연달아 사용할까요?
- 이 액션을 매번 여러 단계에 걸쳐 실행하도록 한다면 사용하기 부담스러울까요?
I — 중요(Important)
- 이 액션이 진짜 멋진 기능 혹은 장점이라고 생각하기 때문에 모두가 쉽게 알아채도록 하고 싶나요?
- 이례적인 경우라 해도 필요할 때 쉽게 접근할 수 있어야 하는 어떤 이유가 있나요?
T — 전형(Typical)
- 이 액션은 다른 비슷한 애플리케이션들에서도 일반적으로 가장 먼저 표시하는 액션인가요?
- 이 상황에서, 이 액션이 액션 오버플로우 속에 묻혀 있다면 사람들이 당황할 수도 있나요?
F, I, T를 갖춘 액션들이 액션 바에 잘 어울릴 것입니다. 그 외의 액션들은 액션 오버플로우에 속합니다.
"새로 고침"이나 "공유"와 같은 특정 공통 액션들은 미리 정의된 모양을 사용할 수 있습니다. 아래 다운로드 링크는 다양한 화면 밀도를 위해 조정된 크기 및 홀로 라이트와 홀로 다크 테마에서 사용가능한 아이콘 패키지를 제공합니다. 이 패키지는 또한 차후에 아이콘을 여러분의 테마에 어울리게 수정할 수 있도록 Adobe® Illustrator® 소스 파일을 비롯한 스타일링되지 않은 아이콘도 제공합니다.
액션 오버플로우
액션 바의 액션 오버플로우는 애플리케이션에서 덜 사용하는 액션에 접근할 수 있도록 해줍니다. 폰에서 오버플로우 아이콘은 메뉴 하드웨어 키가 없는 경우에만 나타납니다. 메뉴 키를 갖춘 폰은 사용자가 메뉴 키를 누를 경우에 액션 오버플로우를 표시합니다.

우측에 고정된 액션 오버 플로우.
얼마나 많은 액션이 메인 액션 바에 들어갈 수 있을까요? 액션 바 용량은 다음 규칙에 의해 조절합니다:
출처: http://kitesoft.tistory.com/19
가장 기본적인 형식의 액션바는 왼쪽에 앱 아이콘과 액티비티의 제목을 표시하고 있습니다. 이 간단한 형식조차도, 액션바는 여러분의 앱에 대한 아이덴티티를 유지하고 사용자의 위치를 확인 하는데 모든 액티비티들에서 유용하게 사용됩니다.
그림 1. 앱 아이콘과 액티비티 제목을 가지고있는 액션바
기본적인 액션바를 만들기 위해서는 액션바를 사용할 수 있는 액티비티 테마(Theme)를 앱에 사용 해야합니다. 이러한 테마는 여러분의 앱에서 지원하는 가장 낮은 안드로이드 버전에 따라 달리 요청합니다. 그래서 이번 시간에는 앱의 최소 지원버전에 따라 두가지로 나누어 설명하고자 합니다.
Android 3.0 이상만을 지원할 경우
---------------------------------
Android 3.0 (API level 11) 부터 액션바는 Theme.Holo 테마(또는 파생된 것들 중 하나)를 사용하는 모든 액티비티들에 포함되어 있습니다. Theme.Holo 테마는 targetSdkVersion 이나 minSdkVersion 속성 중 아무거나 "11" 이상으로 설정할 때 기본 테마로 적용됩니다.
여러분의 액티비티에 액션바를 추가 하기위해 간단하게 두 속성 중 아무거나 "11" 이상으로 설정합니다. 예를들어:
| <manifest ... > <uses-sdk android:minSdkVersion="11" ... /> ... </manifest> |
Note : 만약 여러분이 커스텀 테마를 만들었다면, Theme.Holo 중 하나를 상속받았을 겁니다. 액션바 꾸미기에서 더 알아보겠습니다.
이제 Theme.Holo 를 적용한 모든 액티비티들에 액션바가 보일 겁니다. 이상입니다.
Android 2.0 이상에서 지원하기
-------------------------------
여러분이 Android 3.0 ( 최저 Android 2.0 ) 보다 이전 버전을 사용할 때 액션바를 추가하려면 여러분의 앱은 Android Support Library 를 포함 해야만 합니다.
시작하기위해, 개발자 사이트의 Support Library Setup 문서를 참고하여 v7 appcompat Library 를 추가합니다.( 개발자 사이트의 가이드에 있는 Adding library width resources의 명령을 따라하면서 한번 다운로드 된 library 패키지)
여러분은 여러분의 앱에 통합된 Support Library 를 하나 가지고 있습니다.
1. ActionBarActivity 를 상속하도록 여러분의 Activity 를 수정합니다.
| public class MainActivity extends ActionBarActivity { ... } |
2. 매니페스트 파일안에, <application>요소든 개별적인 <activity>요소든 아무곳이나 Theme.AppCompat 테마들 중 하나를 사용합니다.
| <activity android:theme="@style/Theme.AppCompat.Light" ... > |
Note : 만약 여러분이 커스텀 테마를 만들었다면, Theme.AppCompat 테마들 중 하나를 상속받았을 겁니다. 액션바 꾸미기에서 더 알아보겠습니다.
이제 여러분의 액티비티는 Android 2.1( API level 7) 이상에서 실행할 때 액션바를 포함하게 됩니다.
매니페스트에 여러분의 앱이 지원하는 API level 을 적절하게 설정해야 한다는 것을 기억하세요.
| <manifest ... > <uses-sdk android:minSdkVersion="7" android:targetSdkVersion="18" /> ... </manifest> |
---------------------------------------------------------------------------------------------------------------------------------------------------------------------
출처: http://kitesoft.tistory.com/20
액션바는 앱의 현재 컨텍스트와 관련된 중요한 액션 아이템들에 대해 버튼을 추가 할 수 있습니다. 아이콘 과/또는 텍스트로 액션바에 바로 보여지는 것들은 액션버튼들 입니다. 액션바에 딱 맞지 않던가 그렇게 중요하지 않는 액션들은 액션바의 액션 오버플로어(Action Overflow)에 숨깁니다.
그림 1. 검색에 대한 하나의 액션 버튼과 보이지 않는 액션들이 추가된 액션 오버플로우(Action overflow)를 가지고 있는 액션바.
XML 에서 액션들 명시하기
-------------------------------
모든 액션버튼들과 액션 오버플로우(Action overflow)에서 사용할 수 있는 다른 액션들은 XML Menu resources 에 정의되어 있습니다. 액션바에 포함되길 원하는 각각의 아이템을 <item>요소로 추가합니다.
res/menu/main_activity_actions.xml
| <menu xmlns:android="http://schemas.android.com/apk/res/android" > <!-- Search, should appear as action button --> <item android:id="@+id/action_search" android:icon="@drawable/ic_action_search" android:title="@string/action_search" android:showAsAction="ifRoom" /> <!-- Settings, should always be in the overflow --> <item android:id="@+id/action_settings" android:title="@string/action_settings" android:showAsAction="never" /> </menu> |
검색(Search) 액션은 액션바(Action Bar)안에 공간(room)이 있을 때 액션버튼이 보이도록 선언합니다. 하지만 Setting 액션은 항상 오버플로우(overflow)안에서 만 나타나도록 합니다. (기본적으로, 모든 액션들은 오버플로우(overflow)에 나타나도록 되어 있지만 각각의 액션들에 대해 여러분의 디자인 의도를 직접적으로 명시하는 것이 좋은 습관입니다.)
android:icon 속성은 이미지의 리소스 ID 를 요구합니다. ID의 이름은 반드시 @drawble/ 다음에 여러분이 프로젝트의 res/drawable 디렉토리에 저장해 놓은 비트맵(bitmap) 의 이름이어야 합니다. 예를 들어, ic_action_search.png 를 참조하기 위해"@/drawable/ic_action_search"를 사용합니다. 마치 이전 포스트인 " 간단한 UI 만들기 "에서 소개되었던 title 속성에 사용할 문자열 리소스를 XML에서 res/values/ 디렉토리을 이용하여 정의했던 것과 같습니다.
Note: 여러분의 앱에서 아이콘들과 다른 비트맵(bitmap) 이미지를 만들 때는 해상도가 다른 화면에 대해 각각 최적화 되어 있는 여러 버전을 제공하는 것은 중요합니다. 이 내용은 나중에 Support Different Screens(다른 화면해상도 지원하기) 파트에서 좀더 소개 하겠습니다.
| 액션바 아이콘들 Download 개발자 사이트의 iconography 가이드에 잘 맞추기 위해 여러분들은 Action Bar Icon Pack 안에 제공된 것을 사용하시기 바랍니다. |
만약 여러분의 앱이 Android 2.1로서 낮은 버전이고 이를 지원하고 호환하기 위해 Support Library 를 사용한다면, showAsAction 속성은 android: 네임스페이스를 사용할 수 없습니다. 대신 여러분은 이 속성의 접두어로 Support Library에 의해 제공되며, 여러분 본인이 가지고 있는 XML 네임스페이스를 사용해야 합니다.(사용자 정의 XML 네임 스페이스는 앱의 이름을 기반으로 해야 합니다. 하지만 여러분이 원하고 오직 선언된 파일의 범위 내에서만 접근할 수 있는 이름 이어도 됩니다.) 예를들어,
res/menu/main_activity_actions.xml
<menu xmlns:android="http://schemas.android.com/apk/res/android" xmlns:yourapp="http://schemas.android.com/apk/res-auto" > <!-- Search, should appear as action button --> <item android:id="@+id/action_search" android:icon="@drawable/ic_action_search" android:title="@string/action_search" yourapp:showAsAction="ifRoom" /> ... </menu> |
액션 버튼들에 반응하기
------------------------
사용자가 액션버튼들 중 하나 또는 액션 오버플러우(overflow) 안에 있는 아이템 중 하나를 눌렀을 때 시스템은 자동으로onOptionsItemSelected() 콜백 메소드를 호출합니다. 여러분은 이 메소드 안에, 눌려진 item으로부터 리턴된 ID가 여러분들이 <item> 요소의 android:id 속성에 선언한 값과 일치하는지 확인하기 위해 매개변수로 주어진 MenuItem의 getItemId() 메소드를 호출합니다.
| @Override public boolean onOptionsItemSelected(MenuItem item) { // Handle presses on the action bar items switch (item.getItemId()) { case R.id.action_search: openSearch(); return true; case R.id.action_settings: openSettings(); return true; default: return super.onOptionsItemSelected(item); } } |
하위 단계 액티비티들에 대해 Up 버튼 추가하기
-----------------------------------------------------
여러분의 앱안에 있는 모든 화면들이 앱의 메인 진입화면이 아닐겁니다( "home" 화면이 아닌 액티비티들). 이 앱들은 사용자에게 액션바안에 있는 Up 버튼을 사용하여 앱의 상속구조 안에서 논리적 부모화면(상위화면)에 갈 수 있는 방법이 제공 되어야만 합니다.
그림 4. Gmail 에 있는 Up 버튼
Android 4.1(API level 16) 이상에서 실행하거나 또는 Support Library로 부터 ActionBarActivity를 사용하여 실행할 때, Up 버튼은 간단하게 여러분들이 manifest 파일안에 부모 액티비티를 선언하고 Up 버튼을 사용하게 하면 됩니다.
예를 들어, 메니페스트 안에 액티비티의 부모를 선언하는 방법을 보여드리겠습니다.
| <application ... > ... <!-- The main/home activity (it has no parent activity) --> <activity android:name="com.example.myfirstapp.MainActivity" ...> ... </activity> <!-- A child of the main activity --> <activity android:name="com.example.myfirstapp.DisplayMessageActivity" android:label="@string/title_activity_display_message" android:parentActivityName="com.example.myfirstapp.MainActivity" > <!-- Parent activity meta-data to support 4.0 and lower --> <meta-data android:name="android.support.PARENT_ACTIVITY" android:value="com.example.myfirstapp.MainActivity" /> </activity> </application> |
그리고 나서 setDisplayHomeAsUpEnabled() 메소드를 호출함으로서 앱 icon 을 Up 버튼으로 사용할 수 있도록 합니다.
| @Override public void onCreate(Bundle savedInstanceState) { super.onCreate(savedInstanceState); setContentView(R.layout.activity_displaymessage); getSupportActionBar().setDisplayHomeAsUpEnabled(true); // If your minSdkVersion is 11 or higher, instead use: // getActionBar().setDisplayHomeAsUpEnabled(true); } |
시스템은 MainActivity 가 DisplayMessageActivity 의 부모임을 알고 있기 때문에 사용자가 Up 버튼을 눌렀을때, 여러분이 특별하게 Up버튼의 이벤트를 처리하지 않더라도 자동으로 적절한 부모 액티비티 화면으로 안내합니다.
up 버튼의 네비게이션에 대해 추가적인 정보를 원하시면, 개발자 사이트의 Providing Up Navigation 을 참고하세요.
---------------------------------------------------------------------------------------------------------------------------------------------------------------------------
출처 : http://kitesoft.tistory.com/22
액션바는 사용자에게 작업을 수행하고 탐색할 수 있는 익숙하고 당연한 방법을 제공합니다. 하지만 그것이 다른앱과 정확히 같은 모양으로 보일 필요는 없습니다. 만약 여러분이 더 나은 본인의 앱 브랜드를 꾸미고 싶다면, 여러분은 아주 손쉽게 안드로이드의 스타일(Style)과 테마(Theme) 자원들(Resources)을 사용하여 액션바를 꾸밀 수 있습니다.
안드로이드는 "dark" 또는 "light" 액션바 스타일을 포함한 몇가지 빌트인 액티비티 테마들을 가지고 있습니다. 여러분은 또한 이 테마들을 사용자가 원하는 모습으로 customize 하도록 확장할 수 있습니다.
Note: 만약 여러분이 액션바를 위해 Support Library APIs를 사용한다면 반드시 Theme.AppCompat 스타일을 사용(또는 Override)해야만 합니다.(API level 11버전 이상에서 사용할 수 있는 Theme.Holo 패밀리들 대신하여) 이 과정에서, 여러분은 각각의 스타일 속성을 두 번 선언해야만 합니다. 한 번은 플랫폼의 스타일 속성을 사용합니다.(android: 속성) 그리고 또 한번은 Support Library( appcompat.R.attr 속성- 현재 액티비티 속성들에 대한 Context) 에 포함된 스타일 속성을 사용합니다.
안드로이드(Android) 테마(Theme) 사용하기
--------------------------------------------
안드로이드는 액션바의 색상(Color)를 지시하고 있는 두개의 기본적인 액티비티 테마를 포함하고 있습니다.
° "dark" 테마인 Theme.Holo
° "light" 테마인 Theme.Holo.Light
여러분은 메니페스트 파일 안에 있는 <application> 요소나 개별적인 <activity>요소에 android:theme 를 선언함으로 여러분의 앱 전체 또는 각각의 개별적인 액티비티에 이 테마들을 적용할 수 있습니다.
예:
| <application android:theme="@android:style/Theme.Holo.Light" ... /> |
또한 Theme.Holo.Light.DarkActionBar 를 선언함으로서 밝은 색의 색상 구성을 사용하면서 액션바는 어둡게 사용할 수도 있습니다.
만약 여러분이 Support Library를 사용한다면, 여러분은 Theme.AppCompat 으로 대체하여 사용하셔야 합니다.
° "dark" 테마인 Theme.AppCompat
° "light" 테마인 Theme.AppCompat.Light
° "light" 테마와 "dark" 액션바 테마인Theme.AppCompat.Light.DarkActionBar
여러분의 액션바 색상에 적절하게 대비되는 색상으로 icon 을 사용했는지 확인하시기 바랍니다. 여러분에게 도움을 주기위해 Action Bar Icon Pack 안에 Holo light 나 Holo dark 액션바에서 사용할 수 있는 표준 액션 아이콘들(action icons)을 포함해 놓았습니다.
배경(Background) 커스터마이즈(사용자 정의)
-------------------------------------------
액션바의 배경을 변경하기위해 actionBarStyle 속성을 오버라이드(override) 하여 여러분의 액태비티 테마을 커스터마이징 할 수 있습니다. 이 속성은 액션바에 drawable 리소스를 지정하여 여러분의 배경 속성을 오버라이드 할 수 있도록 합니다.
만약 여러분의 앱이 navigation tabs 나 split action bar 를 사용한다면, 여러분은 이 액션바들 각 각에 backgroundStacked 와backgroundSplit 속성을 지정하여 사용할 수 있습니다.
주의(Caution): 여러분의 커스텀(custom) 테마(Theme)와 스타일(Style)에 적절한 부모 테마를 선언하여 그 것들의 스타일을 상속하는 것은 매우 중요합니다. 부모 스타일이 없다면, 여러분의 액션바(Action Bar)는 여러분이 직접 명시적으로 선언한 속성을 제외하고 많은 스타일 속성들이 없이 만들어 집니다.
Android 3.0 이상에서
Android 3.0 이상을 지원한다면, 여러분은 아래처럼 액션바의 배경(background) 를 정의 할 수 있습니다.
res/values/theme.xml
| <?xml version="1.0" encoding="utf-8"?> <resources> <!-- the theme applied to the application or activity --> <style name="CustomActionBarTheme" parent="@android:style/Theme.Holo.Light.DarkActionBar"> <item name="android:actionBarStyle">@style/MyActionBar</item> </style> <!-- ActionBar styles --> <style name="MyActionBar" parent="@android:style/Widget.Holo.Light.ActionBar.Solid.Inverse"> <item name="android:background">@drawable/actionbar_background</item> </style> </resources> |
그런다음 전체 앱 또는 각 각의 개별적인 액티비티들에 여러분의 테마(Theme)를 적용합니다.
| <application android:theme="@style/CustomActionBarTheme" ... /> |
Android 2.1 이상에서
여러분이 Support Library 를 사용했을 때, 여러분이 위와 같은 테마를 사용하려면 아래처럼 테마를 대체해야 합니다.
res/values/theme.xml
| <?xml version="1.0" encoding="utf-8"?> <resources> <!-- the theme applied to the application or activity --> <style name="CustomActionBarTheme" parent="@style/Theme.AppCompat.Light.DarkActionBar"> <item name="android:actionBarStyle">@style/MyActionBar</item> <!-- Support library compatibility --> <item name="actionBarStyle">@style/MyActionBar</item> </style> <!-- ActionBar styles --> <style name="MyActionBar" parent="@style/Widget.AppCompat.Light.ActionBar.Solid.Inverse"> <item name="android:background">@drawable/actionbar_background</item> <!-- Support library compatibility --> <item name="background">@drawable/actionbar_background</item> </style> </resources> |
그런다음 전체 앱 또는 각 각의 개별적인 액티비티들에 여러분의 테마(Theme)를 적용합니다.
| <application android:theme="@style/CustomActionBarTheme" ... /> |
다음 포스트에서 이어합니다.--
------------------------------------------------------------------------------------------------------------------------------------------------------------------
출처: http://kitesoft.tistory.com/23
기본적으로, 액션바(Action Bar)는 여러분의 액티비 윈도우 상단에 나타납니다. 이로 인해 액티비티 레이아웃(layout)이 사용할 수 있는 총 공간을 약간 감소시킵니다. 만약, 사용자와 상호 작용 과정 동안, 여러분이 액션바를 숨기거나 보여주길 원한다면, ActionBar 객체에 있는hide() 와 show() 메소드를 호출하여 그렇게 할 수 있습니다. 어쨋든, 이로 인해 여러분의 액티비티는 새로운 사이즈에 따라 레이아웃을 새로 계산하고 다시 그리게 됩니다.
액션바(Action Bar)가 보이거나 숨겨질 때, 여러분의 레이아웃(layout)이 리사이징(resizing) 되는 것을 막기 위해서, 여러분은 액션바를 오버레이(Overlay) 모드(mode)로 사용할 수 있습니다. 오버레이 모드(Overlay mode)에서, 시스템은 액션바를 여러분 레이아웃의 앞에 그려냄으로서 여러분의 액티비티 레이아웃이 모든 공간을 사용할 수 있도록 합니다. 오버레이 모드에서의 액션바는 화면 상단에서 레이아웃의 일부를 가리게 됩니다. 하지만 이제는 액션바를 숨기거나 보일 때, 시스템이 여러분의 레이아웃을 리사이징 하지 않고 원활하게 전환합니다.
Tip: 만약 여러분의 레이아웃이 액션바의 뒤에 부분적으로 보여지길 원한다면, 그림 1에 보여진 것 처럼 반투명한 배경(background)을 가진 액션바의 커스텀 스타일을 만들어야 합니다. 액션바(Action Bar)의 배경(background)을 정의하는 방법에 대해 더 자세한 정보를 원한다면 개발자 사이트의 Styling the Action Bar를 참고하시기 바랍니다.
그림 1. 오버레이 모드(Overlay mode)의 갤러리(Gallery) 액션 바(Action Bar)
오버레이 모드(Overlay mode) 사용하기
------------------------------------
액션바(Action Bar)에 오버레이 모드(overlay mode)를 사용할 수 있도록 하기 위해서는, 현재 있는 액션바 테마를 확장한(상속한) 커스텀 테마를 만들 필요가 있다. 그리고 이 테마의 android:windowActionBarOverlay 속성에 true 를 설정합니다.
Android 3.0 이상에서
만약 minSdkVersion 이 11 이상으로 설정했다면, 여러분의 커스텀 테마(custom Theme)는 부모 테마로 Theme.Holo (또는 파생된 것들중 하나)를 사용해야만 합니다. 예 :
| <resources> <!-- the theme applied to the application or activity --> <style name="CustomActionBarTheme" parent="@android:style/Theme.Holo"> <item name="android:windowActionBarOverlay">true</item> </style> </resources> |
Android 2.1 이상에서
만약 Android 3.0 보다 낮은 버전에서 실행되는 디바이스와의 호환성을 위해 Support Library 이르 사용한다면, 여러분의 커스텀 테마(custom Theme)는 부모 테마로 Theme.AppCompat(또는 파생된 것들중 하나)을 사용해야만 합니다. 예 :
| <resources> <!-- the theme applied to the application or activity --> <style name="CustomActionBarTheme" parent="@android:style/Theme.AppCompat"> <item name="android:windowActionBarOverlay">true</item> <!-- Support library compatibility --> <item name="windowActionBarOverlay">true</item> </style> </resources> |
또한 이 테마가 windowActionBarOverlay 스타일에 대한 정의를 2개 포함하고 있다는 것에 주의하시기 바랍니다. 하나는 android: 접두어를 가지고 있고 하나는 없습니다. android: 접두어를 가진 것은 플랫폼에 스타일(style)을 포함하고 있는 Android Version 입니다. 접두어가 없는 것은 Support Library 로 부터 스타일을 읽어들인 오래된 버전입니다.
레이아웃(Layout) Top-margin 지정하기
---------------------------------
액션바가(Action Bar) 오버레이 모드(overlay mode)일때, 레이아웃의 일부가 가려진 상태로 보열질 지 모릅니다. 모든 테마들에서 각 각의 아이템들이 항상 액션바의 아래에 놓여지기 위해서는, actionBarSize 에 의해 지정된 높이(height)를 사용하여 뷰(View 들)의 상단(top)에 마진(margin) 이나 패딩(padding)을 추가해야 한다. 예:
| <RelativeLayout xmlns:android="http://schemas.android.com/apk/res/android" android:layout_width="match_parent" android:layout_height="match_parent" android:paddingTop="?android:attr/actionBarSize"> ... </RelativeLayout> |
만약 여러분이 Support Library를 사용하여 액션바를 만들었다면, 여러분은 위 속성에서 android: 접두어를 제거할 필요가 있습니다. 예 :
| <!-- Support library compatibility --> <RelativeLayout xmlns:android="http://schemas.android.com/apk/res/android" android:layout_width="match_parent" android:layout_height="match_parent" android:paddingTop="?attr/actionBarSize"> ... </RelativeLayout> |
이 경우, 접두어가 없는 ?attr/actionBarSize 값은 Android 3.0 이상 을 포함한 모든 버전에서 작동합니다.
출처: http://kitesoft.tistory.com/78
액션바(ActionBar)에 탭(Tab)를 붙여서 사용하는 앱들이 많더군요.
그래서 이번 포스트는
ActionBar에 Tab를 구현하는 예제소스입니다.
ActionBar에 Tab을 구현할때는 가급적
Fragment를 사용하시는 것이 코드관리 및 리소스관리에
용이합니다.
그런데 Fragment까지 한꺼번에 소개하면
다소 분량이 많아서
단계적으로
간단하게 ActionBar에 Tab을 구현하고
하나씩 기능을 추가하면서 예제를 소개하겠습니다.
먼저 Tab이 뭔지 모를 수도 있고
이 예제의 동작 결과도 볼겸.
미리 결과화면 부터 소개합니다.


각 Tab의 선택에 따라 다른 View가 보이도록 했습니다.
결과만 봐도 Tab이 뭔지 알수 있을 거라 봅니다.
이 에제는 ActionBar에 Tab을 구현하는데 초점이 있어서
Tab마다 보여지는 View는
MainActivity의 setContentView()메소드를 사용했습니다.
Activity 클래스의 setContentView()는 언제나
onCreate()에서만 사용한다고 아시는 분도 있던데.
클래스 안에 어떤 순간에도 메소드 호출이 가능합니다.
항상 setContentView(R.layout.main) 으로만 사용할 수 있는 건 아닙니다.
이 메소드의 의미에 초점을 맞추세요.
즉, 각 Tab마다 보여지는 View의 모양을
별도의 layout 파일로 만들거라서
layout_main.xml은 이 예제에서 별로 중요하지 않습니다.
그럼
각 Tab을 선택했을 때 보여지는 View의 모양을 설계하는
레이아웃 리소스 파일을 만들겠습니다.
res폴더 >> layout 폴더안에
3개의 서로 다른 레이아웃 xml 파일을 만들겠습니다.
첫번째 탭(Tab)에 의해 보여질 View 레이아웃 파일입니다.
파일 이름은 'layout_tab_0.xml' 입니다.
| layout_tab_0.xml |
| <?xml version="1.0" encoding="utf-8"?> <RelativeLayout xmlns:android="http://schemas.android.com/apk/res/android" android:layout_width="match_parent" android:layout_height="match_parent" > <AnalogClock android:layout_width="wrap_content" android:layout_height="wrap_content" android:layout_centerInParent="true"/> </RelativeLayout> |
두번째 탭(Tab)에 의해 보여질 View 레이아웃 파일입니다.
파일 이름은 'layout_tab_1.xml' 입니다.
| layout_tab_1.xml |
| <?xml version="1.0" encoding="utf-8"?> <RelativeLayout xmlns:android="http://schemas.android.com/apk/res/android" android:layout_width="match_parent" android:layout_height="match_parent" > <DigitalClock android:layout_width="wrap_content" android:layout_height="wrap_content" android:layout_centerInParent="true"/> </RelativeLayout> |
세번째 탭(Tab)에 의해 보여질 View 레이아웃 파일입니다.
파일 이름은 'layout_tab_2.xml' 입니다.
| layout_tab_2.xml |
| <?xml version="1.0" encoding="utf-8"?> <RelativeLayout xmlns:android="http://schemas.android.com/apk/res/android" android:layout_width="match_parent" android:layout_height="match_parent" android:padding="15dp" > <CalendarView android:layout_width="match_parent" android:layout_height="match_parent" android:layout_centerInParent="true"/> </RelativeLayout> |
각 View 마다 서로 다른 Widget를 넣었기에
구별하는데 어렵지 않으리라 봅니다.
이제 가장 중요한 MainActivity.java 소스파일입니다.
주요 설명은 주석을 참고하시기 바랍니다.
주석을 빼면 코드는 매우 간단합니다.
반복문을 사용하면 보다 코드를 간략하게 만들 수 있지만
보시기 편하도록 일일히 Tab 3개를 추가했습니다.
| MainActivity.java |
| public class MainActivity extends Activity { ActionBar actionBar; //ActionBar 참조변수 @Override protected void onCreate(Bundle savedInstanceState) { super.onCreate(savedInstanceState); setContentView(R.layout.activity_main); //Activity 객체는 이미 ActionBar를 가지고 있으므로 //이미 존해하는 ActionBar 객체를 얻어오기.(API 10버전 이상에서 사용가능) actionBar= getActionBar(); //ActionBar가 Tab를 보여줄 수 있는 모양이 되도록 설정 actionBar.setNavigationMode(ActionBar.NAVIGATION_MODE_TABS); //ActionBar에 추가 될 Tab 참조변수 Tab tab=null; //첫번째 Tab 객체 생성 및 ActionBar에 추가하기 tab= actionBar.newTab(); //ActionBar에 붇는 Tab객체 생성 tab.setText("Analog"); //Tab에 보여지는 글씨 //Tab의 선택이 변경되는 것을 인지하는 TabListener 설정(아래쪽 객체 생성 코드 참고) tab.setTabListener(listener); //ActionBar에 Tab 추가 actionBar.addTab(tab); //두번째 Tab 객체 생성 및 ActionBar에 추가하기 tab= actionBar.newTab();//ActionBar에 붇는 Tab객체 생성 tab.setText("Digital"); //Tab에 보여지는 글씨 //Tab의 선택이 변경되는 것을 인지하는 TabListener 설정(아래쪽 객체 생성 코드 참고) tab.setTabListener(listener); //ActionBar에 Tab 추가 actionBar.addTab(tab); //세번째 Tab 객체 생성 및 ActionBar에 추가하기 tab= actionBar.newTab(); //ActionBar에 붇는 Tab객체 생성 tab.setText("Calendar"); //Tab에 보여지는 글씨 //Tab의 선택이 변경되는 것을 인지하는 TabListener 설정(아래쪽 객체 생성 코드 참고) tab.setTabListener(listener); //ActionBar에 Tab 추가 actionBar.addTab(tab); } //Tab의 선택변화를 인지하는 Listener 객체 생성 //(Button의 onClickListner 처럼 생각하시면 됩니다.) TabListener listener= new TabListener() { //Tab의 선택이 벗어날 때 호출 //첫번째 파라미터 : 선택에서 벗어나는 Tab 객체 //두번째 파라미터 : Tab에 해당하는 View를 Fragment로 만들때 사용하는 트랜젝션.(여기서는 사용X) @Override public void onTabUnselected(Tab tab, FragmentTransaction ft) { // TODO Auto-generated method stub } //Tab이 선택될 때 호출 //첫번째 파라미터 : 선택된 Tab 객체 //두번째 파라미터 : Tab에 해당하는 View를 Fragment로 만들때 사용하는 트랜젝션.(여기서는 사용X) @Override public void onTabSelected(Tab tab, FragmentTransaction ft) { // TODO Auto-generated method stub //선택된 Tab객체의 위치값(왼족 처음부터 0,1,2....순으로 됨) int position = tab.getPosition(); switch( position ){ case 0: //가장 왼쪽 Tab 선택(Analog) //MainActivity가 보여 줄 View를 //res폴더>>layout폴더>>layout_tab_0.xml 로 설정 setContentView(R.layout.layout_tab_0); break; case 1: //두번째 Tab 선택(Digital) //MainActivity가 보여 줄 View를 //res폴더>>layout폴더>>layout_tab_1.xml 로 설정 setContentView(R.layout.layout_tab_1); break; case 2: //세번째 Tab 선택(Calendar) //MainActivity가 보여 줄 View를 //res폴더>>layout폴더>>layout_tab_2.xml 로 설정 setContentView(R.layout.layout_tab_2); break; } } //Tab이 재 선택될 때 호출 //첫번째 파라미터 : 재 선택된 Tab 객체 //두번째 파라미터 : Tab에 해당하는 View를 Fragment로 만들때 사용하는 트랜젝션.(여기서는 사용X) @Override public void onTabReselected(Tab tab, FragmentTransaction ft) { // TODO Auto-generated method stub } }; } |
여기까지 간단하게 ActionBar에 Tab을 추가했습니다.
다음 포스트에서 Tab의 각 View들의 전환에 역동성을 주기위해
각 View들을 ViewPager를 이용해서 만들어 볼겁니다.
감사합니다.
출처: http://kitesoft.tistory.com/80
앞선 포스트에서
간단한 ActionBar Tab을 구현해봤습니다.
ActionBar에 Tab을 만드는 방법을 알아보기 위한 예제이기에
각 Tab마다 보이는 View의 변경을
setContentView()메소드를 이용했습니다.
하지만
실제 이런 류의 액션바 탭(ActionBar Tab)을 구현한 앱들을 보면
Tab의 선택으로 뷰가 바뀌기도 하지만
Tab에 따라 보여지는 View를 옆으로 드래그해서
넘기는 경우가 많습니다.
즉, 마치 Page를 넘기듯 화면상의 View를 변경하며
변경되는 View에 맞추어 Tab도 자동으로 바뀌도록 되어 있죠.
여러분이 스마트폰으로 인터넷을 보실 때
화면을 옆으로 드래그 하면 해당 View의 색션이 자동으로 바뀌는 것을 자주
보셨을 겁니다.
그래서
이번 포스트는 Tab의 선택으로도 뷰가 변경되고
View의 Page를 넘기듯 하여 Tab을 변경하도록도 하는 예제를 만들어보겠습니다.
이미 ActionBar에 Tab을 추가하는 예제도 소개했으며
View를 Page 넘기듯 변경하는 ViewPager 예제도 소개했었습니다.
이번 예제는 이 둘을 연결하는 예제입니다.
앞선 포스트의 내용을 참고하시면 이해하시는데 도움이 되시리라 봅니다.
먼저 실행화면부터 소개하겠습니다.
탭(Tab) 선택으로 View변경하기
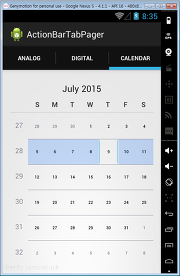
View를 페이지 넘기듯 하여 현재 Tab의 선택 변경하기


각 Tab의 선택에 따라 다른 View가 보이기도 하며
View를 드래그하여 Tab이 변경되는 것도 가능합니다.
실행결과를 보시면 어렵지 않게 어떤 어플인지 인지하실겁니다.
자 그럼
위의 동작이 되도록 ViewPager를 이용한 ActionBar Tab을 만들어보겠습니다.
먼저 Tab은 ActionBar에 추가할 것이므로
레이아웃 파일(activity_main.xml)에는 특별히 작업할 내용이 없지만
Tab에 의해 보여지는 View를 만들어내는
ViewPager를 레이아웃 파일안에 추가하겠습니다.
우선 메인 레이아웃파일입니다.
| activity_main.xml |
| <RelativeLayout xmlns:android="http://schemas.android.com/apk/res/android" xmlns:tools="http://schemas.android.com/tools" android:layout_width="match_parent" android:layout_height="match_parent" tools:context="${relativePackage}.${activityClass}" > <android.support.v4.view.ViewPager android:id="@+id/pager" android:layout_width="match_parent" android:layout_height="match_parent"> </android.support.v4.view.ViewPager> </RelativeLayout> |
보시다 시피 단순히 ViewPager 하나가 추가되어 있습니다.
ViewPager에 대한 설명은 ViewPager(뷰페이저) 포스트를 참고하시기 바랍니다.
이제 각 Tab이 선택했을 때 보여질 View의 레이아웃파일을 만들어보겠습니다.
이 레이아웃 xml파일들은 ViewPager가 차례로 View 객체로 만들게 됩니다.
res폴더 >> layout 폴더안에
3개의 서로 다른 레이아웃 xml 파일을 만들겠습니다.
첫번째 탭(Tab)에 의해 보여질 View 레이아웃 파일입니다.
파일 이름은 'layout_tab_0.xml' 입니다.
| layout_tab_0.xml |
| <?xml version="1.0" encoding="utf-8"?> <RelativeLayout xmlns:android="http://schemas.android.com/apk/res/android" android:layout_width="match_parent" android:layout_height="match_parent" > <AnalogClock android:layout_width="wrap_content" android:layout_height="wrap_content" android:layout_centerInParent="true"/> </RelativeLayout> |
두번째 탭(Tab)에 의해 보여질 View 레이아웃 파일입니다.
파일 이름은 'layout_tab_1.xml' 입니다.
| layout_tab_1.xml |
| <?xml version="1.0" encoding="utf-8"?> <RelativeLayout xmlns:android="http://schemas.android.com/apk/res/android" android:layout_width="match_parent" android:layout_height="match_parent" > <DigitalClock android:layout_width="wrap_content" android:layout_height="wrap_content" android:layout_centerInParent="true"/> </RelativeLayout> |
세번째 탭(Tab)에 의해 보여질 View 레이아웃 파일입니다.
파일 이름은 'layout_tab_2.xml' 입니다.
| layout_tab_2.xml |
| <?xml version="1.0" encoding="utf-8"?> <RelativeLayout xmlns:android="http://schemas.android.com/apk/res/android" android:layout_width="match_parent" android:layout_height="match_parent" android:padding="15dp" > <CalendarView android:layout_width="match_parent" android:layout_height="match_parent" android:layout_centerInParent="true"/> </RelativeLayout> |
각 View 마다 서로 다른 Widget를 넣었기에
구별하는데 어렵지 않으리라 봅니다.
이미 이전 포스트에서도 만들어봤던 파일들입니다.
다음으로
MainActivity 자바파일을 만들기 전에
ViewPager가 View를 옆으로 드래그(페이지를 넘기듯)했을 때
보여질 View들을 만들어 내는 CustomAdapter를 만들겠습니다.
(앞선 ViewPager 포스트를 참고하시기 바랍니다.)
코드의 의미는 주석으로 설명합니다.
| CustomAdapter.java |
| public class CustomAdapter extends PagerAdapter { LayoutInflater inflater; public CustomAdapter(LayoutInflater inflater) { // TODO Auto-generated constructor stub //전달 받은 LayoutInflater를 멤버변수로 전달 this.inflater=inflater; } //PagerAdapter가 가지고 잇는 View의 개수를 리턴 //Tab에 따른 View를 보여줘야 하므로 Tab의 개수인 3을 리턴.. @Override public int getCount() { // TODO Auto-generated method stub return 3; //보여줄 View의 개수 리턴(Tab이 3개라서 3을 리턴) } //ViewPager가 현재 보여질 Item(View객체)를 생성할 필요가 있는 때 자동으로 호출 //쉽게 말해, 스크롤을 통해 현재 보여져야 하는 View를 만들어냄. //첫번째 파라미터 : ViewPager //두번째 파라미터 : ViewPager가 보여줄 View의 위치(가장 처음부터 0,1,2,3...) @Override public Object instantiateItem(ViewGroup container, int position) { // TODO Auto-generated method stub View view=null;//현재 position에서 보여줘야할 View를 생성해서 리턴... //새로운 View 객체를 Layoutinflater를 이용해서 생성 //position마다 다른 View를 생성 //만들어질 View의 설계는 res폴더>>layout폴더안에 3개의 레이아웃 파일 사용 switch( position ){ case 0: //첫번째 Tab을 선택했을때 보여질 뷰 view= inflater.inflate(R.layout.layout_tab_0, null); break; case 1: //두번째 Tab을 선택했을때 보여질 뷰 view= inflater.inflate(R.layout.layout_tab_1, null); break; case 2: //세번째 Tab을 선택했을때 보여질 뷰 view= inflater.inflate(R.layout.layout_tab_2, null); break; } //ViewPager에 위에서 만들어 낸 View 추가 if(view != null) container.addView(view); //세팅된 View를 리턴 return view; } //화면에 보이지 않은 View는파쾨를 해서 메모리를 관리함. //첫번째 파라미터 : ViewPager //두번째 파라미터 : 파괴될 View의 인덱스(가장 처음부터 0,1,2,3...) //세번째 파라미터 : 파괴될 객체(더 이상 보이지 않은 View 객체) @Override public void destroyItem(ViewGroup container, int position, Object object) { // TODO Auto-generated method stub //ViewPager에서 보이지 않는 View는 제거 //세번째 파라미터가 View 객체 이지만 데이터 타입이 Object여서 형변환 실시 container.removeView((View)object); } //instantiateItem() 메소드에서 리턴된 Ojbect가 View가 맞는지 확인하는 메소드 @Override public boolean isViewFromObject(View v, Object obj) { // TODO Auto-generated method stub return v==obj; } } |
이제 이 CustomAdapter를 ViewPager에 적용하고
버튼으로 제어하는 작업을 하겠습니다.
메인 액티비티 소스파일입니다.
설명은 주석을 참고하세요.
다시 말하지만 주석을 제외하면 코드가 별로 길지 않습니다.
미리 겁먹지 않으시길 바랍니다.
| MainActivity.java |
| public class MainActivity extends Activity { ViewPager pager; //ViewPager 참조변수 ActionBar actionBar; //ActionBar 참조변수 @Override protected void onCreate(Bundle savedInstanceState) { super.onCreate(savedInstanceState); setContentView(R.layout.activity_main); //Activity 객체는 이미 ActionBar를 가지고 있으므로 //이미 존해하는 ActionBar 객체를 얻어오기.(API 10버전 이상) actionBar= getActionBar(); //ActionBar가 Tab를 보여줄 수 있는 모양이 되도록 설정 actionBar.setNavigationMode(ActionBar.NAVIGATION_MODE_TABS); //ViewPager 객체 참조 pager= (ViewPager)findViewById(R.id.pager); //ViewPager에 설정할 Adapter 객체 생성 //ListView에서 사용하는 Adapter와 같은 역할. //다만. ViewPager로 스크롤 될 수 있도록 되어 있다는 것이 다름 //PagerAdapter를 상속받은 CustomAdapter 객체 생성 //CustomAdapter에게 LayoutInflater 객체 전달 CustomAdapter adapter= new CustomAdapter(getLayoutInflater()); //ViewPager에 Adapter 설정 pager.setAdapter(adapter); //ViewPager에게 Page의 변경을 인지하는 Listener 세팅. //마치 클릭상황을 인지하는 OnClickListener와 같은 역할.. pager.setOnPageChangeListener(new OnPageChangeListener() { //Page가 일정부분 넘겨져서 현재 Page가 바뀌었을 때 호출 //이전 Page의 80%가 이동했을때 다음 Page가 현재 Position으로 설정됨. //파라미터 : 현재 변경된 Page의 위치 @Override public void onPageSelected(int position) { // TODO Auto-generated method stub //ViewPager는 3개의 View를 가지고 있도록 설계하였으므로. //Position도 역시 가장 왼쪽 처음부터(0,1,2 순으로 되어있음) //현재 전면에 놓여지는 ViewPager의 Page에 해당하는 Position으로 //ActionBar의 Tab위치를 변경. actionBar.setSelectedNavigationItem(position); } @Override public void onPageScrolled(int arg0, float arg1, int arg2) { // TODO Auto-generated method stub } @Override public void onPageScrollStateChanged(int arg0) { // TODO Auto-generated method stub } }); //ActionBar에 추가 될 Tab 참조변수 Tab tab=null; //첫번째 Tab 객체 생성 및 ActionBar에 추가하기 tab= actionBar.newTab(); //ActionBar에 붇는 Tab객체 생성 tab.setText("Analog"); //Tab에 보여지는 글씨 //Tab의 선택이 변경되는 것을 인지하는 TabListener 설정(아래쪽 객체 생성 코드 참고) tab.setTabListener(listener); //ActionBar에 Tab 추가 actionBar.addTab(tab); //두번째 Tab 객체 생성 및 ActionBar에 추가하기 tab= actionBar.newTab(); //ActionBar에 붇는 Tab객체 생성 tab.setText("Digital"); //Tab에 보여지는 글씨 //Tab의 선택이 변경되는 것을 인지하는 TabListener 설정(아래쪽 객체 생성 코드 참고) tab.setTabListener(listener); //ActionBar에 Tab 추가 actionBar.addTab(tab); //세번째 Tab 객체 생성 및 ActionBar에 추가하기 tab= actionBar.newTab(); //ActionBar에 붇는 Tab객체 생성 tab.setText("Calendar"); //Tab에 보여지는 글씨 //Tab의 선택이 변경되는 것을 인지하는 TabListener 설정(아래쪽 객체 생성 코드 참고) tab.setTabListener(listener); //ActionBar에 Tab 추가 actionBar.addTab(tab); }//onCreate Method... //ActionBar의 Tab 선택에 변화가 생기는 것을 인지하는 리스너(Listener) TabListener listener= new TabListener() { //Tab의 선택이 벗어날 때 호출 //첫번째 파라미터 : 선택에서 벗어나는 Tab 객체 //두번째 파라미터 : Tab에 해당하는 View를 Fragment로 만들때 사용하는 트랜젝션.(여기서는 사용X) @Override public void onTabUnselected(Tab tab, FragmentTransaction ft) { // TODO Auto-generated method stub } //Tab이 선택될 때 호출 //첫번째 파라미터 : 선택된 Tab 객체 //두번째 파라미터 : Tab에 해당하는 View를 Fragment로 만들때 사용하는 트랜젝션.(여기서는 사용X) @Override public void onTabSelected(Tab tab, FragmentTransaction ft) { // TODO Auto-generated method stub //선택된 Tab객체의 위치값(왼족 처음부터 0,1,2....순으로 됨) int position = tab.getPosition(); //Tab의 선택 위치에 따라 ViewPager에서 보여질 Item(View)를 설정 //첫번째 파라미터: ViewPager가 현재 보여줄 View의 위치 //두번째 파라미터: 변경할 때 부드럽게 이동하는가? false면 팍팍 바뀜 pager.setCurrentItem(position,true); } //Tab이 재 선택될 때 호출 //첫번째 파라미터 : 재 선택된 Tab 객체 //두번째 파라미터 : Tab에 해당하는 View를 Fragment로 만들때 사용하는 트랜젝션.(여기서는 사용X) @Override public void onTabReselected(Tab tab, FragmentTransaction ft) { // TODO Auto-generated method stub } }; } |
여기까지 ViewPager를 이용한 ActionBarTab을 구현해보았습니다.
사실 이번 예제소스는 단순히 Tab에 의해 다른 레이아웃의 View가 보여지기만 할 뿐
각 레이아웃의 View들을 제어하고 있지는 않습니다.
하지만 실제 어플에서는 이 View들을 제어하는 경우가 많습니다.
이번에 소개한 예제는 그 작업을 하기에는 별로 효율적이지 않은 예제 소스입니다.
다음번 포스트에서 이를 해결하기 위해
Fragment를 사용한 ViewPager ActionBar Tab을 만들어보겠습니다.
출처: http://androidhuman.tistory.com/472
안드로이드 3.0, 허니컴(Honeycomb)에서는 태블릿 단말에 최적화된 컴포넌트들이 많이 추가되었는데요, 프래그먼트(Fragment)와 함께 허니컴에서 추가된 대표적인 UI 컴포넌트 중 하나가 바로 액션바(Action bar)입니다.
액션바는 기존 안드로이드 애플리케이션의 타이틀바(Title bar)를 대체하는 컴포넌트로, 기존 타이틀바가 단순히 제목만을 표시하거나 간단한 정보만을 표시할 수 있던 것에 반해 액션바는 제목 표시 뿐만 아니라 메뉴 제공, 액션 아이템(Action item)을 통한 단축 메뉴 제공, 탭 지원 등 다양한 기능을 포함하고 있습니다. 다음은 전형적인 액션바의 모습을 보여줍니다.

액션바(Action bar)의 모습
액션바를 표시하려면?
안드로이드 3.0 이하 버전으로 작성된 애플리케이션 (매니페스트에 Min SDK Version / Target SDK Version이 11 이하인 경우)을 안드로이드 3.0이 탑재된 단말기에서 실행하면 액션바 대신 기존의 타이틀바가 그대로 표시됩니다. 때문에, 기존 플랫폼 버전을 지원함과 동시에 액션바도 표시되도록 하려면 매니페스트의 Target SDK Version을 11 이상으로 수정해야 합니다.
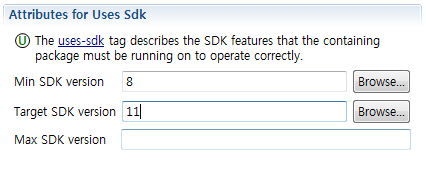
기존 버전과 3.0버전 이상을 동시에 지원하기 위한 매니페스트 설정
액션바와 메뉴(OptionsMenu), 그리고 액션 아이템(Action item)
액션바와 메뉴는 뗼레야 뗄 수 없는 관계입니다. 안드로이드 3.0 이상이 탑재된 단말기를 처음 접하게 되면 메뉴키가 없어 당황하는 분들이 꽤 있습니다. 물론 기존 플랫폼 버전을 타깃으로 작성된 애플리케이션을 실행했을 때는 메뉴를 호출할 수 있도록 하단에 메뉴키가 생기지만, 안드로이드 3.0을 타깃으로 작성된 애플리케이션에서는 메뉴키를 찾을 수 없을 것입니다.

기존 버전을 타깃으로 작성된 애플리케이션을 안드로이드 3.0 이상에서 실행했을 때 메뉴 표시모습
그렇다면, 메뉴는 과연 어디에 표시되는 것일까요? 답은 의외로 가까운 곳에 있습니다. 바로 액션바입니다. 액션바는 여러 역할을 하지만, 가장 주된 역할은 메뉴를 표시 기능입니다. 기존 버전을 타깃으로 작성된 애플리케이션의 타깃을 안드로이드 3.0 이상으로 변경한 후 다시 실행해보면 다음과 같이 액션바 우측 구석에 메뉴 버튼이 표시되는 것을 확인할 수 있습니다.
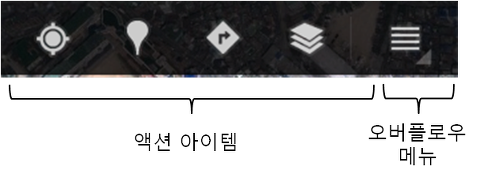
안드로이드 3.0부터는 메뉴가 액션바의 오버플로우 메뉴(눌렀을 때 리스트로 나타나는 메뉴)에 표시되며, 메뉴 항목 중 빈번한 사용이 예상되는 항목은 액션바에 바로 항목이 노출되도록 할 수 있습니다. 이렇게 오버플로우 메뉴가 아닌 액션바에 바로 노출되는 항목을 액션 아이템(Action item)이라 합니다.
일반 메뉴 항목을 액션 아이템으로 표시되도록 하는 방법은 크게 두 가지입니다. 하나는 메뉴 XML을 사용하는 방법, 다른 하나는 코드로 구현하는 방법입니다. 두 가지 방법 모두 동일한 결과를 내는 데는 문제가 없지만, 코드를 통해 구현하는 경우 SDK 버전에 맞추어 별도로 코드를 작성해야 하므로 XML을 통해 설정하는 방법을 권장합니다.
XML에서 메뉴 항목이 액션 아이템으로 표시되도록 설정하려면 다음과 같이 android:showAsAction 속성을 지정하면 됩니다. 다음 예제는 메뉴 항목에 대해 공간이 있을 경우 메뉴 항목의 텍스트를 동시에 표시하도록 구현하고 있습니다.
| <?xml version="1.0" encoding="utf-8"?> <menu xmlns:android="http://schemas.android.com/apk/res/android"> <item android:id="@+id/menu_add" android:icon="@drawable/ic_menu_save" android:title="@string/menu_save" android:showAsAction="ifRoom|withText" /> </menu> |
android:showAsAction 속성으로 지정할 수 있는 항목은 다음과 같습니다.
- ifRoom : 액션 아이템을 표시할 수 있는 공간이 있다면 액션 아이템을 표시합니다.
- never : 항상 액션 아이템으로 표시하지 않습니다. (기본값)
- withText : 메뉴 항목의 아이콘과 메뉴 항목의 텍스트를 함께 액션 아이템으로 표시합니다.
- always : 항상 액션 아이템으로 표시합니다.
메뉴 항목이나 액션 항목을 선택했을 때 수행할 작업 구현은 기존과 동일하게 onOptionsItemSelected() 메서드에서 처리합니다. 안드로이드 3.0부터는 액션바 좌측에 애플리케이션 아이콘이 기본적으로 표시되는데, 이 아이콘을 눌렀을 때 처리할 동작 또한 동일한 메서드에서 처리할 수 있습니다. 애플리케이션 아이콘의 id는 android.R.id.home으로, onOptionsItemSelected()에서 이 id를 사용하여 적절한 작업을 수행하도록 구현할 수 있습니다.
액션바 감 잡아보기
지금까지 액션바에 대해 간단히 알아보았으니 예제를 통해 확실히 사용법을 알아보도록 하겠습니다.
[어플리케이션 정보]
액티비티
- Main (Main.java)
메뉴 리소스
- menu.xml
API Level
- Android 3.0 (API Level 11)
프로젝트를 생성한 후, 다음과 같이 리소스 추가 마법사를 사용하여 메뉴 리소스를 추가합니다.

메뉴 리소스를 추가합니다.
다음, 메뉴 항목을 추가합니다. 예제에서는 총 3개의 메뉴 항목을 추가합니다. 다음과 같이 메뉴 리소스를 작성합니다.
[menu.xml]
| <?xml version="1.0" encoding="utf-8"?> <menu xmlns:android="http://schemas.android.com/apk/res/android"> <item android:showAsAction="ifRoom|withText" android:id="@+id/item1" android:icon="@android:drawable/ic_menu_add" android:title="Add" /> <item android:id="@+id/item2" android:showAsAction="always" android:title="Action item with icon" android:icon="@android:drawable/ic_menu_search" /> <item android:title="Normal item" android:id="@+id/item3" /> </menu> |
각 메뉴 항목을 보면 각각 다른 속성을 적용한 것을 알 수 있습니다. 첫 번째 항목과 두 번째 항목은 모두 액션 아이템으로 표시하도록 설정하였지만, 첫 번째 항목은 액션바에 빈 공간이 있을 때만 표시하며 아이콘과 텍스트 모두 표시되도록 설정하였습니다. 두 번째 항목은 항상 액션 아이템으로 표시되도록 하였으며, 세 번째 항목은 일반적인 메뉴 항목으로써 오버플로우 메뉴에 표시되도록 설정하였습니다.
다음, 메뉴 항목을 선택했을 때 실행할 동작을 구현해 보도록 하겠습니다. 우선 onCreateOptionsMenu()에서 메뉴 리소스 파일을 불러 메뉴에 적용한 후, onOptionsItemSelected() 메서드에서 각 메뉴 항목을 선택했을 때 수행할 동작을 구현합니다.
[Main.java]
| @Override public boolean onCreateOptionsMenu(Menu menu) { getMenuInflater().inflate(R.menu.menu, menu); return true; } @Override public boolean onOptionsItemSelected(MenuItem item) { String text = null; switch(item.getItemId()){ case android.R.id.home: text = "Application icon"; break; case R.id.item1: text = "Action item, with text, displayed if room exists"; break; case R.id.item2: text = "Action item, icon only, always displayed"; break; case R.id.item3: text = "Normal menu item"; break; default: return false; } Toast.makeText(this, text, Toast.LENGTH_SHORT).show(); return true; } |
각 항목을 선택할 때마다 해당 항목의 속성을 토스트로 표시하도록 구현했습니다. 앞에서 알아본 것과 같이 액션바에 표시되는 애플리케이션 아이콘(android.R.id.home)을 선택한 것 또한 감지하여 토스트로 표시하도록 구현했습니다.
예제를 실행하면 다음과 같이 액션바가 표시되는것을 확인할 수 있습니다. 메뉴 리소스에서 설정한 것과 같이 첫번째와 두번째 항목이 액션 아이템으로 표시되고, 나머지 한 항목은 오버플로우 메뉴에 표시됩니다.
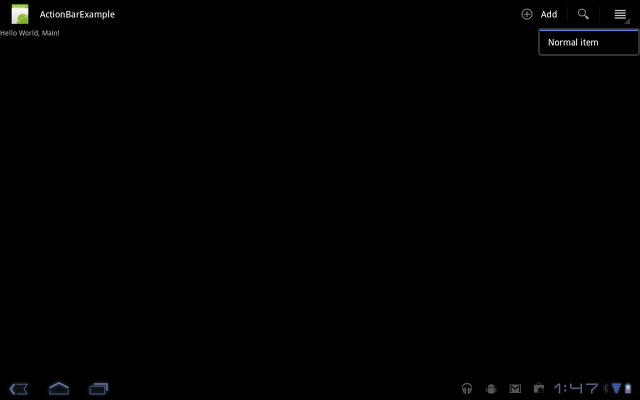
액션바가 표시되는 모습
각 항목을 선택하면 앞에서 구현한 것과 같이 각 항목에 해당하는 토스트가 표시됩니다. 애플리케이션 아이콘을 눌렀을 때 토스트가 표시되는 것 또한 확인할 수 있습니다.

애플리케이션 아이콘을 선택했을 때의 모습
이것으로 액션바에 대해 간단히 알아보았습니다. 이 정도면 어느 정도 액션바가 무엇인지에 대해 감을 잡을 수 있었을 것이라 생각합니다. 다음 포스트에서는 액션바의 조금 더 다양한 내용에 대해 알아보도록 하겠습니다.
출처: http://hyunssssss.tistory.com/294
●액션바(Actionbat)
- 앱 상단에 나오는 네이게이션 모드를 제공해 주는 바이다. 유저의 위치를 확인시켜주고 메뉴등을 제공해 줘서 유저가 앱을 더 편리하게 사용하도록 한다.
- 안드로이드 버전 11부터는 Activity에 이미 액션바가 지원된다. 개발자가 매니페스트에 설정하지 않으면 나오지 않는것 뿐이었다. 이전 버전 개발시 반드시 ActionBarActivity클래스를 상속 받아야 한다.
- 액션바를 사용하려면 매니페스트에 테마(android:theme="@android:style/~~~)를 추가하면 된다.
●예제1
- ActionBarMain.java
| package study.bar; import com.example.day0328.R; import android.app.Activity; import android.os.Bundle; public class ActionBarMain extends Activity{ protected void onCreate(Bundle savedInstanceState) { super.onCreate(savedInstanceState); setContentView(R.layout.actionbar_main); } } |
- actionbat_main.xml
| <?xml version="1.0" encoding="utf-8"?> android:layout_width="match_parent" android:layout_height="match_parent" android:orientation="vertical" > </LinearLayout> |
- manifest.xml
| <?xml version="1.0" encoding="utf-8"?> package="com.example.day0328" android:versionCode="1" android:versionName="1.0" > <uses-sdk android:minSdkVersion="11" android:targetSdkVersion="21" /> <application android:allowBackup="true" android:icon="@drawable/ic_action_search" android:label="@string/app_name" android:theme="@style/AppTheme" > <activity android:name="study.bar.ActionBarMain" android:theme="@android:style/Theme.Holo.Light" android:label="@string/title_activity_action_bar_test" > <intent-filter> <action android:name="android.intent.action.MAIN" /> <category android:name="android.intent.category.LAUNCHER" /> </intent-filter> </activity> </application> </manifest> |

●예제2
- 액티비티를 생성할대 Android Activity를 선택하고 Blank Activity를 선택한다.


- ActionBarTest.java
| package study.bar; import android.app.Fragment; import android.app.FragmentManager; import android.app.FragmentTransaction; import android.os.Bundle; import android.support.v7.app.ActionBarActivity; import android.view.Menu; import android.view.MenuItem; import android.widget.Toast; import com.example.day0328.R; public class ActionBarTest extends ActionBarActivity { FragmentManager manager; FragmentTransaction trans; //프레그먼트의 개수가 많을때는 배열을 사용하면 편하다 Fragment[] fragments = new Fragment[3]; protected void onCreate(Bundle savedInstanceState) { super.onCreate(savedInstanceState); setContentView(R.layout.activity_action_bar_test); //11버전 이후는 모든 Activity에 Fragment가 지원된다. manager = this.getFragmentManager(); fragments[0] = (Fragment1)manager.findFragmentById(R.id.frg_1); fragments[1] = new Fragment2(); fragments[2] = new Fragment3(); } /* * 개발자가 액션바에 메뉴를 추가하거나, 수정할려면 앞으로 * 이 메서드가 호출하고 있는 R.menu.~~.xml파일을 수정하면 된다. */ public boolean onCreateOptionsMenu(Menu menu) { getMenuInflater().inflate(R.menu.action_bar_test, menu); return true; } /* * 사용자가 아이템들을 선택하면, 이벤트가 발생하고 * 해당 아이템 정보가 아래의 메서드의 인수로 전달된다. * MenuItem item 변수가 이벤트를 일으킨 아이템이다. */ public boolean onOptionsItemSelected(MenuItem item) { int id = item.getItemId(); if (id == R.id.action_settings) { Toast.makeText(this, "클릭1", Toast.LENGTH_SHORT).show(); trans = manager.beginTransaction(); trans.replace(R.id.frg_1, fragments[0]); trans.commit(); return true; } if (id == R.id.action_settings2) { Toast.makeText(this, "클릭2", Toast.LENGTH_SHORT).show(); trans = manager.beginTransaction(); trans.replace(R.id.frg_1, fragments[1]); trans.commit(); return true; } if (id == R.id.action_settings3) { Toast.makeText(this, "클릭3", Toast.LENGTH_SHORT).show(); trans = manager.beginTransaction(); trans.replace(R.id.frg_1, fragments[2]); trans.commit(); return true; } return super.onOptionsItemSelected(item); } } |
- activity_action_bar_test.xml
| xmlns:tools="http://schemas.android.com/tools" android:id="@+id/LinearLayout1" android:layout_width="match_parent" android:layout_height="match_parent" android:orientation="vertical" android:paddingBottom="@dimen/activity_vertical_margin" android:paddingLeft="@dimen/activity_horizontal_margin" android:paddingRight="@dimen/activity_horizontal_margin" android:paddingTop="@dimen/activity_vertical_margin" tools:con="" > <fragment android:id="@+id/frg_1" android:name="study.bar.Fragment1" android:layout_width="match_parent" android:layout_height="match_parent"/> </LinearLayout> |
- res/menu/action_bar_test.xml
| xmlns:app="http://schemas.android.com/apk/res-auto" xmlns:tools="http://schemas.android.com/tools" tools:context="com.example.day0328.ActionBarTest" > <item android:id="@+id/action_settings" android:orderInCategory="100" android:title="new" android:icon="@drawable/ic_action_new" app:showAsAction="always"/> <item android:id="@+id/action_settings2" android:orderInCategory="100" android:title="search" android:icon="@drawable/ic_action_search" app:showAsAction="always"/> <item android:id="@+id/action_settings3" android:orderInCategory="100" android:title="@string/action_settings" app:showAsAction="always"/> </menu> |
- Fragment1.java
| package study.bar; import com.example.day0328.R; import android.app.Fragment; import android.os.Bundle; import android.view.LayoutInflater; import android.view.View; import android.view.ViewGroup; public class Fragment1 extends Fragment{ public View onCreateView(LayoutInflater inflater, ViewGroup container, Bundle savedInstanceState) { //3번째 인수는 return한 결과를 시스템이 알아서 구성해주므로 //true로 하지 말고 false로 하면 된다. return inflater.inflate(R.layout.fragment1, container, false); } } |
- fragment1.xml
| <?xml version="1.0" encoding="utf-8"?> android:layout_width="match_parent" android:layout_height="match_parent" android:orientation="vertical" android:background="#0100FF" > </LinearLayout> |
- Fragment2.java
| package study.bar; import com.example.day0328.R; import android.app.Fragment; import android.os.Bundle; import android.view.LayoutInflater; import android.view.View; import android.view.ViewGroup; public class Fragment2 extends Fragment{ public View onCreateView(LayoutInflater inflater, ViewGroup container, Bundle savedInstanceState) { return inflater.inflate(R.layout.fragment2, container, false); } } |
- fragment2.xml
| <?xml version="1.0" encoding="utf-8"?> android:layout_width="match_parent" android:layout_height="match_parent" android:orientation="vertical" android:background="#660033" > </LinearLayout> |
- Fragment3.java
| package study.bar; import com.example.day0328.R; import android.app.Fragment; import android.os.Bundle; import android.view.LayoutInflater; import android.view.View; import android.view.ViewGroup; public class Fragment3 extends Fragment{ public View onCreateView(LayoutInflater inflater, ViewGroup container, Bundle savedInstanceState) { return inflater.inflate(R.layout.fragment3, container, false); } } |
- fragment3.xml
| <?xml version="1.0" encoding="utf-8"?> android:layout_width="match_parent" android:layout_height="match_parent" android:orientation="vertical" android:background="#8C8C8C" > </LinearLayout> |


기타 링크들
----------------------------
참조
- [Android] Action Bar Mechanics
- [Android] Action Bar ActionProvider
- [Android] Action Bar ShareActionProvider( 공유 )
- [Android] Action Bar Usage (Action Bar 사용방법 예제)
- [Android] ActionBar Tabs
--------------------------
'스마트기기개발관련 > 안드로이드 개발' 카테고리의 다른 글
| 안드로이드 작업 해상도, dip에 따른 폰트작업 관련 (0) | 2020.09.21 |
|---|---|
| android 안드로이드 드래그를 통한 화면 전환 드래그 웹뷰 이동, ViewPager,ViewFlipper 등등 을 사용한 슬라이드 화면 전환 관련 (0) | 2020.09.20 |
| 안드로이드 android webview 에서 https 보안에서 컨텐츠(이미지, 텍스트)들이 error, 막히거나, 안보일때 방법 (0) | 2020.09.20 |
| 안드로이드 Android Studio 프로젝트 라이브러리파일(.jar) 추가하기 (0) | 2020.09.20 |
| 안드로이드 결제 테스트 검증 및 알파/베타 버전 배포 및 테스트 방법 (0) | 2020.09.20 |