=================================
=================================
=================================

출처: https://www.npmjs.com/package/es6-module-loader
es6-module-loader
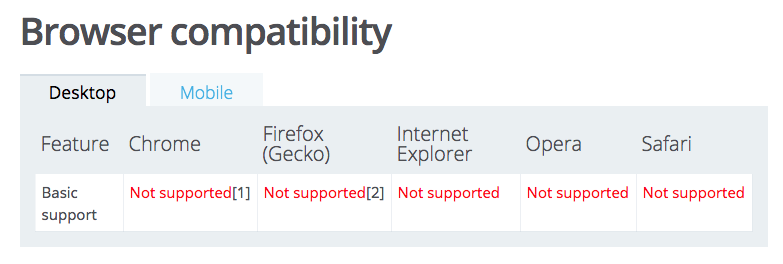
An ES6 Module Loader shim
ES6 Module Loader Polyfill

For upgrading to ES6 Module Loader 0.17, read the release notes here.
Dynamically loads ES6 modules in browsers and NodeJS with support for loading existing and custom module formats through loader hooks.
This project implements dynamic module loading through System exactly to the previous ES6-specified loader API at2014-08-24 ES6 Specification Draft Rev 27, Section 15. The specification for the module loader was removed from the ES6/ES2015 specification in 2014, and a new loader implementing the new draft WhatWG loader spec is pending alpha release on the 1.0 branch.
- Provides an asynchronous loader (System.import) to dynamically load ES6 modules.
- Supports Traceur, Babel and TypeScript for compiling ES6 modules and syntax into ES5 in the browser with source map support.
- Fully supports ES6 circular references and live bindings.
- Includes paths implementation.
- Can be used as a tracing tool for static analysis of modules.
- Supports IE8+, with IE9+ support for ES6 development without pre-compilation.
- The minified production loader is under 5KB minified and gzipped, making it suitable for production use, provided that modules are built into ES5 making them independent of Traceur.
- Supports declaring modules with <script type="module">, the precursor of the proposed <module> tag.
For an overview of build workflows, see the production guide.
For an example of a universal module loader based on this polyfill for loading AMD, CommonJS and globals, seeSystemJS.
Documentation
- Configuring the loader
- Production workflows
- Circular References & Bindings
- Extending the loader through loader hooks
- Tracing API
Getting Started
If using ES6 syntax (optional), include traceur.js, babel.js or typescript.js in the page first then include es6-module-loader-dev.js:
<script src="traceur.js"></script>
  <script src="es6-module-loader-dev.js"></script>
To use Babel, load Babel's browser.js instead and set the transpiler to babel with the loader configuration:
<script>

  System.transpiler = 'babel';

</script>

To use TypeScript, set the transpiler to typescript in the loader configuration:

<script>

  System.transpiler = 'typescript';

</script>

Then we can write any ES6 module:

mymodule.js:

  export class q {

    constructor() {

      console.log('this is an es6 class!');

    }

  }

and load the module dynamically in the browser

<script>

  System.import('mymodule').then(function(m) {

    new m.q();

  });

</script>
The dynamic loader returns a Module object, which contains getters for the named exports (in this case, q).
See the demo folder in this repo for a working example demonstrating module loading in the browser both withSystem.import and with the module-type script tag.
Although System.import() does not support the import of multiple modules defined in an array, becauseSystem.import() returns a Promise, this can be achieved by creating an array of System.imports and usingPromise.all().
If using Traceur, these can be set with:
System.traceurOptions = {...};
With Babel:
System.babelOptions = {...};
With TypeScript:
System.typescriptOptions = {...};
As well as defining window.System, this polyfill provides support for the <script type="module"> tag:
<script type="module">
// loads the 'q' export from 'mymodule.js' in the same path as the page
import { q } from 'mymodule';
new q(); // -> 'this is an es6 class!'
</script>
Because it is only possible to load ES6 modules with this tag, it is not suitable for production use in this way.
npm install es6-module-loader babel traceur typescript
It is important that Babel, Traceur or TypeScript is installed into the path in order to be found, since these are no longer project dependencies.
For use in NodeJS, the Loader and System globals are provided as exports:
index.js:
var System = require('es6-module-loader').System;

  /*

   *  Include:

   *    System.transpiler = 'babel';

   *  to use Babel instead of Traceur or

   *    System.transpiler = 'typescript';

   *  to use TypeScript

   */


  System.import('some-module').then(function(m) {

    console.log(m.p);

  });

some-module.js:

  export var p = 'NodeJS test';

Running the application:

> node index.js

NodeJS test
Contributing
In lieu of a formal styleguide, take care to maintain the existing coding style. Add unit tests for any new or changed functionality. Lint and test your code using grunt.
Also, please don't edit files in the "dist" subdirectory as they are generated via grunt. You'll find source code in the "lib" subdirectory!
Testing
- npm run test:node will use node to to run the tests
- npm run test:browser will run npm run test:browser-babel, npm run test:browser-traceur andnpm run test:browser-typescript
- npm run test:browser-[transpiler] use karma to run the tests with Traceur, Babel or TypeScript.
- npm run test:browser:perf will use karma to run benchmarks
npm run test:browser-[transpiler] supports options after a double dash (--) :
- You can use the --polyfill option to test the code with polyfill.
- You can use the --coverage option to test and extract coverage info.
- You can use the --ie8 option to test the code in the ie8 scope only.
- You can use the --saucelabs option to use karma and saucelabs to run the tests in various browsers. Note: you will need to export your username and key to launch it.npm run test:browsers -- --saucelabs
- export SAUCE_USERNAME={your user name} && export SAUCE_ACCESS_KEY={the access key that you see once logged in}
Credit
Copyright (c) 2015 Luke Hoban, Addy Osmani, Guy Bedford
License
Licensed under the MIT license.
=================================
=================================
=================================
출처: http://k33g.github.io/2015/05/02/ES6.html
First: Preparation
Somewhere type:
npm install babel-core es6-module-loader
Copy to JavaScript directory of your webapp: (ie: /js/)
- node_modules/babel-core/browser.js
- node_modules/es6-module-loader/dist/es6-module-loader.js
- node_modules/es6-module-loader/dist/es6-module-loader.js.map
browser.js is the ES6 transpiler and es6-module-loader.js allows you to load ECMAScript 6 files and to use import in the browser.
Webapp skeleton
Now, you've got something like that (create these files: index.htmland index.js and js/models/human.js)
my-app/ ├── public/ | ├── js/ | | ├── models/ | | | └── human.js | | └── vendors/ | | ├── browser.js | | ├── es6-module-loader.js | | └── es6-module-loader.js.map | ├── index.html | └── index.js
Remark: you need an http server (ie: https://www.npmjs.com/package/http-server)
Now, the code:
index.html
<!DOCTYPE html> <html> <head lang="en"> <meta charset="UTF-8"> <title></title> </head> <body> <h1></h1> <script src="js/vendors/browser.js"></script> <script src="js/vendors/es6-module-loader.js"></script> <script> System.transpiler = 'babel'; // load index.js System.import('index').then(function(module) { // foo }).catch(function (e) { console.error(e); }); </script> </body> </html>
System.import('index') will load and execute index.js
index.js
// index.js - ES6 import Human from 'js/models/human' let bob = new Human("Bob", "Morane"); document.querySelector("h1").innerHTML = `Hello ${bob.toString()}`;
import Human from 'js/models/human' will load human.js
js/models/human.js
//js/models/human.js export default class Human { constructor (firstName, lastName) { this.firstName = firstName; this.lastName = lastName; }; toString () { return this.firstName + " " + this.lastName; } }
And now, launch http-server, and open http://localhost:8080/, that's all!
=================================
=================================
=================================
출처: http://www.tutorialsavvy.com/2015/05/babel-in-browser-compilation-of-javascript.html/
Babel In Browser Compilation Of JavaScript
- In my previous post we have learnt about Babel installation and basic use of compiling the code to ES5 JavaScript Code.
- Babel comes with an in-browser compilation option to compile the code in the runtime.
- In this demo,”We will learn to use in browser compilation for Babel to produce ES5 JavaScript Code during rendering time”.
- To know about steps to install check my previous post. The Babel comes with Command Line Interface(CLI),Require hook and Browser sub module default installed.
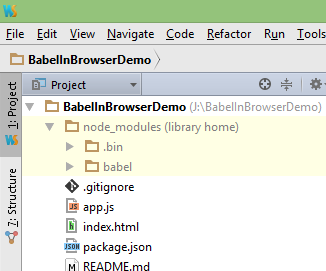
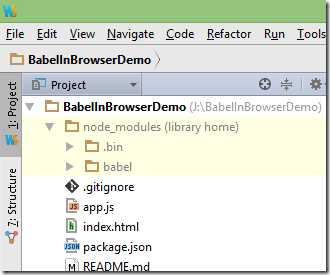
- The demo project structure is as follows where app.js contains the featured advance code.
image: http://www.tutorialsavvy.com/wp-content/uploads/2015/05/image_thumb71.png

- The index.html file contains the code for displaying the output in browser.The code content of index.html file is as follows.
<!DOCTYPE html> <html> <head lang="en"> <meta charset="UTF-8"> <title>Babel In Browser Compilation Demo</title> <script src="node_modules/babel/node_modules/babel-core/browser.js"></script> </head> <body> <script type="text/babel" src="app.js"></script> </body> </html>
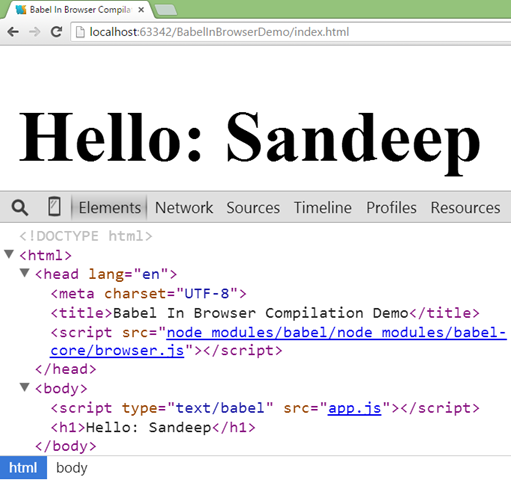
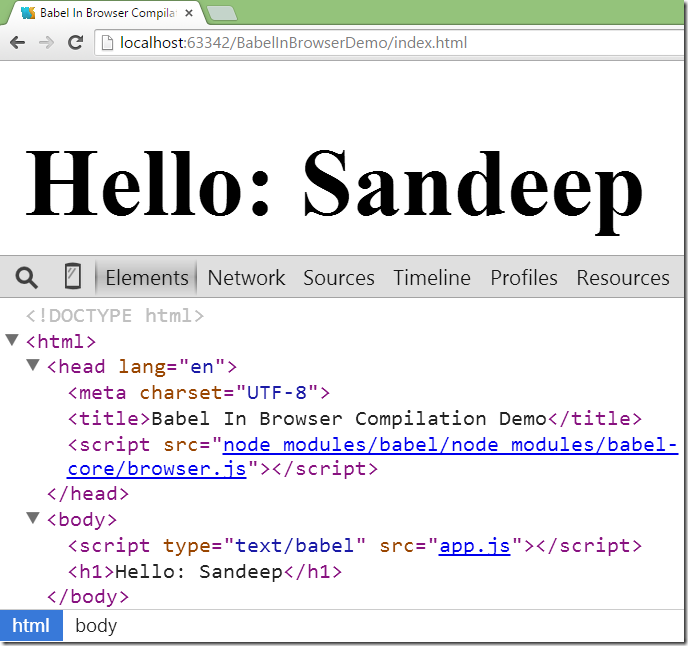
- In index.html file we have added the in browser compiler called Browser.js for doing compilation during run/render time.The in-browser compiler detects the feature code by checking <script> element having type attribute value text/babel.
<script type="text/babel" src="app.js"> </script>
- The output of above code will be rendered as following screenshot.
image: http://www.tutorialsavvy.com/wp-content/uploads/2015/05/image_thumb72.png

- The demo code can be downloaded from the following link.
https://github.com/saan1984/BabelInBrowserDemo
Read more at http://www.tutorialsavvy.com/2015/05/babel-in-browser-compilation-of-javascript.html/#SPGLGhKIfX5KusYd.99
=================================
=================================
=================================
출처: http://www.jonathan-petitcolas.com/2015/03/09/transpiling-es6-to-es5-using-babel.html
Transpiling EcmaScript6 code to ES5 using Babel
If you also watch marmelab blog, you have probably already heard of ng-admin, the REST-based admin panel powered by Angular.js. Developed in good old EcmaScript5 JavaScript, it was time to make a step forward, introducing ES6 and its wide set of new features (a post on it soon).
We, at marmelab, spent the last two weeks updating the ng-admin configuration classes to ES6. We voluntarily restricted the perimeter to do the spadework for this new JavaScript version. And, as admin configuration is independent of Angular.js, that's the perfect target for our experiment.
As always in web development, we can't use a new technology, no matter how exciting, directly out of the box. To ensure browser compatibility, we need to transpile it into more common JavaScript. So, even if we write our code in ES6, we have to include a phase of transpiling, to convert it into pure ES5 code, understandable by all browsers.
Babel vs Traceur
There are two main ES6 to ES5 transpilers: Babel (formerly known as 6to5) and Traceur. We had to take one of them: Babel.
The main reason we chose Babel is it doesn't need any runtime extra script to run. Everything is done server-side. You just have to execute a compilation task once, and then deploy the compiled sources. At the opposite, Traceur needs to embed such a script, bringing an extra overhead. Yet, it should be nuanced, as we still need a polyfill (core-js) for some missing browser methods, likeArray.from.
Another issue is that Traceur is not compliant with React.js. This is not a big deal in this case, but as we also use the Facebook framework at marmelab, let's accumulate knowledge on a single technology. He who can do more can do less.
And, icing on the cake, Babel has an online REPL if you want to quickly give it a try.
How to use Babel to transpile your code?
Turning your ES6 code to ES5 JavaScript
First, you need to install Babel:
npm install babel --save-dev
Then, let's consider the following simple class:
class View {
    constructor(name) {
        this._name = name;
    }

    name(name) {
        if (!arguments.length) return this._name;
        this._name = name;
        return this;
    }
}

export default View;
Compiling it into pure ES5 JavaScript is as simple as the following command:
babel View.js
By default it will output the file in standard output. You can of course redirect it to a file using the standard > operator.
babel View.js > build/View.js
Babel modules
Previous example had no dependencies. Yet, what would happen if we had to import another class? Let's experiment it right now:
import View from "./View";

class ListView extends View {
    constructor(name) {
        super(name);
        this._type = "ListView";
    }
}
Compile these two classes using the commands:
babel View.js > build/View.js
babel ListView.js > build/ListView.js
If you open the build/ListView.js file, you will see some calls to require function:
var View = _interopRequire(require("./View"));
On ng-admin, we use requirejs to load our dependencies. So, I first thought I just had to embed requirejs and that everything would work out of the box. Unfortunately, after several hours of debug, I learnt it wasn't the case. Indeed, this require call is not the same than the require from requirejs. While the first is related to CommonJS, requirejs uses the AMD standard.
AMD? CommonJS? UMD?
I have always been confused about all these standards. I took profit of this project to clarify them. After digging the topic, it is simple.
All of these standards aimed to simplify development of modular JavaScript. Asynchronous Module Definition (AMD) is the requirejsmodule loader. It targets browsers only, and is supposed to simplify front-end development (even if I hardly found any more difficult to configure library).
AMD modules are defined through the define function, such as:
define(['dependencyA', 'dependencyB', function(dependencyA, dependencyB) {
    return {
        doSomething: dependencyA.foo() + dependencyB.foo();
    }
});
CommonJS is based on the Node.js module definition. This is not compatible with requirejs, but has been brought to front developers thanks to libraries such as browserify or webpack. Our previously AMD module would looks like the following in CommonJS:
var dependencyA = require('dependencyA');
var dependencyB = require('dependencyB');

module.exports = {
    doSomething: dependencyA.foo() + dependencyB.foo()
};
Finally, as neither AMD nor CommonJS succeeded in standing out from the crowd, another attempt of standardization emerged: Universal Module Definition (UMD). It has been built to be compatible with both of them.
(function (root, factory) {
    if (typeof define === 'function' && define.amd) {
        // AMD
        define(['dependencyA', 'dependencyB'], factory);
    } else if (typeof exports === 'object') {
        // Node, CommonJS-like
        module.exports = factory(require('dependencyA'), require('dependencyB'));
    } else {
        // Browser globals (root is window)
        root.returnExports = factory(root.dependencyA, root.dependencyB);
    }
}(this, function (dependencyA, dependencyB) {
    doSomething: dependencyA.foo() + dependencyB.foo()
}));
Really ugly and verbose, isn't it?
Using Babel with requirejs
So, we need AMD to be able to use requirejs with Babel. Yet, Babel exports by default to the CommonJS format. Fortunately, we can specify it a --modules option:
babel --modules amd ListView.jsChecking generated output shows that we are now compliant with requirejs:
define(["exports", "module", "./View"], function (exports, module, _View) {
    // ...
});
Testing with Babel
ng-admin uses two testing framework: Karma and Mocha. Here is how to configure these frameworks.
Karma
For Karma, we just have to install an extra package:
npm install --save-dev karma-babel-preprocessorThen, update your karma.conf.js configuration file:
config.set({
    // ...
    plugins: [/* ... */ 'karma-babel-preprocessor'],
    preprocessors: {
        'ng-admin/es6/lib/**/*.js': 'babel'
    },
    babelPreprocessor: {
        options: {
            modules: "amd"
        }
    }
});
We add the freshly installed plug-in, specifying it to transpile to AMD module. We also have to specify which files should be transpiled, via the preprocessors option.
Mocha
For Mocha, install process is similar and requires the mocha-traceur plugin:
npm install --save-dev mocha-traceur grunt-mocha-testWe also installed the grunt-mocha-test as we are using Grunt. Then, a little bit of configuration:
// Gruntfile.js
grunt.initConfig({
    mochaTest: {
        test: {
            options: {
                require: 'mocha-traceur'
            },
            src: ['src/javascripts/ng-admin/es6/tests/**/*.js']
        }
    }
});

grunt.loadNpmTasks('grunt-mocha-test'); // enable "grunt mochaTest" command
If you prefer using mocha directly, just specify the compilers option:
mocha --compilers js:mocha-traceur --recursive src/javascripts/ng-admin/es6/tests/Now you got the big picture on how we succeeded to rewrite ng-admin configuration classes using EcmaScript6. There is still a lot of work to do on ng-admin for a full migration. Don't hesitate to give a helping hand!
=================================
=================================
=================================
출처: http://stackoverflow.com/questions/28761120/how-to-use-ecmascript6-modules-within-webpages
I'm pretty excited about using ECMAScript 6 features now via Babeljs - in particular, I'd love to start making my JavaScript code more modular using the new modules feature.
Here's what I've written so far:
// ECMAScript 6 code - lib.js
export const sqrt = Math.sqrt;
export function square (x) {
  return x * x;
}

export function diag (x, y) {
  return sqrt(square(x) + square(y));
}

// ECMAScript 6 code - main.js
import { square, diag } from 'lib';
console.log(square(11));
console.log(diag(4, 3));
I understand that I can transpile this code from ES6 to ES5 via babel on the command line:
babel lib.js > lib6to5.js
babel main.js > main6to5.js
But what do I need to do to use this code within my HTML?
For example, what would this index.html file look like:
<!-- index.html -->
<!doctype html>
<html>
  <head>
    <meta charset="utf-8">
    <title>ECMAScript 6</title>

    <!-- What goes here?
     How do I include main6to5.js and lib6to5.js to make this work in the browser? -->
    <script src="?????"></script>

  </head>
  <body>

  </body>
</html>
Thank you
javascript ecmascript-6 babeljs
Without using Modules: If you are not using modules (imports/exports), then you can simply transpile your code into ES5 and include those ES5 files in your html. Example:
// ES6 - index.js
// arrow function
var result = [1, 2, 3].map(n => n * 2);
console.log(result);

// enhanced object literal
var project = "helloWorld";
var obj = {
    // Shorthand for ‘project: project’
    project,
    // Methods
    printProject() {
     console.log(this.project);
    },
    [ "prop_" + (() => 42)() ]: 42
};
console.log(obj.printProject());
console.log(obj);
Transpile to es5: babel index.js > es5.js
In index.html, include <script src="es5.js"></script> Will print out the following in console:
[2,4,6]
helloWorld
{"project":"helloWorld","prop_42":42}
Using Modules: Now if you are using modules (which is your case with lib.js and main.js), after converting your code into ES5 you also have to bundle them (from AMD/CommonJS/Modules to code that your browser can understand). You can do this with various build systems like gulp, webpack,browserify, etc. I'm going to use browserify as an example here.
Say my folder structure looks like this:
es6
|- src
  |- lib.js
  |- main.js
|- compiled
|- index.html
I run babel to transpile my files /src to /compiled folder: babel src --out-dir compiled.
Now I have my ES5 code in the compiled folder. I install browserify in the cmd line and then bundle my main.js (entry point) in my compiled folder
~/es6 » npm install --global browserify
~/es6 » browserify ./compiled/main.js -o ./bundle.js
Now I have bundle.js which is look like this:
(function e(t,n,r){function s(o,u){if(!n[o]){if(!t[o]){var a=typeof require=="function"&&require;if(!u&&a)return a(o,!0);if(i)return i(o,!0);var f=new Error("Cannot find module '"+o+"'");throw f.code="MODULE_NOT_FOUND",f}var l=n[o]={exports:{}};t[o][0].call(l.exports,function(e){var n=t[o][1][e];return s(n?n:e)},l,l.exports,e,t,n,r)}return n[o].exports}var i=typeof require=="function"&&require;for(var o=0;o<r.length;o++)s(r[o]);return s})({1:[function(require,module,exports){
"use strict";

exports.square = square;
exports.diag = diag;
var sqrt = exports.sqrt = Math.sqrt;

function square(x) {
    return x * x;
}

function diag(x, y) {
    return sqrt(square(x) + square(y));
}

Object.defineProperty(exports, "__esModule", {
    value: true
});
},{}],2:[function(require,module,exports){
"use strict";

var _lib = require("./lib");

var square = _lib.square;
var diag = _lib.diag;

console.log(square(11)); // 121
console.log(diag(4, 3)); // 5
},{"./lib":1}]},{},[2]);
Then in your index.html:
<!doctype html>
<html>
  <head>
    <meta charset="utf-8">
    <title>ECMAScript 6</title>

    <script src="./bundle.js"></script>

  </head>
  <body>

  </body>
</html>
Then simply open up your index.html, and your console should give you the following:
 121           bundle.js:27
 5             bundle.js:28
I started out by trying the same thing, but eventually found that Gulp really helped out a lot.
One thing to keep in mind: babel source.js > destination.js won't polyfill new ES6 syntax. Your code right now isn't using any let statements, destructured assignment, generator functions, or anything like that; but if you do add that at a later stage, you will need a more sophisticated transformation.
Here is an answer that explains how to setup the gulp file: Javascript 6to5 export module usage(Disclaimer: It is one of my answers :P)
Here are the steps specific to your case:
- Create a file called gulpfile.js in your directory with the following in it:
var gulp = require('gulp');
var browserify = require('browserify');
var babelify= require('babelify');
var util = require('gulp-util');
var buffer = require('vinyl-buffer');
var source = require('vinyl-source-stream');
var uglify = require('gulp-uglify');
var sourcemaps = require('gulp-sourcemaps');

gulp.task('build', function() {
  browserify(['./lib.js', './main.js'], { debug: true })
  .add(require.resolve('babel/polyfill'))
  .transform(babelify)
  .bundle()
  .on('error', util.log.bind(util, 'Browserify Error'))
  .pipe(source('app.js'))
  .pipe(buffer())
  .pipe(sourcemaps.init({loadMaps: true}))
  .pipe(uglify({ mangle: false }))
  .pipe(sourcemaps.write('./'))
  .pipe(gulp.dest('./'));
});

gulp.task('default', ['build']);
- Run npm install gulp browserify babel babelify gulp-util vinyl-buffer vinyl-source-stream gulp-uglify gulp-sourcemaps to install the needed dependencies.
- Run gulp to bundle everything together.
- Use the bundled script in your HTML with this element: <script src="app.js"></script>
The nice thing in addition to polyfills being added is that the code is minified, and you get sourcemaps, which means even in your developer tools, you can debug the ES6 code itself.
Note: While the import statement you are using is correct according to the ES6 draft specification, Babel won't like it. You will need to add a ./, so that it looks something like this:
import { square, diag } from './lib';
I suspect this is because the transformation happens in Node.js, and this differentiates a file from a node module. As a side point, you can write ES6 for node do requires with import statements :)
[Note: I realise my answer is poor as it doesn't fully reflect the questioners intention to use ES6 modules via babeljs in a front-end workflow. Keeping the answer her for those that want to use ES6 modules within a webpage]
Try using jspm.io for loading the ES6 modules in the browser without transpiling upfront with babel. A plunker can be found here
jspm works on top on of system.js which tries to be a loader for any module format (ES6, AMD, CommonJS)..
To make this work in my browser, I based myself on this jspm ES6 demo. Just copied System.js andes6-module-loader.js in a js/lib folder and copied your es6 js files in the js folder. Then the html just looks like this:
<html>
    <body>
        Test .. just open up the Chrome Devtools console to see the ES6 modules output using jspm
        <script src="js/lib/system.js"></script>
        <script>System.import("main");</script> </body>
</html>
A plunker can be found here
=================================
=================================
=================================
출처: http://codeutopia.net/blog/2014/12/18/getting-started-with-using-es6-ecmascript-6/
How to start using ES6 today?
December 18, 2014 – 3:36 pm Tags: JavaScript
When you want to use ES6 you’re faced with a list of questions: Transpilers, shims, browser support…
In this article, I’ll give you a detailed guide on making sure you get started with ES6 the right way, and instructions on how you can set up a workflow for using ES6 in production easily.
Considerations before deciding on ES6
Before you decide to use ES6 in your app, there’s a few considerations.
- Do I care about the ES6 spec changing?
- What are my target platforms?
- Do I need to debug on older devices or browsers?
- Am I developing a performance-critical application?
Let’s address each of these before we go further.
ES6 spec changes
The ES6 specification is not finished. The way certain features work can change in future versions.
This means the tools you need to use in order to make ES6 features work in the current JavaScript version may also change, and break your existing code.
If you’re worried about potential changes to the specification and your code breaking, you should think twice before you jump in the ES6-wagon.
Target platforms
Your target platforms – devices, browsers, etc. – should be kept in mind when deciding whether or not to use ES6.
Using ES6 requires either the use of a transpiler or a shim. We’ll talk more about this later in the article, but if you need to use a transpiler, it will affect both your ability to debug the code and the performance of the code.
If you are one of the poor people who still have to deal with IE6 or even IE7, then you may be stuck on using a smaller subset of ES6 features.
Debugging
If you end up using a transpiler, it will generate compiled JS files for you. Sometimes this output can be difficult to follow, and this can make debugging difficult.
Thankfully modern browsers support source maps, which means you don’t need to worry about this so much. A source map will allow you to see the original ES6 code, rather than the compiled ES5 code.
However, if you target some older platforms, they may not support source maps. Many older browsers support ES5 just fine, and the transpiled code will work in them, but if you need to debug on those browsers it may prove to be more difficult.
This is less of a problem if you use a shim. The code in those is written by a human rather than generated, and should therefore be easier to understand.
Performance
This is also a primarily transpiler-related consideration. The ES6 transpilers don’t make any performance optimizations based on the browser running the code.
In some cases, this can result in code that doesn’t perform so well in all browsers. If you are working on something that needs to have very high performance, such as games, you may want to stick to “standard” JavaScript. However this doesn’t mean you shouldn’t use ES6 at all – simply avoid using ES6 features in performance critical sections of your code if you have problems with it.
Choice: Use a transpiler, or use a shim?
If you decide to use ES6, you need to make a choice: Which features of ES6 do you want to use?
ES6 provides both new syntax, such as let or the module system, but it also provides new objects and functions on existing objects. If you want to use the new syntax, you need a transpiler. If you only want to use the additional objects and functions such as Promises, the new String or Math functions or such, then you can use a shim.
Shims are simpler and easier to work with, as you only need to include it in your page or node app before other scripts. However, a shim cannot support syntactic features. If you want those, you need a transpiler.
Setting up ES6 Shim
If you only want to use the new objects and functions, you can use a shim. If you want new syntax, skip to the setting up traceur -part.
For this, we will use ES6 Shim.
ES6 Shim in nodejs
Setting the shim up in node is very simple:
Run npm install es6-shim
Then, include require('es6-shim'); in your node-scripts.
ES6 Shim in the browser
ES6 Shim has a reasonably wide browser support, even down to Internet Explorer 8.
The simplest way to get started in browser is just include a script tag in your page:
<script src="path/to/es6-shim.js"></script>
You can download the file from the ES6 Shim GitHub page. You can also install it using one of the alternative approaches listed on the same page.
Using the shim
Simply make sure that the shim file gets loaded before any scripts that depend on the ES6 features. Production use requires no changes.
Setting up the Traceur transpiler
There are two ways to use Traceur:
- Include Traceur compiler in your page/node
- Pre-compile the code on the server
The first option is good for quickly testing things, but it comes with a performance hit. The JS code is compiled on the fly on the page, so it’s not as fast as running pre-compiled code. If you’re planning on running ES6 code in the browser, I recommend using approach #2, but #1 is OK with nodejs.
Traceur workflow with nodejs
In node-land things are reasonably easy. First, we need the Traceur transpiler module:
npm install --save traceur
We have two typical scenarios for using ES6:
- Load the whole app using ES6 modules, a typical case with new applications
- Mix and match node modules and ES6 modules, a typical case with existing applications
Warning: Instead of Traceur, you might be tempted to use node’s --harmony* flags. These are experimental features and not recommended.
Load the whole app as ES6
If your app is written mostly in ES6, you will probably want to use this method. You can still use node’s own require loading with this if needed!
The way this method works is you write an entry point for your application as a normal node module. In this entry point, you load an ES6 file, which bootstraps your application.
First, let’s create the bootstrap file:
//bootstrap.js export function run() { console.log('Hi there'); }
Next, create the entry point file. This is what we will run using node:
//app.js var traceur = require('traceur'); traceur.require.makeDefault(function(file) { return file.indexOf('node_modules') == -1; }); require('./bootstrap').run();
Now we can run the above code using node: node app.js.
The second line of code makes traceur’s require override node’s own. We use a simple check against the file path to make sure we don’t run any files in node_modules through traceur, as it would serve no purpose.
The beautiful part about this is that Traceur becomes essentially transparent: We can use node modules within ES6 modules, we can use require, etc.
Using node modules within ES6
We can use either require or ES6 module import syntax for this.
For example, using require:
//bootstrap.js var express = require('express'); export function run() { console.log('Hi there'); var app = express(); }
Or, using ES6 module imports:
//bootstrap.js import * as express from 'express'; export function run() { console.log('Hi there'); var app = express(); }
Mixing and matching node modules and ES6 modules
This approach can be used if you have an existing app where you want to start using ES6 modules.
With this approach, we just include traceur within our module, and use the require function from it directly:
var traceur = require('traceur'); var example = traceur.require('./example.js'); //example.js is an ES6 module, we can use it from here as we'd normally use it: example.whatever();
Traceur workflow for browsers
Of course in browser-land life isn’t as easy. We need to install the Traceur as a command-line tool, and need another file from it as well.
Setup
First, install the tool:
npm install -g traceur
You can now run it using traceur from the command-line.
We will also need the traceur-runtime.js file. Once you’ve installed traceur, you can find it in your npm directory. This is typically located in/usr/local/lib/node_modules/traceur/bin/traceur-runtime.js. Copy the file so that you can include it within the HTML page.
If you can’t find the file, you can install traceur into a local node_modules using npm install traceur. Then, the file will be in the current dir, undernode_modules/traceur/bin/traceur-runtime.js
Setting up an ES6 module on a web page
Let’s assume a simple project structure, where source code files are placed in src/, and the build output will be in build/. The traceur-runtime file is assumed to be inlib/traceur-runtime.js
First off, we’ll create a simple example file:
//src/app.js
export function run() {
  console.log('Hi there');
}
Next, we can use traceur to convert it into ES5:
traceur --out build/bundle.js src/app.js
Using the --out flag, we’re telling traceur to bundle all dependencies of our app.js script into the bundle.js file.
Finally, the HTML:
<!DOCTYPE html>
<html>
  <head>
    <script src="lib/traceur-runtime.js"></script>
    <script src="build/bundle.js"></script>

    <script>
      var m = System.get('src/app.js');

      //m is our ES6 module, with all the exported things
      m.run();
    </script>
  </head>

  <body>
  </body>
</html>
We need to include the runtime and our bundle. Then, we use the ES6 System module loader to get access to the module, and call the run function we exported in it.
Using imports and other libraries
If you’re building multiple ES6 modules, using them with this setup is simple:
//src/app.js
import * as foo from 'foo';

export function run() {
  console.log('Hi there');
}
You can import any ES6 modules as normal. Traceur will handle the dependencies, and will automatically bundle them into the output file.
Using other libraries, such as jQuery, works exactly like it does when not using ES6:
<script src="path/to/jquery.js"></script>
<script src="lib/traceur-runtime.js"></script>
<script src="build/bundle.js"></script>

<script>
  var m = System.get('src/app.js');
  m.run();
</script>
//src/app.js
export function run() {
$(() => {
$(document.body).html('hello world');
});
}
You simply include any libraries you want before your scripts, and the globals they provide will be available in your ES6 modules as well.
Source maps
Lastly, let’s take a look at how to get source maps to ease debugging.
Source maps for node
To enable source maps with node,
npm install --save traceur-source-maps
And include it in your script:
var traceur = require('traceur'); require('traceur-source-maps').install(traceur);
Source maps for browsers
In the case of browsers, we just need to adjust the traceur command parameters a little bit:
traceur --source-maps --out build/bundle.js src/app.js
In closing
With the right tools we can start taking advantage of the features available in future versions of JavaScript today. As usual, it does not come without its possible downsides, but often they aren’t relevant depending on your use-case.
If you want to learn more about how ES6 can improve your JavaScript, I also wrote about the practical benefits of ES6 features.
The final question remains: When can you stop using shims and traceur? This one is quite tough to answer, but most likely it will be several years. You can use kangax’s helpful ES6 compatibility tables to check for specific features, some of which are already supported by more than one browser.
=================================
=================================
=================================
키워드: Module, 모듈, import, export, module.exports, export default
내용:
ES6에는 언어 레벨에서 모듈을 정의할 수 있는 방법을 제공한다.
`import`와 `export` 키워드로 외부 모듈을 가져오거나 설정할 수 있으며,
비동기 모델을 포함하고 있다. (모듈이 로드될 때까지 실행되지 않는다)
하지만, 2015년 5월 현재, 모든 브라우저에 구현되어 있지 않다.
ES6의 모듈 시스템을 사용하려면, ES6 Module Transpiler, Babel, Traceur 등과 같은 트랜스파일러를 사용해야 한다.
먼저, 모듈을 정의하는 `export` 문법은 아래와 같다.
export name1, name2, ..., nameN;
export *;
export default name;
- name: export할 속성이나 함수, 객체
- *: 파일 내의 정의된 모든 속성, 함수, 객체
- default: 모듈의 기본값. 파일 내에서 한 번만 호출될 수 있다.
예제를 보면 더 이해하기 쉽다.
// 속성을 export 하는 것은 CommonJS의 패턴과 동일한다.
export function foo() {};
export {
foo: function () {},
bar: 'bar'
};
// ES6에 추가된 객체 리터럴(Enhanced Object Literals)을 함께 사용하면,
// 더 간결하게 변수를 export 할 수 있다.
var foo = function () {};
var bar = function () {};
export { foo, bar };
// 모듈 전체를 export 하고자 할 땐, `default` 키워드를 함께 쓸 수 있다.
export default function () {}
// `export default`는 CommonJS의 아래 패턴과 동일하다고 보면 된다.
module.exports = function () {};
export 한 모듈을 불러올 땐, `import` 키워드를 쓸 수 있고 문법은 아래와 같다.
import name from "module-name";
import {
member [as alias],
...
} from "module-name";
import "module-name" [as name];
- module-name: 불러올 모듈명, 파일명
- member: 모듈에서 export 한 멤버의 이름
- alias: 불러온 멤버를 할당할 변수명
정의는 약간 복잡해보일 수 있지만, 예제를 보면 쉽게 이해된다.
// `my-module` 모듈을 가져와 `myModule`라는 변수에 할당한다.
import myModule from 'my-module';
// 위 코드는 아래처럼 쓸 수도 있다.
import 'my-module' as myModule;
// CommonJS 스타일로 작성했다면, 아래 코드와 동일하다.
var myModule = require('my-module');
// 모듈에서 특정 멤버만 변수로 할당할 수 있다.
import { foo, bar } from 'my-module';
// CommonJS 스타일로 작성했다면, 아래 코드와 동일하다.
var myModule = require('my-module');
var foo = myModule.foo;
var bar = myModule.bar;
// 모듈이나 멤버의 이름을 다른 변수명으로 설정할 수 있다.
// 변수명이 긴 경우 요긴하게 사용할 수 있다.
import {
reallyReallyLongModuleName as foo
} from 'my-module';
// 단순히 특정 모듈을 불러와 실행만 할 목적이라면
// 아래처럼 `import`만 하는 것도 좋다.
import 'my-module';
위에서 언급했던 것처럼, ES6의 모듈 시스템이 아직 브라우저에 적용되진 않았고,
적용되더라도 적게는 6개월에선 1년 이상까지의 시간이 걸릴 것으로 예상된다.
현재 사용하려면, ES6 Module Transpiler, Babel, Traceur 등과 같은 트랜스파일러를 사용해보면 된다.
트랜스파일러는 모듈을 동기로 한 파일로 병합해 사용하는 구조인데,
RequireJS처럼 비동기 모듈 로딩이 필요한 상황이라면 SystemJS 를 고려해보는 것도 좋다.
참고:
JavaScript modules the ES6 way: http://24ways.org/2014/javascript-modules-the-es6-way/
MDN export: https://developer.mozilla.org/en-US/docs/Web/JavaScript/Reference/Statements/export
MDN import: https://developer.mozilla.org/en-US/docs/Web/JavaScript/Reference/Statements/import
=================================
=================================
=================================
출처: http://guybedford.com/practical-workflows-for-es6-modules
Practical Workflows for ES6 Modules
Guy Bedford ⋅ 6 April 2014 (revised 20 July 2014)
ES6 modules are set to become the future replacement for the AMD and CommonJS module formats. They are defined by the current ES6 Specification and will be implemented in JavaScript engines in the future in both the browser and the server. This article covers a variety of practical workflows for implementing ES6 modules. These approaches are very new, and there will still be edge cases, but these principles provide a path forward towards ES6 for use in both new and existing projects today.
The following workflows are based on the talk I gave recently at Fluent 2014, you can watch the 35 minute presentation covering roughly the same material here.
Why Use ES6 Modules
The ES6 Specification defines two primary module features:
- Module syntax The way we write modules in our code with the newimport, export and module keywords.
- The module loader The module loading pipeline instructing the JavaScript engine how to handle loading modules. It comprehensively specifies the entire loading algorithm through a module loader class.
- This module loader instance can then be provided as a global variable in the environment, called System in the browser, which can then be called directly allowing dynamic loads in the browser withSystem.import('module-name').
The theory behind why we might want to start write our code using ES6 module syntax today is because it means we are writing our code based on what is a module specification for the future versions of the language.
Many web applications need to dynamically load scripts after the initial page load. In order to do this, we need a dynamic module loader. We can in fact use the Systemdynamic loader in browsers today in production using the ES6 Module Loader polyfillwith the SystemJS loader extension.
The reason we would use the System browser loader with a polyfill is exactly the same reason we'd use ES6 module syntax - to be able to build our applications on top of a spec-compliant module system.
Future ES6 Loader Bundling Scenarios
There has been some complaint about the fact that the ES6 Module Loader provides no native bundling format. But this becomes clear when understood in terms of the time scales of adoption for the spec.
The way bundling will be enabled is through improvements at the protocol level such asSPDY and HTTP/2 which allow lots of small modules to be sent with similar performance to sending an entire file bundle.
There are also proposals at the specification level for other bundling options at the protocol level, so this is very much the focus of the problem.
The workflows shown here give us some bundling workflows that can work in browsers today, but the real solutions for bundling in the future will be for these approaches not to be necessary at all.
Tooling
These approaches are based on using Google's Traceur project for compilation, the benefit over the similar ES6 Module Transpiler build methods being that it also allows the use of other ES6 syntax features such as classes, arrow functions, generators, desctructuring etc.
The workflows below all use Traceur directly. The following tools provide compilation from ES6 to AMD or CommonJS with Traceur for existing build systems:
- Grunt-Traceur by Aaron Frost, currently being updated
- Gulp-Traceur by Sindre Sorhus
- Broccoli-Traceur by Sindre Sorhus
These tools effectively provide the --dir compilation as used in the workflows here.
Workflow Quick Links
Using ES6 modules with NodeJS or Browserify
- If you want to write ES6 modules and use them in NodeJS or Browserify,compile them into CommonJS.
Using ES6 modules with existing AMD projects
- To write ES6 modules and use them in an existing AMD project, compile them into AMD.
Using the SystemJS dynamic browser loader
- For basic use of the SystemJS, see an example of loading AMD.
Production bundling approaches for the SystemJS browser loader
- To create single-file bundles for SystemJS with Traceur, use the Traceur instantiate module output mode.
- The create custom bundles of code with modules of any module format, compile with the SystemJS Builder.
Static Workflow Examples
For these examples, we use a very simple two module application, consisting ofapp/app.js and app/module.js.
app/module.js exports a single value:
export var test = 'es6!';
The main entry point, app/app.js then loads from app/module.js with:
import {test} from './module'; console.log(test);
We use relative module syntax and ommit the .js extension just like in CommonJS and AMD.
Using other ES6 Features
Traceur supports a lot of other ES6 syntax features, including classes, generators, arrow functions and destructuring.
If you want to take advantage of these other ES6 features, all of the above build workflows still apply, except we need to then separately include the traceur-runtime.jsfile as well.
The runtime is only 6KB minified and gzipped in production, so it is not a production high cost for the benefits ES6 functionality.
For example, say we use classes in app/module.js now:
export var test = 'es6'; export class MyClass { constructor() { console.log('ES6 Class!'); } }
We then load this in app/app.js with:
import {test, MyCLass} from './module'; console.log(test); new MyClass();
If we don't use other syntax, including the Traceur runtime isn't necessary. These differences in workflow are described below between these two cases.
Static Workflow 1: Running the app in NodeJS
To run the above in NodeJS, we need to first install Traceur, Google's ES6 to ES5 JavaScript transpiler. This converts the new ES6 module syntax into something existing JavaScript engines can understand.
To install Traceur, we do:
npm install -g traceur
Now that we have Traceur installed, we can run our application directly from the directory root of our project with:
traceur app/app
You should then see the incredibly rewarding console output, es6!.
Static Workflow 2: Compiling into CommonJS
If we want to publish our project to npm or use Browserify, what we can do is transpile our entire application into CommonJS first, and then provide that to users.
This can be done with the --dir option in Traceur:
traceur --dir app app-build --modules=commonjs
The above tells Traceur to run through each ES6 module in the app directory and individually compile it into a corresponding CommonJS module in the app-builddirectory.
We can now run our entire application with NodeJS directly:
node app-build/app
And again we should see the midly tantilising output, es6.
With Additional ES6 Features
If we had used ES6 classes, or another feature, it isn't enough to simple run the app.
Instead we first install Traceur as a local dependency for our project:
npm install traceur --save
Then we create a new entry point, index.js, and load the runtime first:
require('traceur/bin/traceur-runtime'); require('./app-build/app');
Static Workflow 3: Browser Single File Build
So that's the server, now we want to make this remarkable application work in the browser.
Traceur makes it very easy to build for the browser with the out option:
traceur --out app-build.js app/app
So it will read app/app.js, trace all the module dependencies, and then build them into a single file app-build.js.
Then we just load this into the browser:
<!doctype html> <script src="app-build.js"></script>
And we're done, the text es6 appearing in the browser console.
With Additional ES6 Features
traceur-runtime.js works equivalently in the browser. We copy the file fromnode_modules/traceur/bin/traceur-runtime.js or from GitHub (ensuring to use the correct version tag) and then include it with a <script> tag before loading anything else.
<!doctype html> <script src="traceur-runtime.js"></script> <script src="app-build.js"></script>
We now get our ES6 classes and generators etc. working in the browser.
Static Workflow 4: AMD Build
The previous workflow assumes that all of our code is in ES6, and that we want to build everything into a single file.
If using a build tool like the r.js optimizer, one can get more bundling flexibility though.
In this scenario, we build all our ES6 into AMD, just like we did for CommonJS. Then we can load it with an AMD loader and build with the r.js optimizer.
traceur --dir app app-build --modules=amd
The above builds each ES6 module in the app directory individually into a corresponding AMD module in the app-build directory.
We can now load them with RequireJS (or any AMD loader):
<!doctype html> <script src="require.js"></script> <script> require(['app-build/app']); </sript>
The great thing about this workflow is we can now use ES6 code alongside existing AMD code and get flexibile bundling.
With Additional ES6 Features
Just like workflow 3, this can take advantage of ES6 features by including the Traceur runtime script before requiring the modules.
Dynamic Module Loader
In the static workflows we saw how to create builds using Traceur that can run in the browser and NodeJS, but the problem with these workflows in the browser is that we have no way to load new modules after the initial page load unless we use an AMD loader.
The ES6 Module Specification defines a System loader for the browser (supported in IE8+, and IE9+ if using additional ES6 features), that we can actually polyfill to behave just like the spec using the ES6 Module Loader Polyfill, coming to 7.4KB minified and gzipped, suitable for production.
With some extension libraries, we can make this loader behave just like an AMD loader including support for loading AMD, CommonJS and global scripts as well as other features such as map config and plugins.
Dynamic Workflow 1: Loading ES6 Dynamically in the Browser
We begin by downloading the ES6 Module Loader polyfill and Traceur (es6-module-loader.js, traceur.js see the Getting Started section for the links) and including them in our page.
Say we have a directory of ES6 module files app (our same example has app/app andapp/module where app/app imports from ./module), we can import the ES6 and transpile it in the browser dyanmically with:
<!doctype html> <script src="traceur.js"></script> <script src="es6-module-loader.js"></script> <script> System.import('app/app').then(function(app) { // app is now the Module object with exports as getters }); </script>
The System loader uses ES6 promises to get the module value. Then that is all there is to it. Now the console log statements would match the previous example.
Loading modules separately and transpiling ES6 in the browser is not suitable for production, that is why we have dynamic workflows 2, 3 and 4.
Dynamic Workflow 2: Loading with SystemJS
The 4.6KB (minified and gzipped) SystemJS loader extension library provides compatibility layers to load any module format (ES6, AMD, CommonJS, global scripts) dynamically in the browser. It also comes with map config, and a plugin system like RequireJS as well as various other features.
To use SystemJS, we include both system.js (see the getting started guide for links) andes6-module-loader.js.
In this example, we'll just load an AMD module:
module.js:
define(function() { return 'This is AMD'; });
We could equally have written a CommonJS or global module, SystemJS detects the format automatically.
We then load this with:
<!doctype html> <script src="es6-module-loader.js"></script> <script src="system.js"></script> <script> System.import('module').then(function(module) { console.log(module); }); </script>
In this way, SystemJS can be used as an AMD-style loader.
Dynamic Workflow 3: Creating a SystemJS Bundle with Traceur
To create a production bundle with Traceur that SystemJS can understand, we can use the modules=instantiate option.
In future this module output will be designed to support circular references, making it the most suitable output for ES6 conversion in existing browsers. We're working on this currently.
This creates a full bundle for all the dependencies of an ES6 module entry point, that will work with SystemJS.
To create the bundle (using the same two module example):
traceur --out app-build.js app/app --modules=instantiate
This creates the file app-build.js from the tree of app/app.js.
We can then load this bundle after SystemJS and have it populate the module registry correctly. If we've compiled ES6, we need to also include the Traceur runtime.
<!doctype html> <!-- only use Traceur runtime if using other ES6 features --> <script src="traceur-runtime.js"></script> <script src="es6-module-loader.js"></script> <script src="system.js"></script> <script src="app-build.js"></script> <script> System.import('app/app'); </script>
Now when the System.import call is made, app/app has already been populated in the module registry cache by the bundle and no XHR requests are created.
Dynamic Workflow 4: Creating Custom Bundles for all Module Formats
This workflow is the most flexible, and the recommended approach for bundling ES6 modules currently.
The SystemJS Builder project provides a programattic API for creating custom bundles.
For example, if we have a dependency tree like the following:
app - app.js (ES6) lib - jquery.js (AMD) - underscore.js (AMD) - bootstrap.js (global)
Say I want to build everything into a single build file.
For this I can do:
npm install systemjs-builder builder.build('app', { /* SystemJS Configuration Here */ baseURL: 'app', paths: ... map: ... }, 'buildfile.js') .then(function() { console.log('Build complete'); }) .catch(function(err) { console.error(err); })
This will trace the app module, with the provided SystemJS configuration, and build all of its dependencies into a single file, buildfile.js.
There is also an advanced build API for doing custom tree operations such as excluding modules or intersecting shared module trees for tiered bundles.
This build workflow will respect circular references between AMD, CommonJS and globals, with the correct behaviour as defined by the specification.
This workflow API is stable, but the exact output format is still being refined as an area of active development (as of July 2014).
Now we can include this bundle after SystemJS, and have the registry populated correctly:
<!doctype html> <!-- only use Traceur runtime if using other ES6 features --> <script src="traceur-runtime.js"></script> <script src="es6-module-loader.js"></script> <script src="system.js"></script> <script src="buildfile.js"></script> <script> System.import('app/app'); </script>
Summary
For using ES6 modules and module loaders, the general summary would be:
- For existing CommonJS projects, compile ES6 into CommonJS.
- For existing AMD projects, compile ES6 into AMD.
- New ES6 projects can use dynamic ES6 module loaders that load multiple module formats, like the SystemJS loader.
- It is possible to upgrade an AMD project to use the SystemJS loader, which will support loading AMD as well as ES6, and then use that with ES6 modules compiled into AMD for production.
- The Traceur instantiate output is a specially designed ES6 compile target that will soon support circular references. Bundling techniques to work alongside this output are the current focus of active development for new ES6 build workflows.
Feedback
Feedback on these workflows is very welcome. Feel free to leave a comment, or get involved in the issue queues of the appropriate projects.
=================================
=================================
=================================
출처: http://haruair.com/blog/2917
ECMAScript 6를 위한 Babel 기본 사용법
JavaScript의 최신 문법, ECMAScript 6가 적용되기 전에 사용해볼 수 있는 방법
JUNE 7, 2015
ECMAScript 6 에서 추가되는 많은 새로운 기능들이 기대가 되면서도 아직까지 직접 사용해보지 못했었다. 최근에 JavaScript 관련 컨퍼런스 영상 뿐만 아니라 대부분의 포스트도 최신 문법으로 작성되는 경우가 많아 살펴보게 되었다.
ES5 표준은 2009년에 표준화되어 점진적으로 반영되고 있지만 ECMAScript 6는 2015년 6월 승인을 목표로 작성되고 있는 새 ECMAScript 표준이다. Prototype 기반의 객체 지향 패턴을 쉽게 사용할 수 있도록 돕는class의 추가, => 화살표 함수 표현, 템플릿 문자열, generator와 yield 등 다른 언어에서 편리하게 사용하던 많은 기능들이 추가될 예정이다.
현재 나와있는 JS 엔진에는 극히 일부만 실험적으로 적용되어 있어서 실제로 사용하게 될 시점은 까마득한 미래와 같이 느껴진다. 하지만 현재에도 기존 JavaScript와 다른 문법을 사용할 수 있도록 돕는 transform compiler가 존재한다.
TypeScript, CoffeeScript는 JavaScript 문법이 아닌 각각의 문법으로 작성된 코드를 JavaScript에서 동작 가능한 코드로 변환한다. 이와 같은 원리로 ECMAScript 6 문법으로 작성된 파일을 변환-컴파일하는 구현이 존재한다. 이 포스트에서 소개하려는 라이브러리, babel이 바로 그 transcompiler 중 하나다.
Babel 사용하기
다른 라이브러리와 같이 npm으로 설치 가능하다.
$ npm install --global babel
ES6로 작성한 파일로 js 컴파일한 결과를 확인하려면 다음 명령어를 사용할 수 있다.
$ babel script.js
파일로 저장하기 위해 --out-file, 변경할 때마다 저장하도록 하려면 --watch 플래그를 활용할 수 있다. 파일 대신 경로도 사용할 수 있다.
$ babel ./src --watch --out-file script-compiled.js
babel을 설치하면 node.js의 CLI와 같이 사용할 수 있는 babel-node 라는 CLI를 제공한다. node처럼 REPL나 직접 파일을 실행할 때 사용할 수 있다. 직접 실행해서 확인할 때 편리하다.
$ babel-node # REPL 실행 시 $ babel-node app.js
자세한 내용은 babel CLI 문서에서 확인할 수 있다.
다른 도구와 함께 Babel 사용하기
Babel은 다양한 usage에 대한 예시를 제공하고 있다. Babel의 Using Babel을 확인하면 현재 사용하고 있는 도구에 쉽게 접목할 수 있다.
Meteor는 다음 패키지를 설치하면 바로 사용할 수 있다. 이 패키지를 설치하면 .es6.js, .es6, .es, .jsx파일을 자동으로 컴파일 한다.
$ meteor add grigio:babel
Webpack을 사용하고 있다면 babel-loader를 설치한 후 webpack.config.js에 해당 loader를 사용하도록 설정하면 끝난다.
Webpack을 사용해보지 않았다면 다음 순서대로 시작할 수 있다. Webpack은 모듈을 하나의 파일로 묶어주는 module bundler의 역할을 하는 도구다. 먼저 CLI를 설치한다.
$ npm install --global webpack
프로젝트에서 babel을 사용할 수 있도록 babel-loader를 추가한다.
$ npm install babel-loader --save-dev
webpack.config.js 파일을 다음과 같이 작성한다.
module.exports = { entry: "./app.js", output: { path: __dirname, filename: "bundle.js" }, module: { loaders: [ { test: /\.js$/, exclude: /node_modules/, loader: "babel-loader" } ] } }
위 설정은 node_modules 디렉토리를 제외한, 프로젝트 내에 있는 모든 *.js를 babel로 변환 후 묶어준다. 각각 세부적인 옵션은 webpack 문서에서 살펴볼 수 있다.
매번 비슷하면서도 전혀 새로운 라이브러리가 많이 나와 때로는 따라가기 버겁다는 생각이 들 때도 있지만 찬찬히 들여다보면 그 새로움에 자극을 받게 된다. (부지런한 사람들 같으니!) 다음 세대 ECMAScript를 준비하는 마음으로 새로운 문법도 꼼꼼히 봐야겠다. Babel, Webpack 등 최근 나오는 라이브러리는 문서화가 잘 되어있는 편이라 금방 배우기 쉬운 편이니 각 문서를 확인해보자.
=================================
=================================
=================================
'WEB' 카테고리의 다른 글
| <img> 태그와 여백에 html코드 관련 (0) | 2020.09.21 |
|---|---|
| html table 상태에서 태그 <td> <tr> 호 형성된 테이블에서 enter 값 이벤트 받기 관련 (0) | 2020.09.21 |
| npm 관련 등등 (0) | 2020.09.20 |
| 윈도우 http서버 아파치 설치 관련 그리고 iis와 같이 사용 관련 (0) | 2020.09.20 |
| 유튜브, 애드센스 연결 확인 관련 (0) | 2020.09.15 |